3 Effective Ways to fix Error 0xc1900101 when Updated Windows 10,11

Error 0xc1900101 - This error is not only very common for Windows 10 users, but occurs when installing to Windows 11.
The error codes you may encounter are as follows:
0xC1900101 - 0x2000c
0xC1900101 - 0x20017
0xC1900101 - 0x30018
0xC1900101 - 0x3000D
0xC1900101 - 0x4000D
0xC1900101 - 0x40017
This error occurs when:
1. Trying to install the new Windows 11 update from Windows Update, but I keep getting error 0xc1900101.
The installation starts, and after a couple restarts, it says:
"Attempting to recover installation"
"Undoing changes made to your computer"
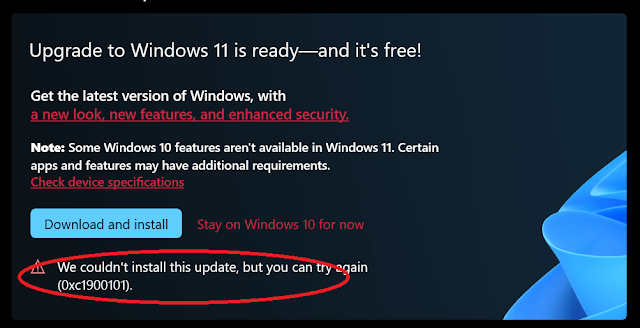
"We couldn't install Windows 11"
"We couldn't install this update, but you can try again"
And then geeted with error 0xc1900101 on Windows Update.


2. When Update Windows 10 (version 20h2, 2004...)


I have consulted many articles of authors on the internet to fix this error. However, there is no one method that is really 100% effective. But in this article, I will introduce you to the 3 most effective methods for you to try to fix this error.
Method 1: This should be called a series of methods (common on forums) for you to try your luck. Please try to follow the 5 steps below:
Step 1: Check the capacity of the hard drive (especially the system drive - C drive). Please upgrade and expand the hard drive if it is not eligible for the update
Step 2: Uninstall Third-party Antivirus programs
Step 3: Update or Re-Install Drivers (adapter networks, ethernet, display...)
Step 4: Run SFC Scan
Step 5: Run DISM Scan
Step 6: Update BIOS (latest version - remember that please update via official manufacture of your PC)
All the above 6 steps, I will not guide you in detail. Please refer to my articles on this website or internet.
Method 2: Applied for ASUS laptop, device
In case your computer (ASUS model) cannot upgrade or install to Windows 11. Please do the following:
You must prevent Windows Update from automatically reinstalling the above driver, or else you will get the 0xc1900101 code again. Please see do as below:
Step 1: Press Windows + X (hotkeys)

Step 2: Select System. Under Related settings choose Advanced system settings

Step 3: Go to Hardware tab. In category Device Installation Settings click Device Installation Settings

Step 4: Select No (your device might not work as expected) to prevent the automatically download of manufacturers apps...

Step 5: Delete the driver under Device manager. Restart the computer
Note that this method only applies to ASUS computers.
Method 3: Classic but effective
In case you have done all the ways but cannot fix the above error. Please apply this ancient method to fix in Windows 10 or installed Windows 11.
Step 1: Please wiped the hard drive (SSD, HDD, nNVMe) clean (removed all partitions)
Step 2: Install with a fresh copy of Windows 10 (21H1) on a USB 3.0 flash drive.
Step 3: Installed Windows 11 (by upgraded from Windows Update or use assistant software as Microsoft's guide)
With this method, I think you can achieve 97% success. Some users have to replace the hard drive to completely fix the above error 0xc1900101. This is a problem that Microsoft is gradually having to overcome and upgrade in the next upgrades.
If you succeed at any step, how, any solution above. Please comment below.
https://www.qtithow.com/2022/01/fixed-error-code-0xc1900101-windows-10-11.html
ReplyDeleteWith this method, I think you can achieve 97% success. Some users have to replace the hard drive to completely fix the above error 0xc1900101. This is a problem that Microsoft is gradually having to overcome and upgrade in the next upgrades.
ReplyDeleteIf you succeed at any step, how, any solution above. Please comment below.