Browsing Category " Microsoft Outlook "

“Your Microsoft Exchange administrator has blocked the version of Outlook that you are using. Contact your administrator for assistance.”


Hi Everyone,

Users will see the following error message in Outlook: 

“Your Microsoft Exchange administrator has blocked the version of Outlook that you are using. Contact your administrator for assistance.” 


Download & Install Microsoft 365 Apps by Office Deployment Tool


Outlook will now be disabled or trying to connect. You CAN NOT send and receive any email.

The reason is that you are using Microsoft 365 (email service) on Office (Outlook) 2007, 2010, 2013. Detail as below:

"After November 1, 2021, only Outlook 2013 Service Pack 1 (with latest fixes) and later will be able to connect to Microsoft 365 services. It’s worth noting here that Outlook 2007, 2010, and Office 2013 versions earlier than 15.0.4971.1000 *and Office 2016 versions earlier than 16.0.4600.1000 aren’t supported"


If you are using Office 2007, 2010 please note the following times, your Outlook will not be able to connect to Mail Exchange (Microsoft 365):

  • The block will start rolling out on November 1st 2021 for users on Outlook 2007 and will proceed in a phased rollout. 
  • The block has started rolling out for Outlook 2010 users on January 11, 2022 and will proceed in a phased rollout.


Outlook users will see the following error message in Outlook, when they experience the block that we are rolling out: “Your Microsoft Exchange administrator has blocked the version of Outlook that you are using. Contact your administrator for assistance.”

Why are we blocking old versions? 

Older versions of Outlook, such as Outlook 2007 and 2010 are incompatible with the following upcoming service changes, which is prompting this controlled block: 

  1. Support for basic authentication is ending to increase the security of Microsoft 365 by relying on modern authentication protocols, which are not only more secure, but also provide compliance and policy controls to help you manage your data. 
  2. We’re working on adding support for HTTP/2 in Microsoft 365. HTTP/2 is a full duplex protocol, which decreases latency through header compression and request multiplexing. On the service side, we’ll be able to better prioritize requests and more effectively push data to clients. 
  3. It can be a challenge to stay current, but there are many reasons why staying current is a good idea: 
  4. Security fixes will protect your devices against known vulnerabilities. 
  5. Reliability – over the last five years we’ve eliminated 75% of crashes in Outlook! 
  6. Updated versions have all the coolest new features to make your life easier!


Solution

Users can immediately start using Outlook on the web through a browser on their Windows (or any other) device. This is temporary solution.

I recommend switching to Office 365 or higher versions of Office like Office 2019 or Office 2021. 

Download & Install Microsoft 365 Apps by Office Deployment Tool

How to download & install Office Standard 2019


Outlook on the web

Upgrade guidance

  • For Office 2007 and 2010, use the roadmaps listed below to move to Microsoft 365 Apps. If your organization is highly regulated or uses devices that can’t take updates, consider Office 2019
  • For Office 2013, move to Version 15.0.4971.1000 of Office 2013 (Service Pack 1 with the October 2017 Update)  
  • For Office 2016, move to Version 16.0.4600.1000 of Office 2016 (With the November 2017 Update, KB4051890)
  • Office 2007 end of support roadmap 
  • Office 2010 end of support roadmap

Conclusion

Above is all information related to this error. If you or your company are using Microsoft 365 services on Office software versions 2013, 2010, 2007, please pay attention.

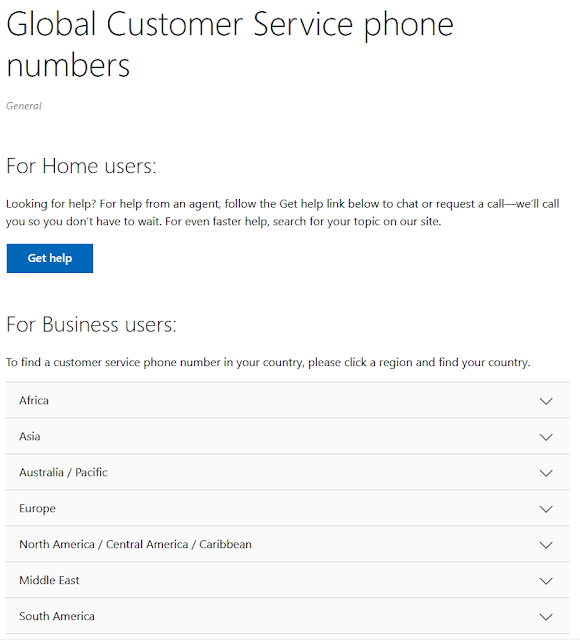
Contact Microsoft Support by Phone number

In addition to asking questions on the forums to get support from Microsoft, you can contact them directly via phone number.
Microsoft has branches and support worldwide. They are ready to assist you 24/7.

Please visit the following link to be able to contact Global custom Service phone numbers immediately: Contact Microsoft Support by Phone number


Note: Please select the correct area where you live and work to receive the best support from Microsoft.


Quick Guide to Fix “A form region cannot be opened”


“A form region cannot be opened” is an error related to Outlook and Skype for Business (or Lync).
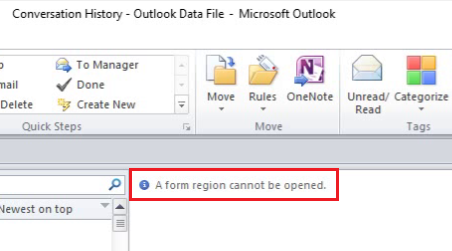
Normally, Skype for Business conversations will be linked and saved in Conversation History in Outlook. You want to review chat history, you just go to this item and see it directly on the right hand side of Outlook. However, the error has occurred, you cannot view live view and  see the following error message:

“A form region cannot be opened”

Some error messages are similar to the following:


The cause of all the above errors is the Add-in - Conversation History on Outlook.

 
How to do:

Fix "A form region cannot be opened" error

Step 1: Open Outlook > File > Options > Add-Ins


Step 2: In the Add-Ins panel, find out whether there is Conversation History Add-Ins for Microsoft Office? If so, please go to Step 3


Step 3: Click Go… > Uncheck the Conversation History Add-Ins for Microsoft Office as below.
When you uncheck it, this Add-Ins will inactive in Outlook. 


Step 4: Click OK to agree.


Step 5: Go back to the Add-Ins panel just then, check if Conversation History Add-Ins for Microsoft Office has been inactive.

OK, Done. Now you open Outlook again and check again

Conclusion:
This method is 100% successful, helping you to fix the error "A form region cannot be opened" on Conversation History Outlook. If you have any questions, please comment below. Thank you everyone!

In addition, if you have any problems with your computer, please contact us directly through the QTitHow fanpage. We will try to help and answer you as soon as possible. Thank you!

Tags:

A form region cannot be opened, Outlook, Skype for Business , Conversation History, Conversation History Add-Ins for Microsoft Office, Conversation History Add-Ins

How To Setup Automatically Reply In Outlook

On


Introduction:
There are two ways to send automatic out-of-office replies. The way you use depends on the type of email account you have.
Click File, then select the image below that matches your version of Outlook.

If you see the Automatic Replies button


If you don't see the Automatic Replies button


In this article, i will guide you, when you see the Automatic Replies button
Please see detail guide how to set automatic replies in Outlook.


How to Do:
Step 1: Click File and choose Automatic Replies


Step 2: A new widow will appear. Please click Send automatic replies to enable this function.
Step 3: If you only setup Automatic Replies for a period of time, then choose Only send during this time range


Step 4: Set the time according to your wishes
Step 5: On Inside My Organization tab, type the response that you want to send to teammates or colleagues while you are out of the office.

Step 6: Click OK to finished.

Note: Sending automatic replies to anyone outside my organization will send your automatic reply to every email, including newsletters, advertisements, and potentially, junk email. If you want to send automatic replies to those outside your organization, we recommend choosing My contacts only.

Conclusion:
Very simple, right? With just a few basic operations you can complete to install Automatically Reply in Outlook
If you have any question, please comments on box as below. Thank for your following.

In addition, if you have any problems with your computer, please contact us directly through the QTitHow fanpage. We will try to help and answer you as soon as possible. Thank you!

Maybe you are interested!

How To Recall Email In Outlook

On


Introduction:
When you send an email, and relize that the email has been sent: the recipent address is wrong, the content is wrong or not yet attach the file...
Please do not worry. Outlook provides a buil-in feature that recall an email or replace a message. However, there are a few requirements to perform this action.
Please read intructions for details.


Requirements to recall an email
  • Both you and your recipient must have an Exchange server email account and use Outlook as the email client.
  • The recipient's mailbox is open when you attempt to process a recall.
  • The original message is unread and is in the recipient's Inbox.
  • The message was not touched by any process, such as a rule, spam filter, or add-in.
How to Do:
You can see guide video as below to Recall E-mail in Outlook:


Step 1: Access to Sent Items folder.


Step 2: Find the email has been sent (you want to recall). And double click to open it.


Step 3: In the Message tab, find the Actions feature. And then choose Recall this message


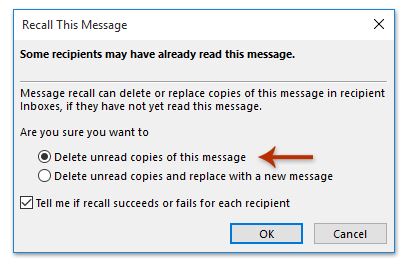
Step 4: "Recall This Message" windows will appear. You can keep the defaults setting and click OK.


Step 5: After finished, Exchange Server will sent a success message.


Conclusion:

With 5 steps, you can recall an email in Outlook
If you have any question, please comments on box as below. Thank for your following.

In addition, if you have any problems with your computer, please contact us directly through the QTitHow fanpage. We will try to help and answer you as soon as possible. Thank you!

Maybe you are interested!

2 Cách Hoàn Hảo Giúp Bạn Sửa Lỗi “This operation has been cancelled due to restrictions in effect on this computer” Thành Công


Xin chào tất cả mọi người,
Bạn đã bao giờ gặp lỗi này chưa?
"This operation has been cancelled due to restrictions in effect on this computer. Please contact your system administrator"
Lỗi này xảy ra khi bạn đang cố gắng mở đường link (hyperlink) bất kì trên môi trường Word, Outlook, hay Text…Đường link (hyperlink) này có thể là một đường link của  trang web nào đó, đường link nội bộ (trong máy tính hoặc share folder)…


Thông báo lỗi này có thể tương tự giống lỗi sau đây, đều khiến bạn không thể mở được đường link trên máy tính:
Your organization's policies are preventing us from completing this action for you. For more info, please contact your help desk.

Trong bài viết này, QTit sẽ hướng dẫn các bạn cách khắc phục triệt để lỗi ở trên. Giúp bạn có thể mở đường link và máy tính hoạt động trở lại như bình thường. Bạn có thể áp dụng nó trên các nền tảng Windows và Office hiện nay.
Hãy theo dõi 2 cách của chúng tôi dưới đây nhé.
 
 
2 Cách Hoàn Hảo Giúp Bạn Sửa Lỗi “This operation has been cancelled due to restrictions in effect on this computer” Thành Công

Cách 1: Cài đặt gói phần mềm Easy Fix của Microsoft
Bước 1: Download gói phần mềm Easy Fix của Microsoft tại đây.
Bước 2: Cài đặt chúng trên máy tính.
Bước 3: Restart lại máy tính khi quá trình xử lý kết thúc
Nếu sử dụng cách 1 mà bạn vẫn chưa thể mở được hyperlink. Bạn hẫy làm tiếp cách 2 như sau

Cách 2: Reset cài đặt Internet Explorer
Bước 1: Trên Control Panel, mở Internet Option.
Bước 2: Tìm trên cửa sổ mở ra tab Advanced. Click và Reset


Bước 3: Một cửa sổ khác hiện ra, bạn hãy tích vào Delete personal settings. Cuối cùng click vào Reset.


Bước 4: Hãy tắt thông báo sau khi quá trình reset kết thúc


Bước 5: Truy cập vào Control Panel, chọn Default Programs


Bước 6: Trong cửa sổ Programs hiện ra. Hãy tìm tới 2 chương trình Internet Explorer và Microsoft Outlook, sau đó nhấn vào Set this program as default.


Ok, done. Giờ bạn hãy kiểm tra lại xem được chưa nhé.
Đây là 2 phương pháp hoàn hảo nhất để sửa lỗi: "This operation has been cancelled due to restrictions in effect on this computer. Please contact your system administrator".
 
Cám ơn các bạn đã theo dõi bài viết. Nếu có bất kì khó khăn nào trong quá trình sửa lỗi trên bạn có thể trực tiếp liên hệ với chúng tôi qua fanpage QTitCare. Hoặc có thể mang máy tính của bạn đến cửa hàng sửa chữa máy tính laptop tại Quảng Yên, chúng tôi sẽ hỗ trợ bạn tốt nhất có thể. Xin cám ơn!

Download Free Microsoft Office 2010 Professional Plus Full 2019 (Bản Quyền Mãi Mãi)


Xin chào tất cả mọi người,
Ngày hôm nay QTit xin chia sẻ với các bạn một phần mềm phổ biến và hữu dụng Microsoft Office 2010 Professtional Plus. Đây là bộ công cụ soạn thảo phần mềm được sử dụng rộng rãi. Và rất nhiều bạn đã hỏi và muốn download bộ phần mềm office 2010 professional plus key đầy đủ bao gồm cả license – bản quyền dùng mãi mãi. Vậy thì tất cả đã có trong bài viết này.

Download Free Microsoft Office 2010 Professional Plus Full 2019 (Bản Quyền Mãi Mãi)


Chúng tôi sẽ cung cấp cho các bạn 2 phiên bản Microsoft Office 2010 Professtional Plus: 32 Bit và 64 Bit. Tuỳ theo cấu hình máy tính và nền tảng Windows, bạn có thể chọn một trong hai nhé:
Để sử dụng phần mềm này vĩnh viễn bạn hãy download product key office 2010 professional plus ở dưới đây:
 

Cám ơn các bạn đã theo dõi bài viết. Nếu có bất kì khó khăn nào trong quá trình sửa lỗi trên bạn có thể trực tiếp liên hệ với chúng tôi qua fanpage QTitCare. Hoặc có thể mang máy tính của bạn đến cửa hàng sửa chữa máy tính laptop tại Quảng Yên, chúng tôi sẽ hỗ trợ bạn tốt nhất có thể. Xin cám ơn!

Hướng Dẫn Cách Sửa Lỗi "Cannot start Microsoft Outlook. Cannot open the Outlook window. Invalid XML, the view cannot be loaded." Trên Outlook


Không mở được Outlook, chỉ xuất hiện 1 cửa sổ thông báo lỗi "Cannot start Microsoft Outlook. Cannot open the Outlook window. Invalid XML, the view cannot be loaded.", dù có Repair lại hay cài đặt lại Microsoft Office cũng không thể mở được Outlook. Bạn đã từng bao giờ gặp vấn đề này chưa? Nếu đang gặp tình trạng này, thì hôm nay bạn đã tìm được cách giải quyết nhanh và hiệu quả nhất ngay dưới đây.
 
Trước hết, QTit xin giới thiệu qua lỗi, tại sao gây ra lỗi và phương pháp để sửa lỗi này.
Hiện tượng lỗi: Bạn không thể mở Outlook trên máy tính và xuất hiện 1 cửa số thông báo lỗi dưới đây:
Tại sao: Lý do khiến Outlook của bạn gặp vấn đề này chính là do cài đặt Navigation Pane trên máy tính của bạn đang không phù hợp hoặc bị lỗi.
Giải pháp: cài đặt hoặc xóa bỏ toàn bộ cài đặt Navigation Pane, cho nó trở về trạng thái ban đầu.
Hướng Dẫn Cách Sửa Lỗi "Cannot start Microsoft Outlook. Cannot open the Outlook window. Invalid XML, the view cannot be loaded." Trên Outlook

Bước 1: Mở hộp thoại Run trên máy tính, bằng cách bấm tổ hợp phím Cửa sổ + R

Bước 2: Gõ đoạn code sau đây trên cửa sổ Run vừa hiện: Outlook.exe /ResetNavPane. Nhấn Enter hoặc OK sau đó.

Bước 3: Ngay lập tức Outlook sẽ được mở lên, đồng thời Navigation Pane được thiết lập lại từ đầu.
Để xem chi tiết cách sửa lỗi này, bạn có thể xem video dưới đây:

Trên đây là toàn bộ hướng dẫn giúp bạn sửa lỗi "Cannot start Microsoft Outlook. Cannot open the Outlook window. Invalid XML, the view cannot be loaded." trên Outlook.

Nếu bạn cần hỗ trợ hoặc câu hỏi nào, xin vui lòng bình luận ở phía dưới nhé. Cám ơn sự quan tâm của mọi người.
 
Cám ơn các bạn đã theo dõi bài viết. Nếu có bất kì khó khăn nào trong quá trình sửa lỗi trên bạn có thể trực tiếp liên hệ với chúng tôi qua fanpage QTitCare. Hoặc có thể mang máy tính của bạn đến cửa hàng sửa chữa máy tính laptop tại Quảng Yên, chúng tôi sẽ hỗ trợ bạn tốt nhất có thể. Xin cám ơn!

Làm Cách Nào Để Xóa Được Lịch Sử Địa Chỉ Email Từ Auto-Complete List Trong Outlook?


Bạn có để ý không? Outlook sẽ tự động nhớ những Email bạn đã gửi, cụ thể là những Email bạn đã gõ trong phần hộp CC/BCC/To khi bạn soạn thảo và gửi Email. Outlook sẽ tự động xổ ra 1 danh sách những email khi bạn gõ vào ô CC/BCC/To dựa theo kí tự đầu tiên. Tính năng này rất hữu ích đúng không? Giúp bạn nhanh chóng chọn lựa Email mà không cần phải gõ đầy đủ địa chỉ Email nữa.
Tuy nhiên, trong nhiều trường hợp và theo thời gian số lượng Email xổ ra để gợi ý quá lớn và bạn không còn liên lạc tới nó nữa dẫn đến việc chọn lựa mất thời gian. Nhu cầu lúc này đó là xóa bỏ những Email cũ, không liên lạc và không cần thiết nữa.
 
Trong bài viết này QTit sẽ hướng dẫn bạn 2 phương pháp để có thể xóa được lịch sử địa chỉ Email tự động nhớ trong Outlook. Hay còn được Outlook định danh là chức năng Auto-Complete List

Làm Cách Nào Để Xóa Được Lịch Sử Địa Chỉ Email Từ Auto-Complete List Trong Outlook?

(1)    Xóa từng Email từ Auto-Complete List
Nếu bạn cần xóa bỏ từng Email một từ Auto-Complete List, hãy làm theo các bước sau đây:
Bước 1: Vào Home > New Email để tạo Email mới
Bước 2: Trong cửa sổ Message hiện ra, bạn hãy gõ kí tự đầu hoặc một vài kí tự đặc biệt có trong Email mà bạn muốn xóa trong trường To/Cc/Bcc. Như hình dưới đây:

Bước 3: Bây giờ danh sách lịch sử Email xổ ra, hãy di chuyển chuột tới vị trí danh sách email đó, click vào hình dấu “X” (Delete) để xóa những Email mong muốn nhé.
Vậy là đã xong, những Email không cần thiết đó đã được xóa khỏi Auto-Complete List trong Outlook rồi.
(2)    Xóa toàn bộ Email trong Auto-Complete List
Nếu bạn cần xóa toàn bộ lịch sử Email trong Auto-Complete List thì hãy làm theo các bước như sau:
Bước 1: Click File > Options
Bước 2: Trong cửa sổ Options vừa hiện ra, bạn click vào Mail bên tay trái. Sau đó tìm đến Empty Auto-Complete List trong vùng Send Messages. Bạn hãy Click vào nó như hình dưới đây:

Bước 3: Trong hộp thoại Microsoft Outlook, xin hãy click vào Yes để thực thi.

Bước 4: Click vào Ok để hoàn thành và lưu lại toàn bộ thao tác

Từ bây giờ, tất cả lịch sử địa chỉ Email đã bị xóa bỏ khỏi Auto-Completet List rồi.
Qua 2 phương pháp này, bạn sẽ dễ dàng xóa bỏ được lịch sử Email gợi ý trong ô CC/BCC/To rồi. Thủ thuật này rất đáng ghi nhớ phải không. 
 
Cám ơn các bạn đã theo dõi bài viết. Nếu có bất kì khó khăn nào trong quá trình sửa lỗi trên bạn có thể trực tiếp liên hệ với chúng tôi qua fanpage QTitCare. Hoặc có thể mang máy tính của bạn đến cửa hàng sửa chữa máy tính laptop tại Quảng Yên, chúng tôi sẽ hỗ trợ bạn tốt nhất có thể. Xin cám ơn!

Thủ Thuật Xóa/Gọi Lại Một Email Đã Gửi Trong Outlook Trước Khi Người Nhận Đọc Email


Trong nhiều trường hợp bạn gửi Email xong và nhận ra rằng Email đó bị lỗi hoặc đã vô ý gửi Email đó đi. Lúc này bạn rất mong muốn xóa Email hoặc gọi lại nó trở lại trước khi người đọc xem Email.
Bài viết này QTit sẽ bật mí cho bạn một thủ thuật trong Outlook để bạn có thể xóa hoặc gọi lại Email đã gửi trước khi người đọc xem được Email. Hãy xem các bước làm dưới đây nhé!

Thủ Thuật Xóa Một Email Đã Gửi Trong Outlook Trước Khi Người Nhận Đọc Email

Trong hướng dẫn này tôi sẽ giới thiệu cho bạn một tính năng trong Outlook rất hay đó là Recall This Message. Chức năng này giúp bạn xóa Email đã gửi trước khi người đọc đọc được nó.
Bước 1: Mở thư mục Sent Items trong Outlook, sau đó kích đúp vào Email vừa gửi và bạn mong muốn xóa.

Bước 2: Trong cửa sổ Message hiện ra, bạn vào Message > Actions > Recall This Message. Như hình dưới đây:

Bước 3: Trong cửa sổ Recall This Message hiện ra, bạn tích vào lựa chọn Delete unread copies of this message. Như hình sau:
Chú ý: Bạn có thể tích vào thêm một lựa chọn nữa là Tell me if recall succeeds or fails for each recipient

Bước 4: Đóng cửa sổ Message của email đã gửi. Vậy là xong rồi.
Chú ý: Nếu ở bước 3 bạn tích vào lựa chọn Tell me if recall succeeds or fails for each recipient thì ngay lập tức sẽ có một Email thông báo cho bạn nếu bạn xóa và gọi lại Email vừa gửi thành công. Như hình ở dưới.
Tuy nhiên, nếu không may người đọc đã đọc email đó, thì bạn không thể recall và xóa email đó được. Bạn chú ý rằng, bạn recall và xóa được email khi và chỉ khi người đọc chưa đọc email.


Trên đây là 4 bước đơn giản giúp bạn có thể gọi lại email tức thì khi đã gửi email trước khi người nhận đọc được. Rất hay phải không nào? 

Cám ơn các bạn đã theo dõi bài viết. Nếu có bất kì khó khăn nào trong quá trình sửa lỗi trên bạn có thể trực tiếp liên hệ với chúng tôi qua fanpage QTitCare. Hoặc có thể mang máy tính của bạn đến cửa hàng sửa chữa máy tính laptop tại Quảng Yên, chúng tôi sẽ hỗ trợ bạn tốt nhất có thể. Xin cám ơn!

Copyright © 2016 QTitHow All Rights Reserved