How to Connect a Printer via WiFi on Windows 10/11 (Step-by-Step Guide)
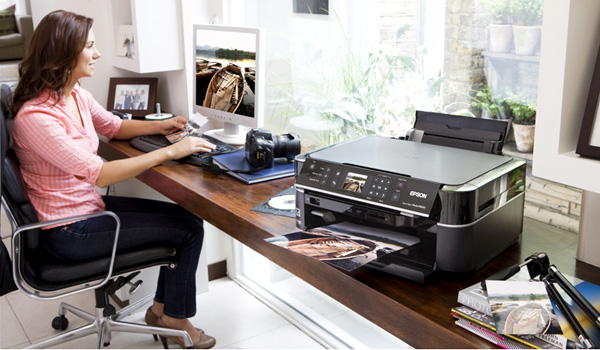
Printing wirelessly has become an essential part of modern home and office environments. Whether you're using a laptop, desktop, or even a smartphone, connecting your printer via WiFi allows you to print from anywhere within your network — no cables needed. This guide walks you through everything you need to know about how to connect a printer via WiFi on Windows 10 and Windows 11.
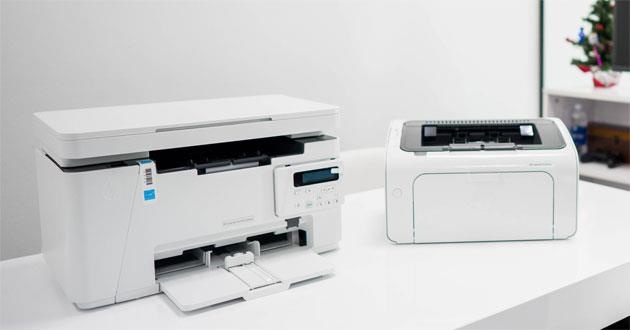
What Is a WiFi Printer?
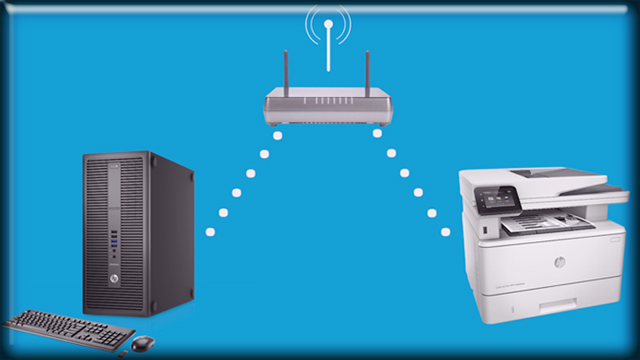
A WiFi printer is a printer that connects to your local wireless network, allowing computers, laptops, tablets, and smartphones to send print jobs wirelessly — without needing a USB or LAN cable. Compared to traditional wired printers, WiFi printers offer far greater flexibility and mobility.
They are increasingly popular in offices and homes because they eliminate cable clutter, save space, and allow multiple devices to share a single printer over the same network.
How to Connect a Printer via WiFi
Before getting started, make sure your printer supports WiFi connectivity and that both your computer and printer are connected to the same WiFi network.
Step 1: Connect the Host Computer to the Printer via WiFi
This process is similar to setting up a printer over a LAN network.
1. Turn on the host computer and power on the printer.
2. Install the printer driver on the host computer. Most WiFi printers come with a driver disc. If not, search for your printer model + "driver" on Google, download, and install it.
3. Go to Start > Settings > Control Panel > Printers and Faxes (or Printers and Devices).
4. Right-click the printer icon and select Sharing > Share this Printer > Apply > OK. A hand icon will appear under the printer icon when sharing is successful.
Step 2: Connect Other Computers to the Shared Printer
1. Go to Start > Settings > Printers and Faxes.
2. Click File > Add Printer > Next.
3. Select A Network Printer or a printer attached to another computer > Next.
4. Choose Browse for a printer > Next.
5. Double-click the host computer, select the shared printer, then click Next > Finish.
Step 3: Share the Printer with Other Devices on the Same Network
1. Turn on the computer or laptop you want to add the printer to.
2. Install the printer driver as you did on the host machine.
3. Go to Control Panel > Printers and Devices > Add Printer.
4. Select Add a network, wireless or Bluetooth printer to scan for shared printers.
5. Alternatively, press Windows + R, type //[host IP address], and press Enter to connect directly.
Configure Wireless Internet Access on Your Printer
Before adding the printer to Windows, you need to connect it to your WiFi network. Here are the general steps:
1. Turn on your WiFi router and laptop.
2. Power on the printer.
3. On the printer's control panel, navigate to the wireless setup settings (e.g., on Epson: Setup > Wireless LAN Settings; on HP: Network).
4. Select your WiFi network SSID.
5. Enter your WiFi password (WEP key or WPA passphrase).
6. The wireless light on the printer will turn on once it's connected successfully.
Tip: Some manufacturers provide a software wizard that automates the WiFi connection process for their printers.
How to Set Up a Wireless Printer on Windows 11
Once your printer is connected to WiFi, follow these steps to add it to your Windows 11 computer:
Step 1: Open Settings
Press Win + I to open the Settings app.
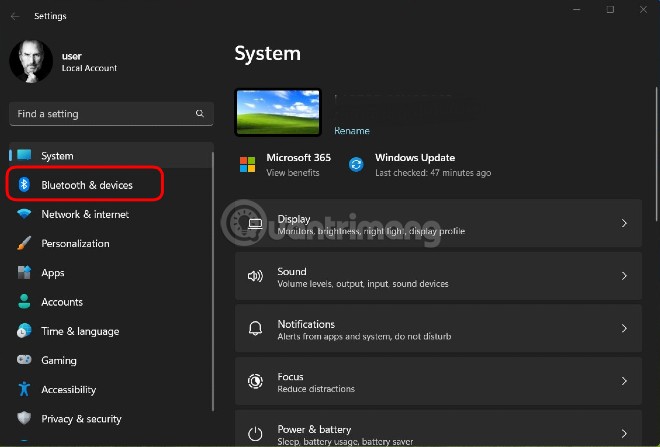
Step 2: Go to Bluetooth & Devices
Click on Bluetooth & devices in the left sidebar.
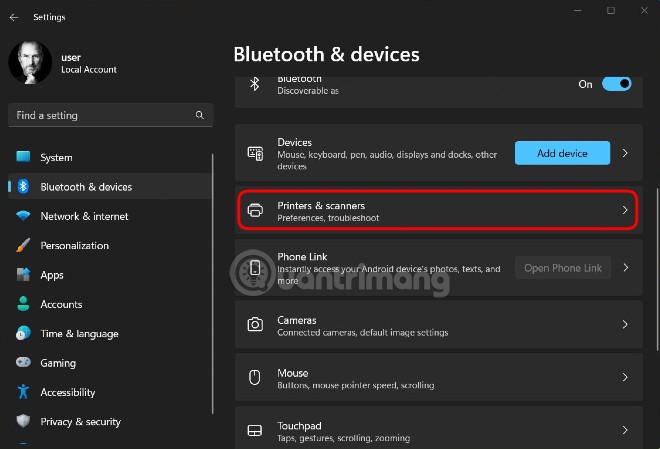
Step 3: Open Printers & Scanners
Click on Printers & scanners.
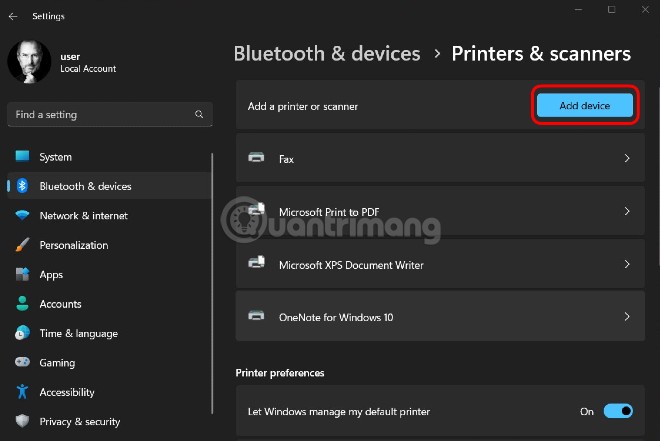
Step 4: Add a Device
Click the blue Add device button. Windows will automatically scan for available printers. If your printer appears, click on it to connect.
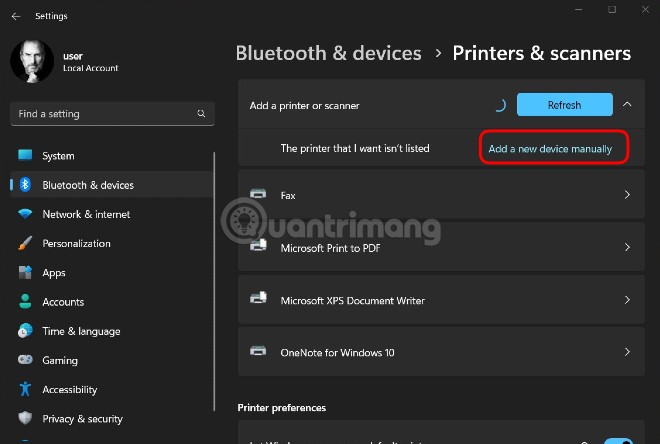
Step 5: Add Manually if Not Found
If your printer doesn't appear, click Add a new device manually.
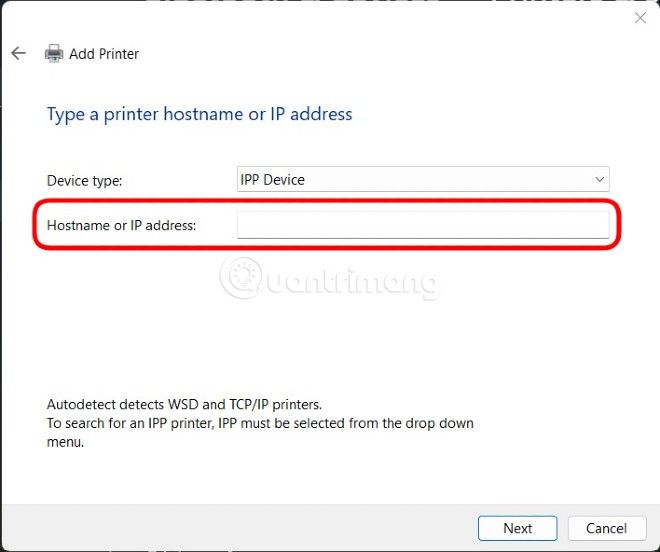
Step 6: Connect via IP Address
Select Add a printer using an IP address or hostname, then click Next.

Step 7: Enter the IP Address
Type the printer's IP address in the Hostname or IP address field, then click Next.
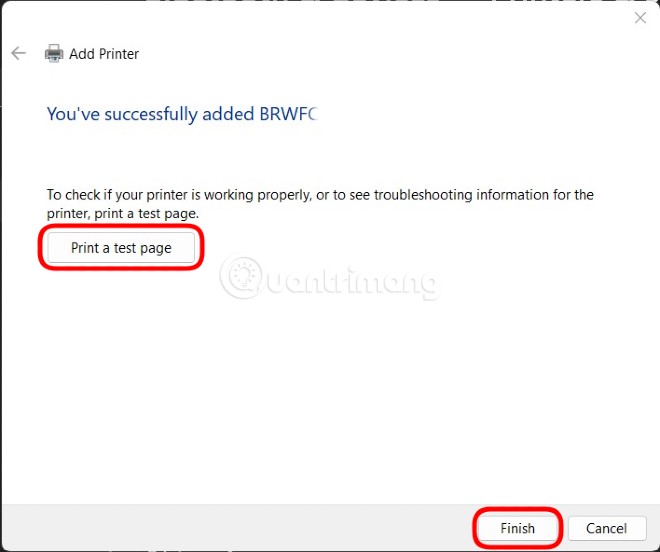
Step 8: Finish Setup
If the IP address is correct, setup will complete. Click Finish to exit, or click Print a test page to verify the connection.
How to Set Up a Wireless Printer on Windows 10
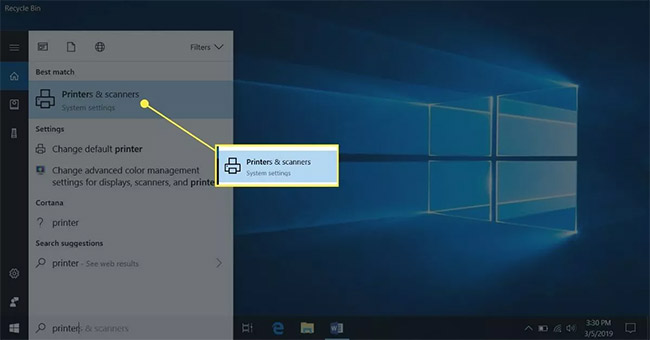
Step 1: Search for Printers & Scanners
Open the Windows Search box, type "printer", and select Printers & Scanners.
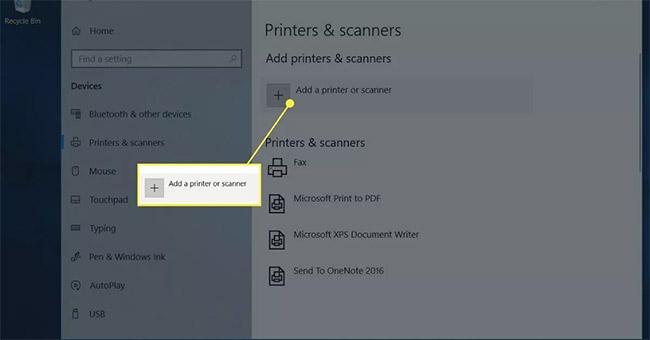
Step 2: Add a Printer
In the Settings window, click Add a printer or scanner.
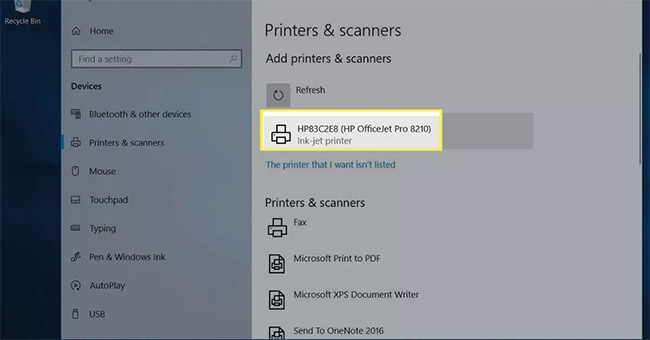
Step 3: Select Your Printer
Choose your printer from the list and click Add device.
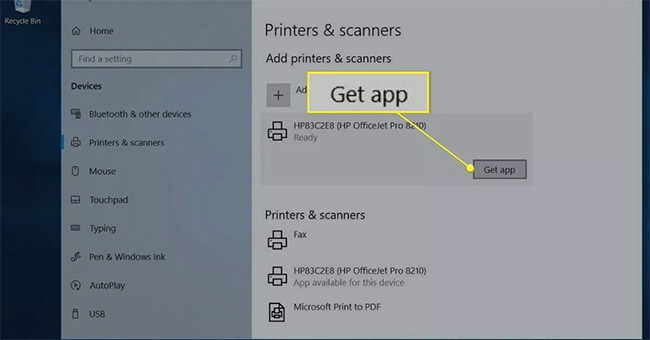
Step 4: Install Additional Software (if prompted)
Windows may ask you to install additional software. Click Get app to download it from the Microsoft Store.
Step 5: If Printer Is Not Found
Go back to Printers & Scanners > Add a printer or scanner > The printer that I want isn't listed. Then select Add a Bluetooth, wireless or network discoverable printer and click Next.
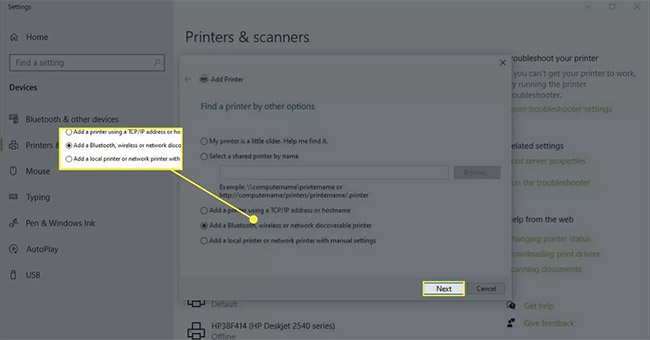
You can also choose Add a printer using a TCP/IP address or hostname if you have the printer's IP address, then enter it to connect.
Note: Make sure your laptop and printer are on the same WiFi network. If you use a WiFi Range Extender, it may create a separate network — which could prevent detection.
Adding a Printer on Windows 8 and Windows 7
1. Go to Start > Devices and Printers.
2. Click Add a printer.
3. In the Add Printer wizard, select Add a network, wireless or Bluetooth printer.
4. Choose your printer from the list and click Next.
5. Install the driver if prompted, complete the wizard, and click Finish.
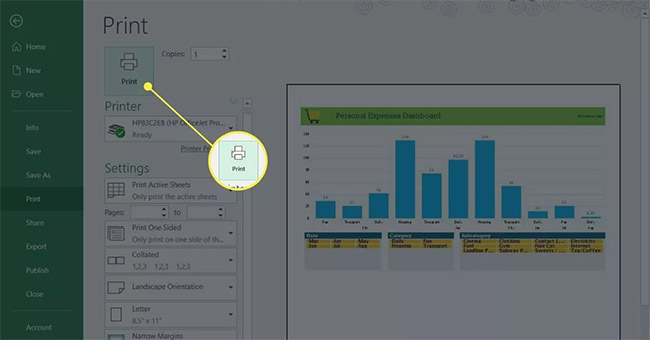
How to Print Wirelessly via WiFi
Step 1: Prepare the Printer
Make sure the printer is powered on, connected to WiFi, and has paper loaded in the tray.
Step 2: Open the Document
Open the file or document you want to print in any application or web browser.
Step 3: Print
Click the Printer icon or press Ctrl + P, select your wireless printer, adjust settings if needed, and click Print.
Your printed pages will be waiting in the output tray of the printer.
How to Print Remotely When Away from WiFi
Some printer manufacturers offer an email printing service. Your printer is assigned a unique email address, and you can send documents to that address to print them — even when you're away from home or the office.
Tip: On HP printers, look for HP ePrint in the printer menu to find the assigned email address.
Step 1: Ensure the Printer Is Ready
Make sure the router is on, the printer is connected to WiFi, and paper is in the tray.
Step 2: Compose an Email
Open your email app and create a new message.
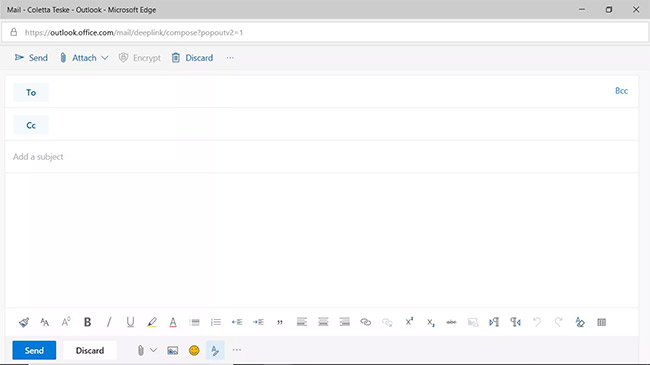
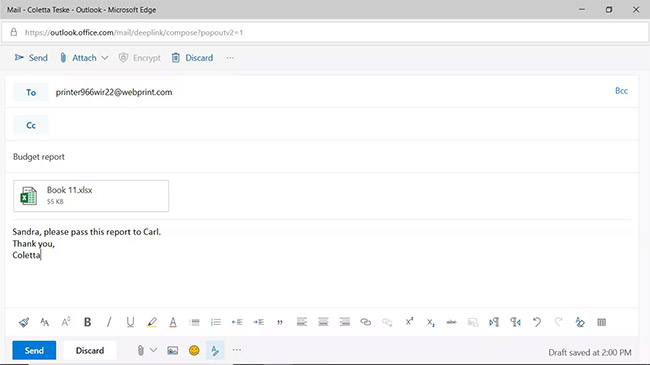
Step 3: Address and Attach
Enter your printer's email address in the To field. Add a subject line (some services require it), then attach the document you want to print.
Note: Email print services may limit file size, number of attachments, and supported file types.
Step 4: Send
Click Send. The document will be sent to your wireless printer and printed automatically.
Tips & Things to Note
Here are some important things to keep in mind when connecting a printer via WiFi:
Choose a WiFi printer from a reputable brand such as Canon, HP, or Brother. Avoid cheap, unbranded printers.
Make sure your printer's hardware specs are sufficient for your usage needs to avoid interruptions during printing.
Use a computer with adequate processing power to ensure a stable and efficient connection.
Always make sure both your computer and printer are connected to the same WiFi network.
Troubleshooting WiFi Printer Connection Issues
If you encounter problems connecting your printer via WiFi, try the following solutions:
1. Make Sure the Printer Is Shared on the Network
Double-check that the printer has been properly set up and shared on the network. If everything looks correct, move on to the next steps.
2. Run the Windows Troubleshooter
Press Win + I to open Settings, go to Update & Security > Troubleshoot, select Printer, and click Run the troubleshooter. Windows will automatically detect and fix any issues. You can also run Hardware and Devices to check peripheral connections.
3. Check and Update the Printer Driver
Press Windows + R, type devmgmt.msc, and press Enter. In Device Manager, expand Print Queues, right-click your printer, and choose to update, uninstall, or reinstall the driver.
4. Re-scan for the Printer on Windows 10
Press Win + I > Devices > Printers & Scanners > Add a printer or scanner. If the printer isn't found, click The printer that I want isn't listed, then select Add a Bluetooth, wireless or network discoverable printer and click Next. Wait for Windows to scan and display available printers.
Conclusion
Connecting a printer via WiFi on Windows 10 or Windows 11 is straightforward once you understand the steps. Whether you're setting up a new wireless printer at home or sharing one across an office network, this guide covers all the methods you need. If you run into issues, the built-in Windows Troubleshooter and driver checks are your best first steps to resolve them.
No Comment to " How to Connect a Printer via WiFi on Windows 10/11 (Step-by-Step Guide) "