Complete Guide: Integrating Gmail with n8n Using Google Cloud Console
In today's automation-driven world, n8n has become the go-to workflow platform for SMEs, growth marketers, and data engineers across Southeast Asia. The reason? It's flexible, cost-effective, and handles complex integrations beautifully. One trend we're seeing everywhere now is connecting marketing channels, CRM systems, and Google Sheets directly to email to send real-time notifications — and it's becoming essential for staying competitive.
The Gmail Node plays a critical role in n8n workflows. Think of it as an automated mail dispatcher that handles confirmation emails, sends reports, and manages customer communications without any manual intervention. In this guide, we'll walk you through every step needed to wire Gmail into n8n properly and efficiently, so you can master automated email delivery from day one.
How to Integrate Gmail with n8n
Step-by-Step Setup Instructions for Gmail Integration on n8n
1. Initialize the Gmail Node to Get Your OAuth Redirect URL
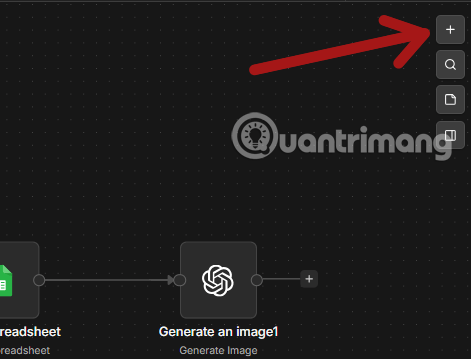
Step 1: Open n8n and navigate to your main workflow canvas. Click the Add first step button or the plus icon (+) in the center of the canvas to create a new node.
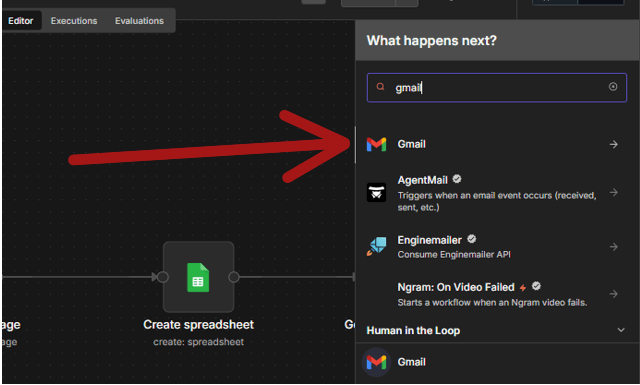
Step 2: A search panel will appear showing available integrations. Type Gmail in the search box, then select the Gmail option from the results to add it to your workflow.
Step 3: The system will prompt you to select a specific action for this node. Choose Send an email or another action depending on your automation needs.
Step 4: On the right panel where you configure the Gmail Node, locate the Credential for Gmail Account section. Click the dropdown menu and select Create New Credential.
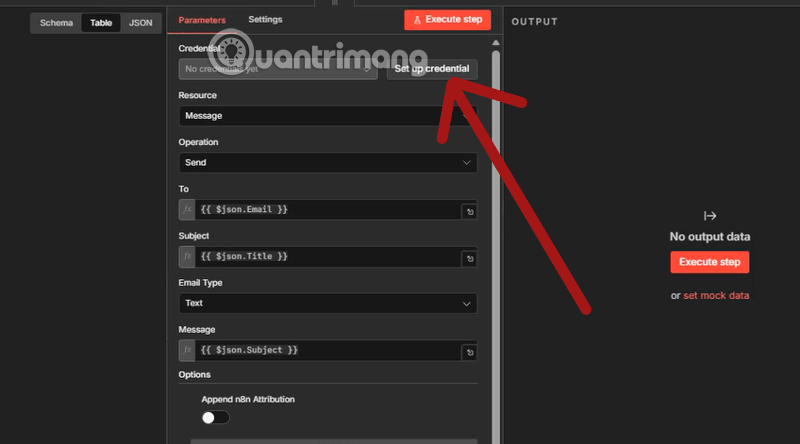
Step 5: You'll see the credential creation screen with an OAuth Redirect URL displayed. Copy this URL — you'll need it in the next section when setting up Google Cloud.

2. Configure Google Cloud for n8n Gmail Integration
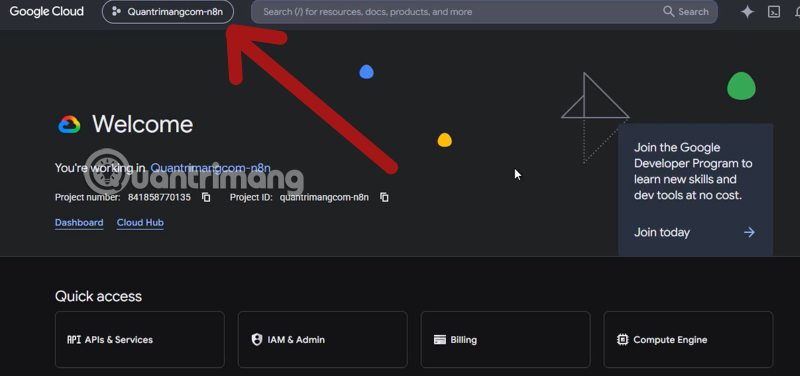
Step 1: Head over to the Google Cloud Console homepage. Click the Project selector button in the top-left corner of the navigation bar to see your projects, then choose New Project.
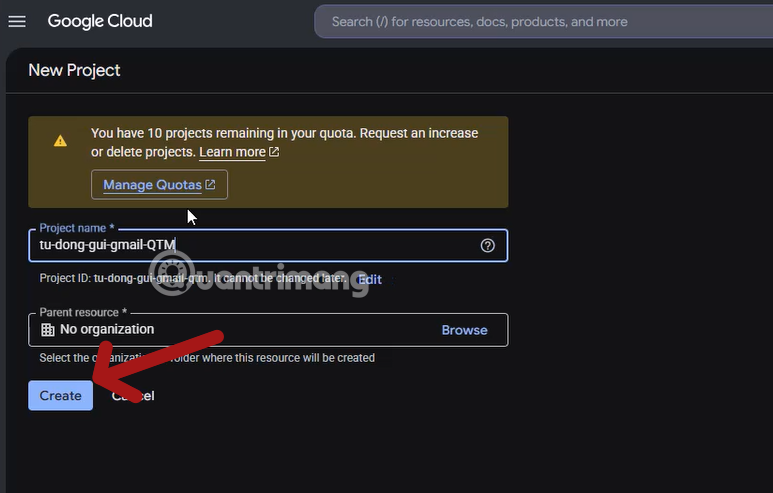
Step 2: A dialog will open for creating a new project. Enter a name like gmail-automation-n8n, then click the blue Create button to initialize it.
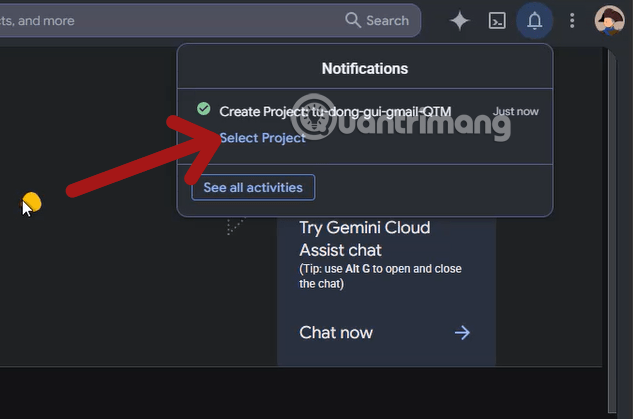
Step 3: A notification will appear in the top-right corner. Click Select Project to switch to your newly created project.
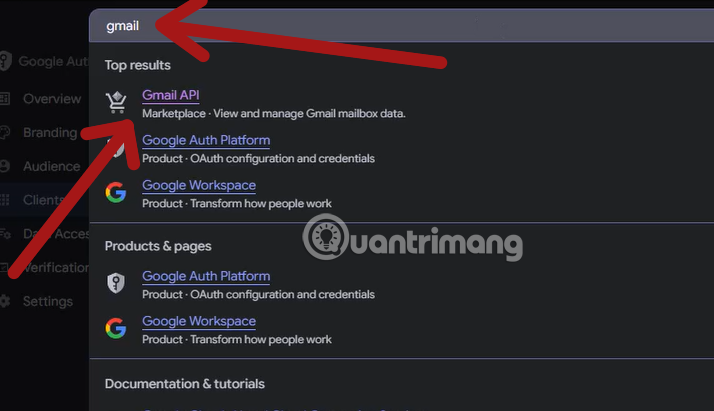
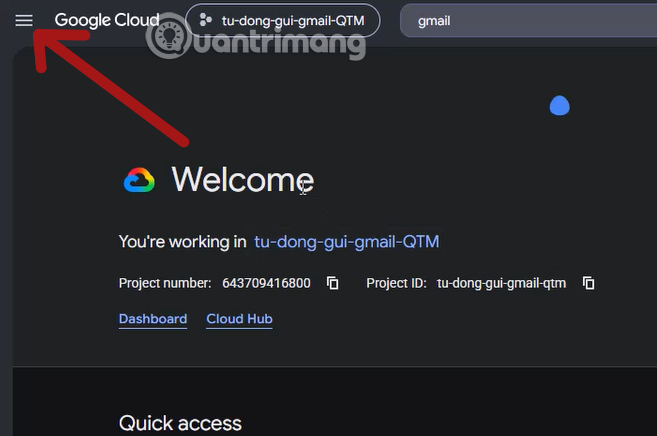
Step 4: You're now inside your project. Next, click the search bar at the very top of the console (next to your project name).
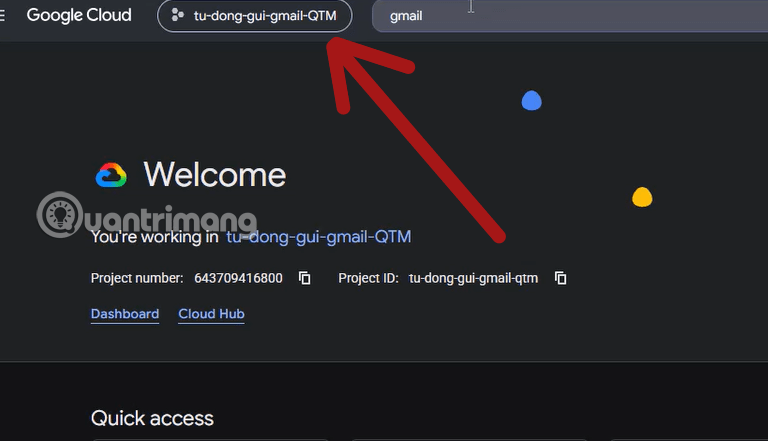
Step 5: Type gmail in the search field. From the dropdown results, select Gmail API.
Step 6: The Gmail API details page will load. Click the blue Enable button to activate this API for your project.

Step 7: Once enabled, you need to access the configuration menu. Click the hamburger menu icon (three horizontal lines) in the top-left corner.
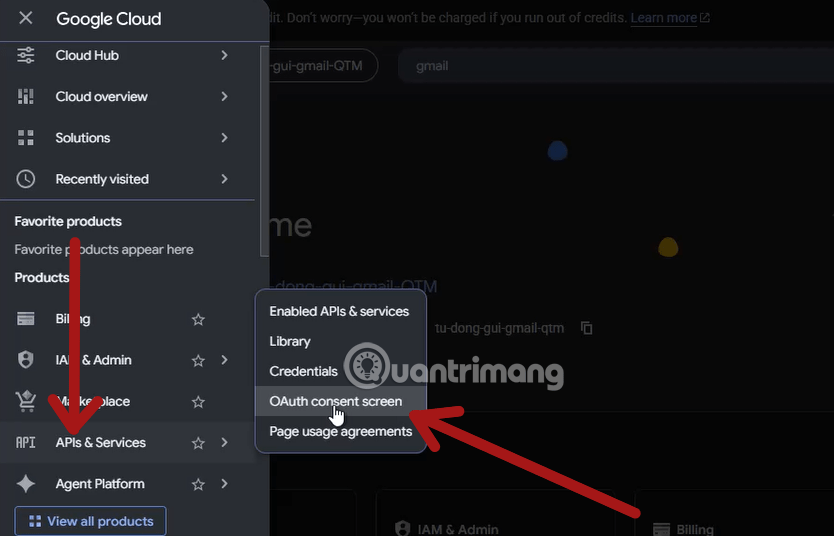
Step 8: From the main menu, hover over APIs & Services and click OAuth consent screen.
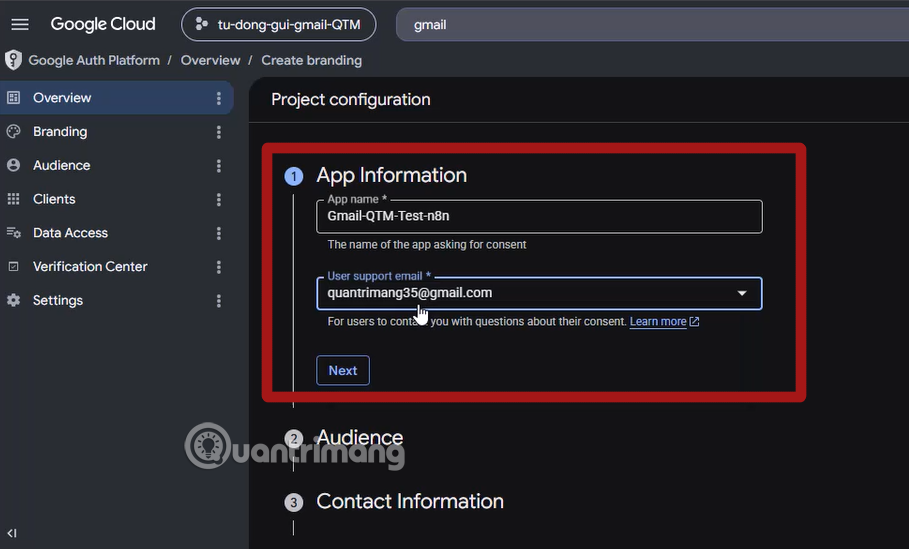
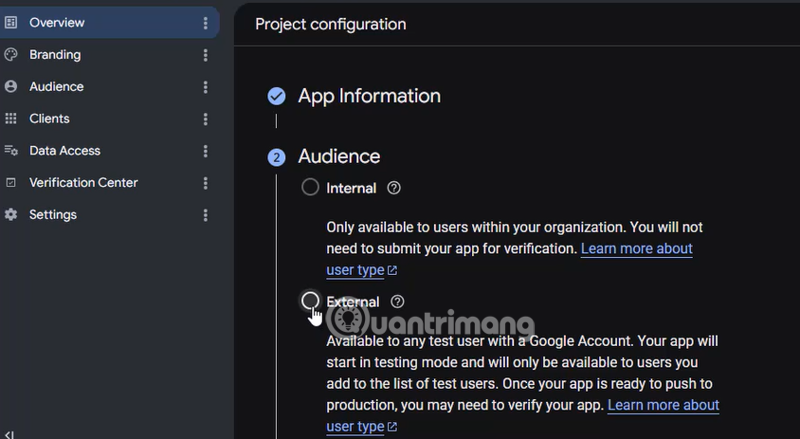
Step 9: Under Project configuration, fill in the App Information section. Enter an app name like Gmail-n8n-Automation and add your support email.
Step 10: You'll need to choose between two user access types:
- Internal: Only available to users within your Google Workspace or Cloud Identity. No app verification required if used internally. Pros: Fast deployment, low verification risk. Cons: Can't be used by external customers.
- External: Allows any Google account to access. When first created, it runs in testing mode and only works for test users you add. To move to production, you may need to pass Google verification, especially if your app requests sensitive permissions.
In the Contact Information section, enter your registered email address. Click Next, then Create to finalize your project configuration.

3. Generate Client ID and Client Secret, Then Connect to n8n
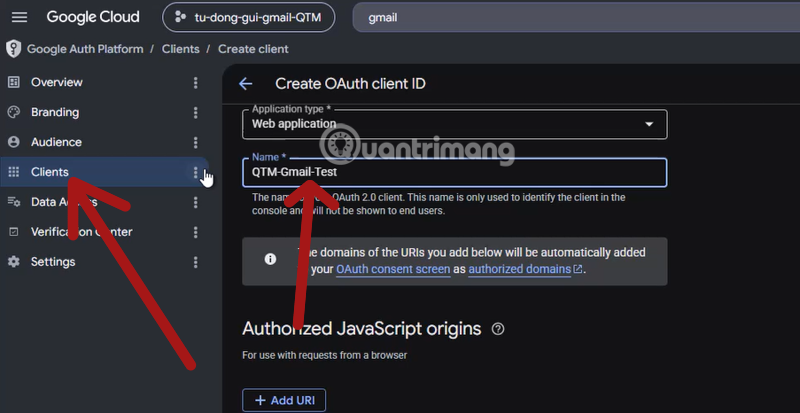
Step 1: After completing your project configuration, select Credentials from the menu. Choose Web application from the Application Type dropdown, then give your credential a name.
Step 2: Click Add URL.
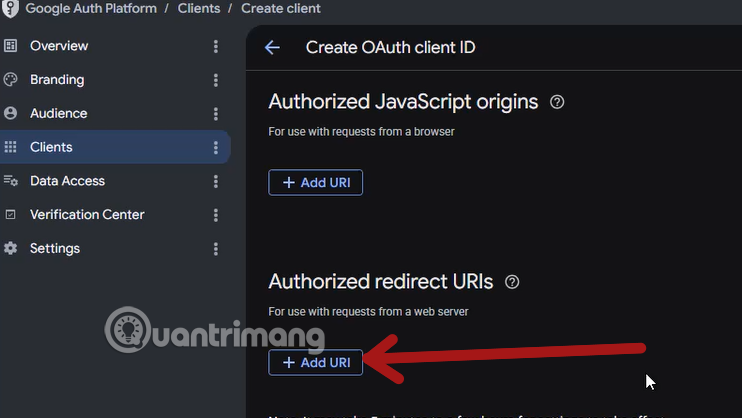
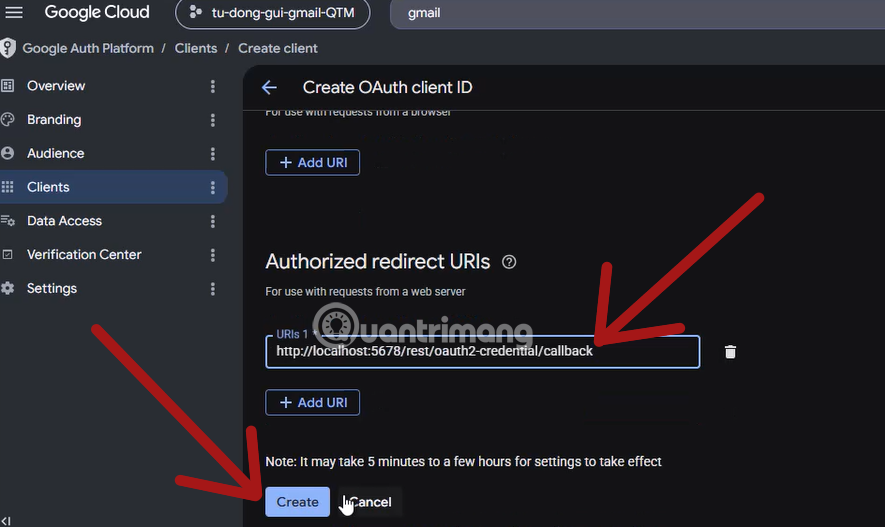
Step 3: Paste the OAuth Redirect URL you copied earlier into the Authorized Redirect URLs field, then click Create to save.
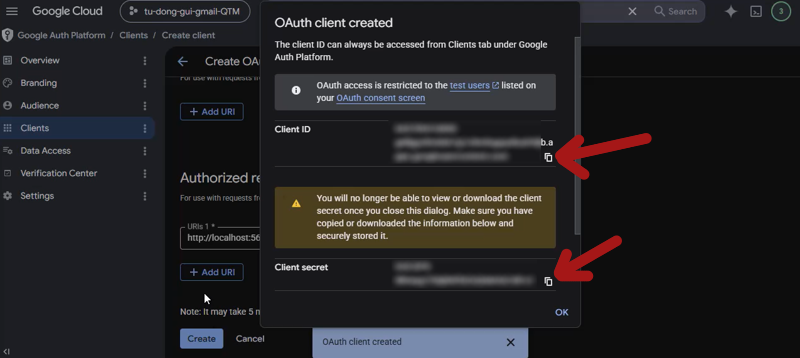
You'll now see your Client ID and Client Secret. Here's the important part: copy both values immediately into a text editor or password manager. Once you close this dialog, the Client Secret won't be visible again — you'd have to create new credentials if you lose it.
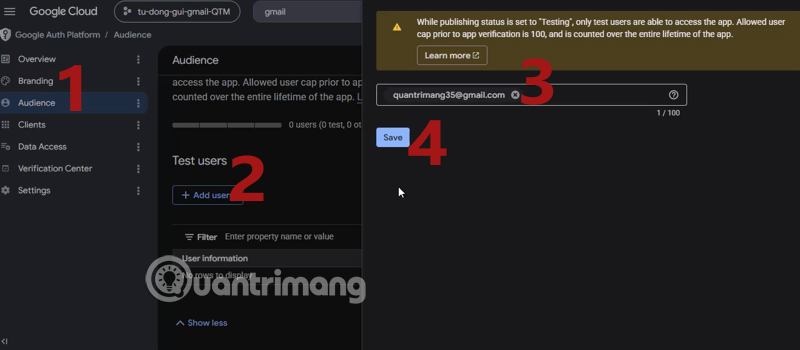
Next, click Audience and then Add user under Test users. Enter the email address you're using for this Google Cloud setup and click Save.
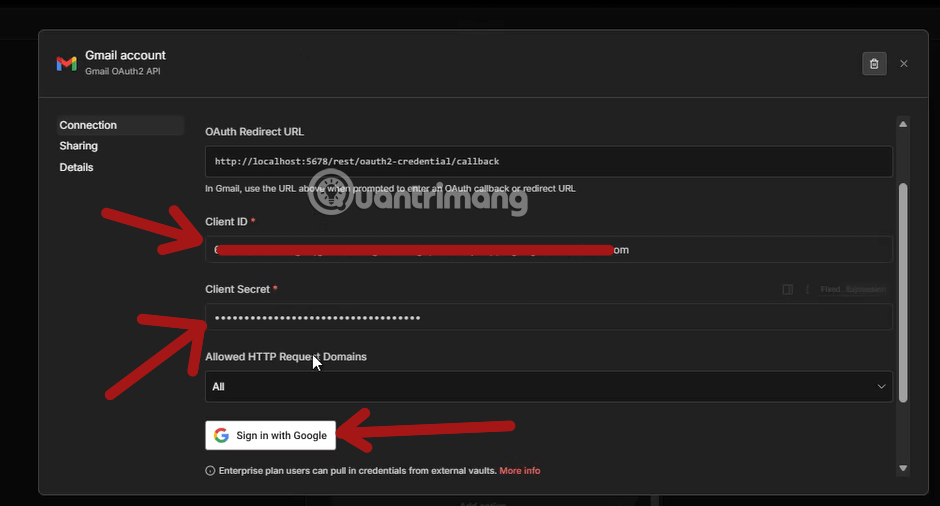
Return to n8n and paste your Client ID and Client Secret into the credential form. Then click Sign in with Google. Log in with the Google account you configured, and when prompted, grant n8n permission to access your Gmail data.
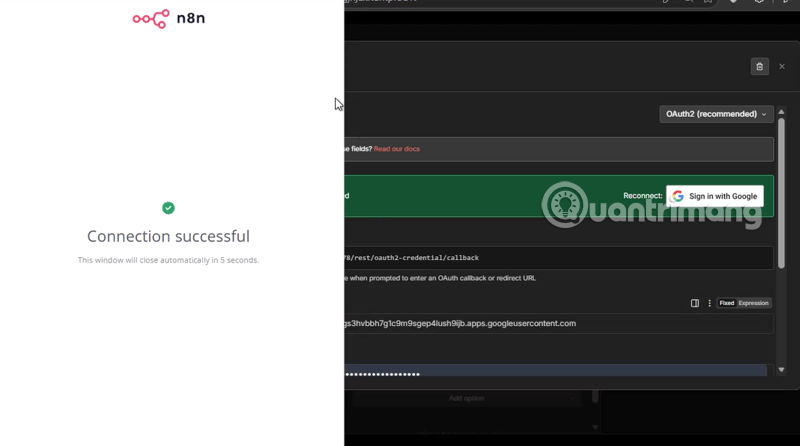
When you see the success message below, congratulations — your Gmail integration is now live!
Important Considerations When Using Gmail Node in n8n
Understanding Google API Rate Limits
When you integrate Gmail via OAuth2 personal authentication, you need to be aware of Google's quota restrictions. A standard free Gmail account can send roughly 500 emails per day, while Google Workspace accounts can reach 2,000 per day. If your automation exceeds these limits, the Gmail Node will return a 429 error (Too Many Requests). What's interesting here is that this is often overlooked during initial testing, but it becomes a real concern once workflows move into production.
Alternatives for Self-Hosted n8n Deployments
If you're running n8n on your own server, OAuth2 configuration can sometimes run into issues with redirect URL validation and security policies. In these scenarios, you can switch to the SMTP Email Node using Google's App Password feature, or go the enterprise route with Google Service Account. Both approaches provide better stability and won't experience the periodic disconnections that OAuth2 sometimes has.
Conclusion
Connecting Gmail to n8n is a strategic move that helps businesses optimize resources, reduce human error, and accelerate customer interactions. By following this setup guide carefully from start to finish, your system will be ready to send hundreds of personalized emails daily with precision and reliability.
No Comment to " Complete Guide: Integrating Gmail with n8n Using Google Cloud Console "