How to Enable Your Laptop Webcam on Windows 7, 8, 10, and 11
Nearly every modern laptop comes equipped with a built-in camera—and most users have no idea how to actually turn it on. Whether you're jumping into a video call on Zoom, using Google Meet for work, or just want to snap a quick selfie, knowing how to access your webcam is essential. The good news? It's simpler than you think, and the process is remarkably consistent across different Windows versions.
Unlike desktop computers that require you to connect an external camera, your laptop's integrated webcam is always there waiting to be activated. While the exact steps differ slightly between Windows 7, 8, 10, and 11, the overall approach remains straightforward—no complicated setup required. This guide walks you through enabling and using your camera on each Windows version.
Enabling Your Camera on Windows 11
Using Settings to Control Your Webcam
Windows 11 handles camera access similarly to Windows 10, but with a few interface tweaks. You might need to enable your camera for online meetings, video calls, or when websites ask for camera access. Here's how to do it:
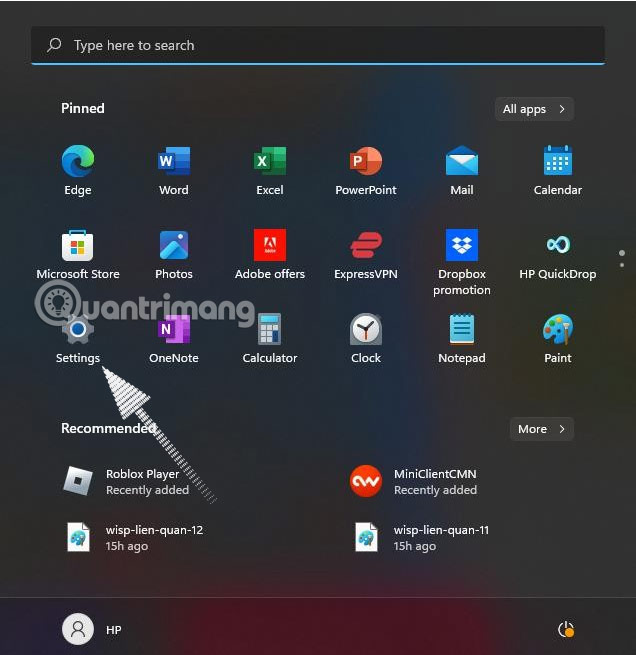
Step 1: Click the Start button, then select Settings. Alternatively, press Windows + I as a keyboard shortcut.
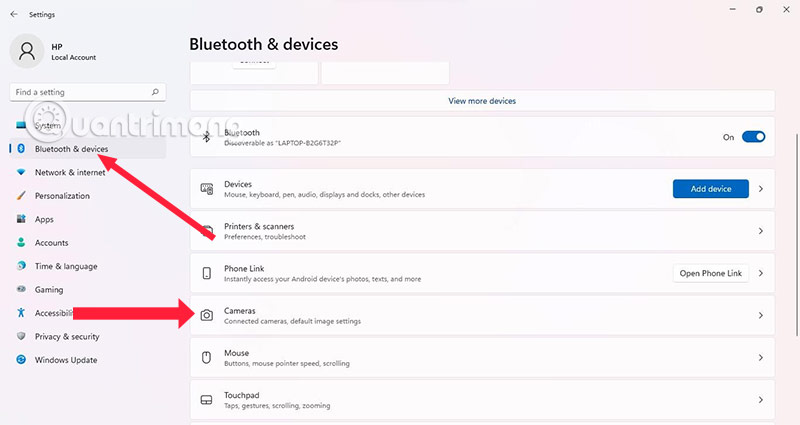
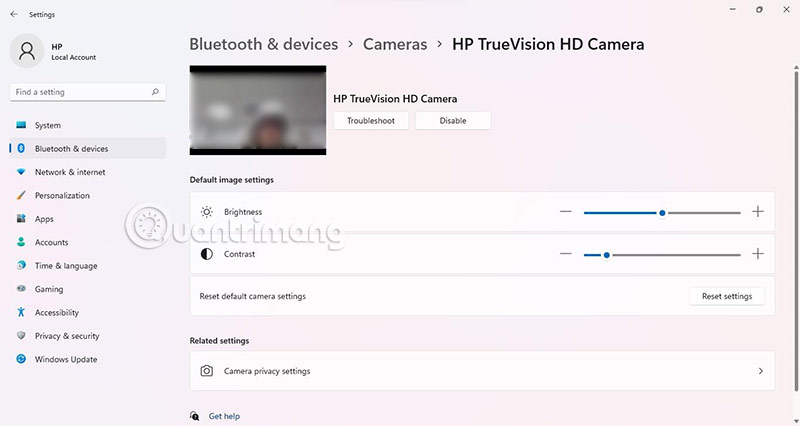
Step 2: In the Settings menu, search for Bluetooth & devices, then select Camera from the devices list on the right side.
Step 3: Look for the Connect Camera section and select your available camera from the list.

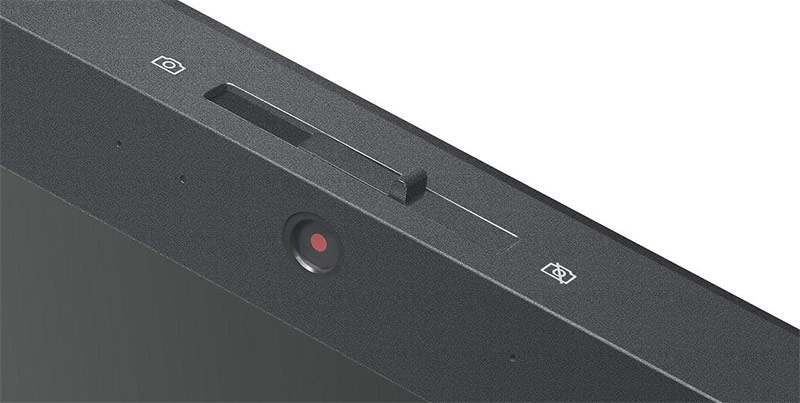
Step 4: Some laptops have a physical camera shutter or lock button. This is typically located on the side of your laptop or directly on the camera lens itself.
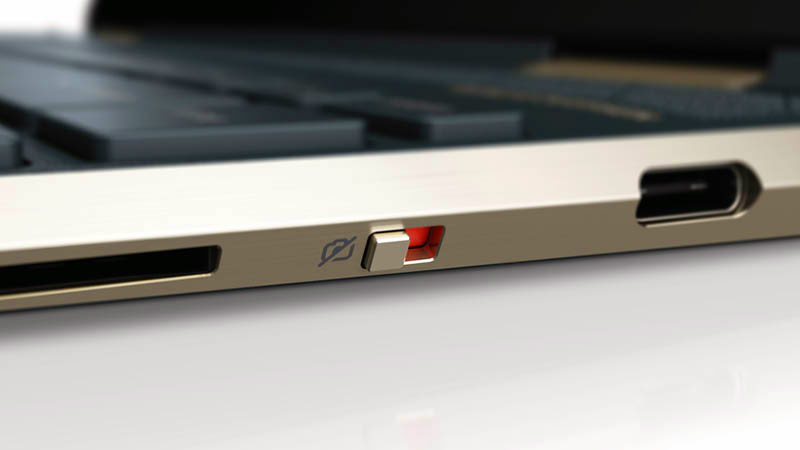
Step 5: If your camera has a physical shutter, you'll see a small toggle switch next to the lens like this:
Step 6: Your camera will now be active. You'll see a live feed in the settings window, along with brightness and contrast adjustment sliders below it.
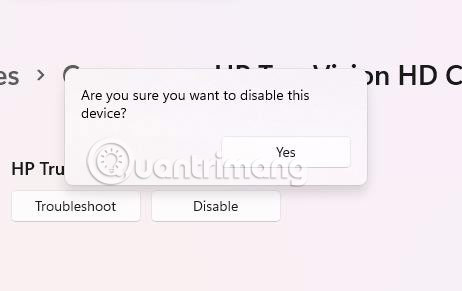
Step 7: To disable the camera, click the Disable button next to Troubleshoot, then confirm by clicking Yes.
Managing Your Camera Through Device Manager
If you prefer the traditional method—or simply want more control—you can toggle your camera on and off through Device Manager. What's interesting here is that disabling your camera this way prevents all applications and websites from accessing it, giving you a system-wide kill switch.
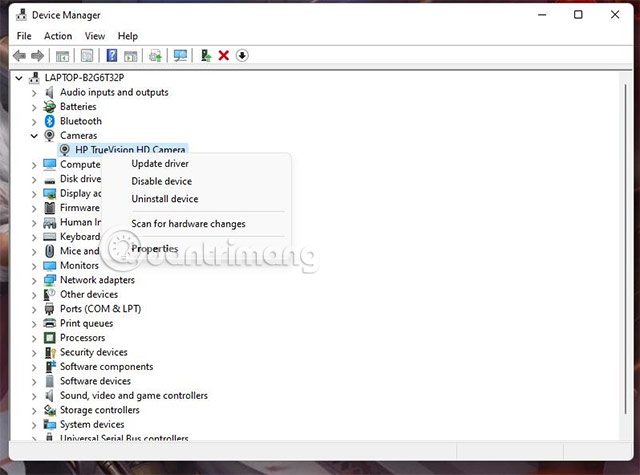
First, open the Start menu and search for Device Manager in the search bar.
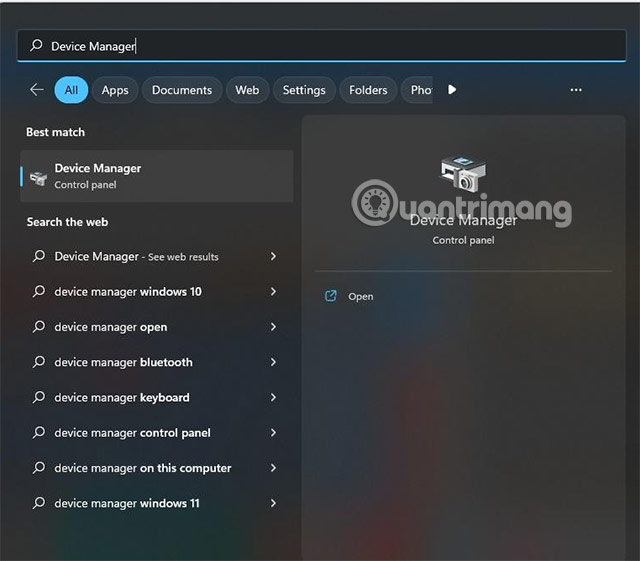
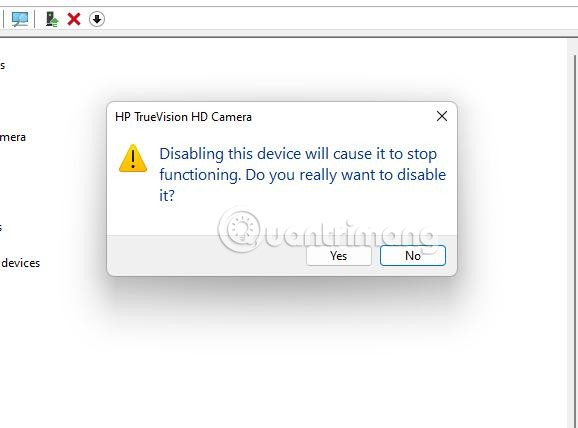
Device Manager will appear. Look for the Cameras section in the list to see your connected camera device. Right-click on your camera and select Enable Device to turn it on. To disable it, select Disable Device instead.
Click Yes to confirm. Once you disable your camera this way, no applications or websites will be able to detect or access it.
Enabling Your Camera on Windows 10
Granting Camera Permission in Settings
Before your camera will work with applications like Zoom, Google Meet, Microsoft Teams, Skype, or Viber, you need to grant those apps permission to access it. This is a privacy feature in Windows 10 that puts you in control. Here's how to set it up:
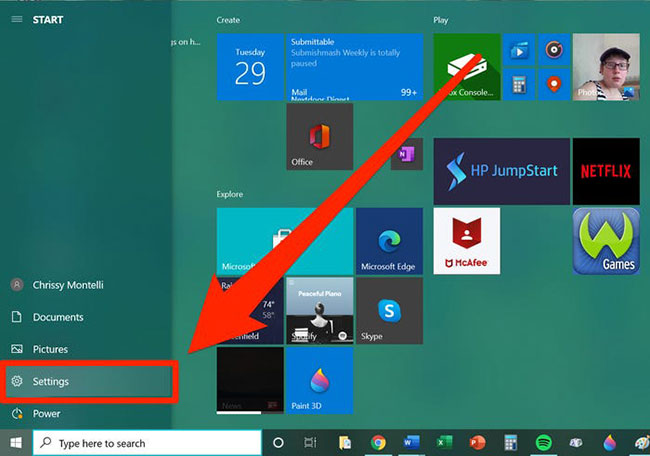
1. Click the Start button, then click Settings.
2. Scroll down in the window and click Privacy.
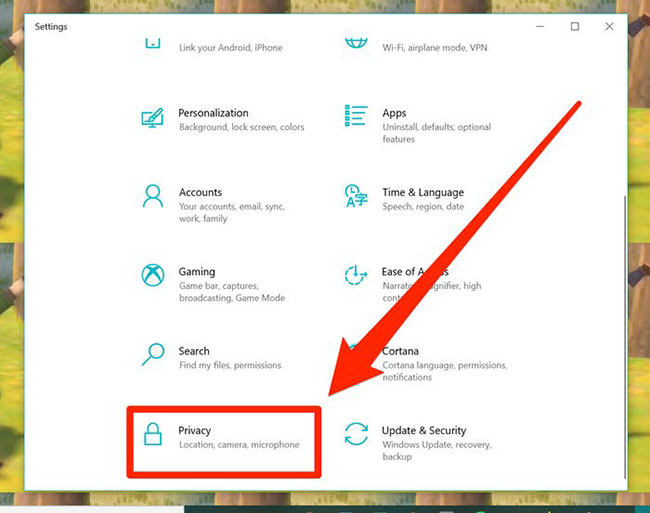
3. In the left menu, scroll down and click Camera.
4. On the right side, scroll down to find Allow apps to access your camera. Toggle this switch to On, and also toggle the Camera option itself to On. Then enable the toggle for any specific applications you want to access your camera.
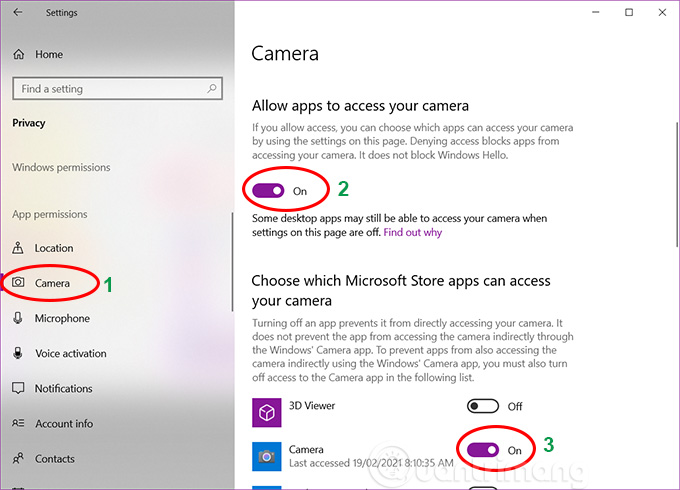
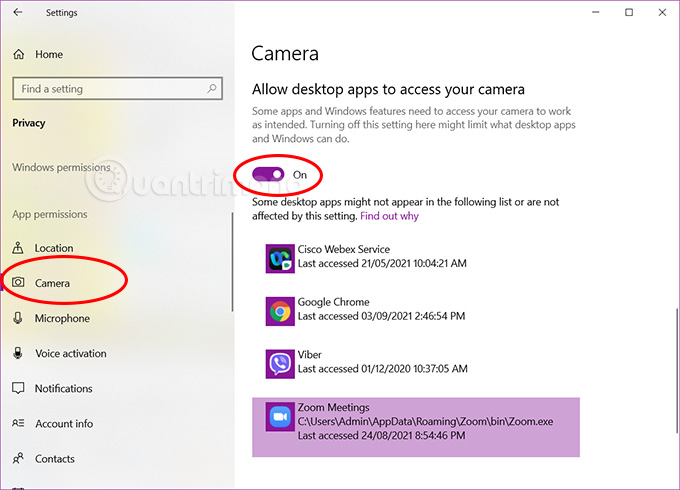
5. Continue scrolling to find Allow desktop apps to access your camera and toggle it to On. This enables installed applications like Chrome (for Google Meet) and Zoom to use your camera. Any eligible desktop apps will be listed below this toggle.
Opening and Using Your Webcam
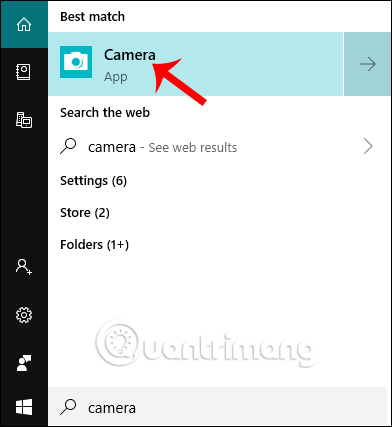
Step 1: Type camera into the Windows search bar and press Enter. Click the Camera result that appears.
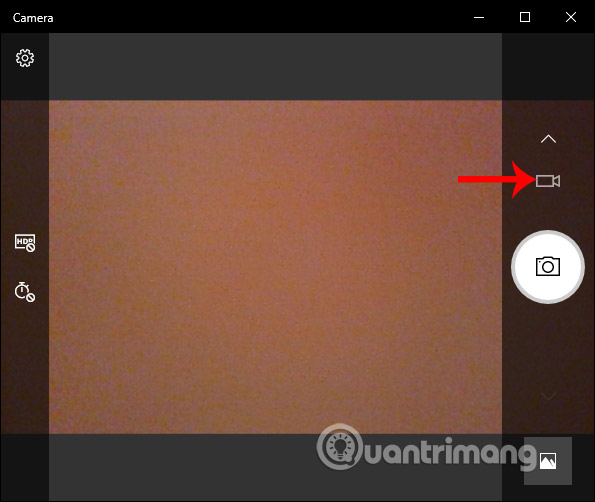
Step 2: The Camera app will open with a live preview from your webcam. It automatically detects faces and displays them with a square frame. On the left, you'll see toggles for HDR mode and options to set a countdown timer before taking a photo.
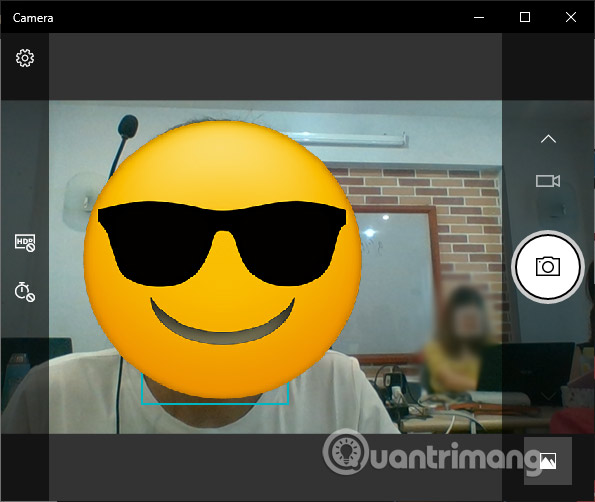
To take a still photo, click the camera icon. To record video instead, click the video icon above it.
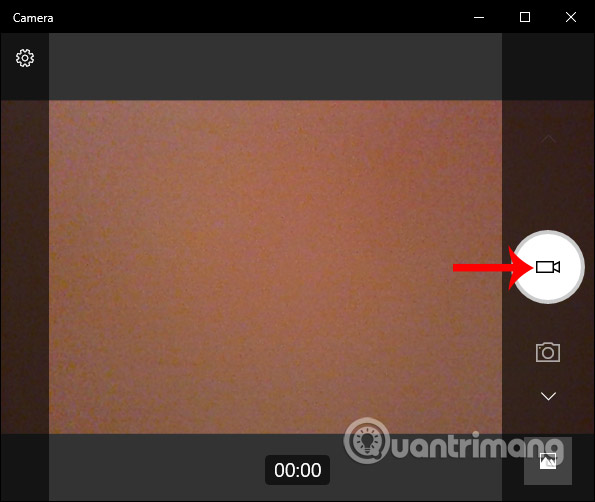
The video recording interface will appear. Press the large central record button to start recording your video.
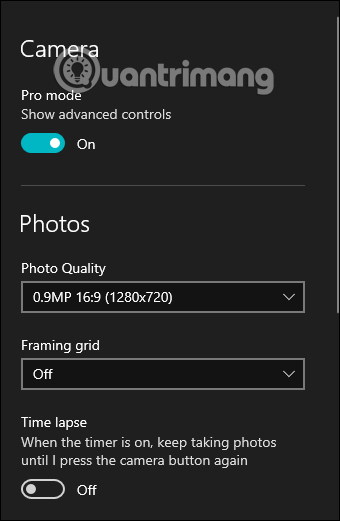
Step 3: Click the gear icon to adjust settings for photos and videos. For photos, you'll see these options:
- Show advanced controls: Replace the countdown timer with manual lighting adjustments
- Photo Quality: Choose your image resolution
- Framing grid: Display a grid overlay to help you compose your shot
- Time lapse: After clicking the camera button, the app will capture a time-lapse video of rapid motion
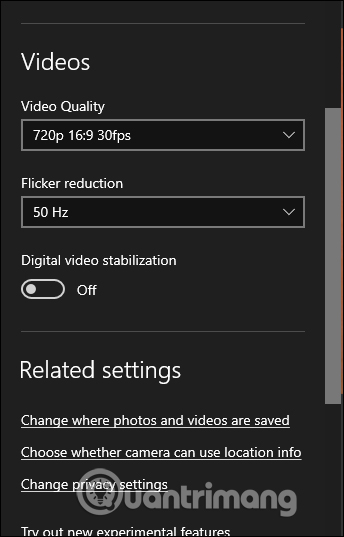
For video recording, these settings are available:
- Quality: Select your video resolution
- Flicker reduction: Adjust the scan frequency to eliminate flickering when filming under LED lights
- Digital video stabilization: Smooth out shaky video, though this may slow autofocus if your subject is moving
Adjusting Camera Preferences
When you first launch the Camera app, Windows will ask whether you want to allow it to access your location so it can tag your photos and videos. If you change your mind about this or any other setting later, you can return to Settings within the Camera app to modify your preferences. Additional options include enabling the framing grid, adjusting photo and video quality, and changing where your files are saved on your computer.
Enabling Your Camera on Windows 7
If your Windows 7 laptop came with camera software pre-installed, simply click Start, type camera in the search box, and press Enter to open it.
If nothing labeled "camera" or "webcam" appears, try searching for "webcam" or "web camera" instead.
Select the camera result from your search. This launches your camera software and automatically activates your laptop's webcam. Adjust your laptop's position until the camera captures what you want—usually your face or a specific area. You'll see a live preview on your screen, just like a digital camera viewfinder. Most laptop cameras automatically focus on faces in the frame. If yours doesn't have this feature, it will typically focus on the closest object or the brightest area.
Fine-tune the camera settings until the preview looks right. You can usually adjust focus, brightness, contrast, color, and sharpness. Make these adjustments by dragging sliders on the screen horizontally or vertically, depending on what you're changing. Follow the on-screen prompts to save your settings.
Using Your Camera for Video Chat on Windows 7
Make sure no other applications are using your camera, and ensure you have a reliable high-speed internet connection.
Open any Windows-compatible video chat software such as Skype or AIM Video Messenger. The software will automatically activate your camera and let you video chat with your contacts using the same or compatible software. You'll see a preview screen similar to the Camera app interface, and you can adjust settings and framing just like during initial setup.
Pin the camera app icon to your desktop for quick access. Right-click the app and select Send to > Desktop from the menu.
When you're finished, close the camera application completely for security. Right-click the program icon and select Close.
If your Windows 7 laptop doesn't have built-in camera software, you'll need to install a third-party application like CyberLink YouCam to enable camera functionality.
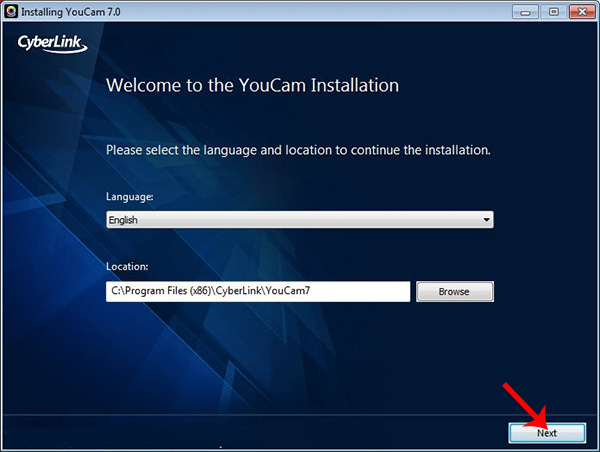
Step 1: Download CyberLink YouCam from a reputable source and run the installer on your computer.
Step 2: Select English as the language and choose your installation folder. Click Next to continue.
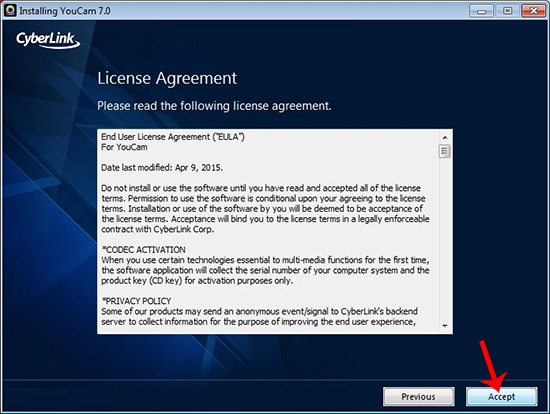
When you see the license agreement screen, click Continue to finish installing CyberLink YouCam on Windows 7.
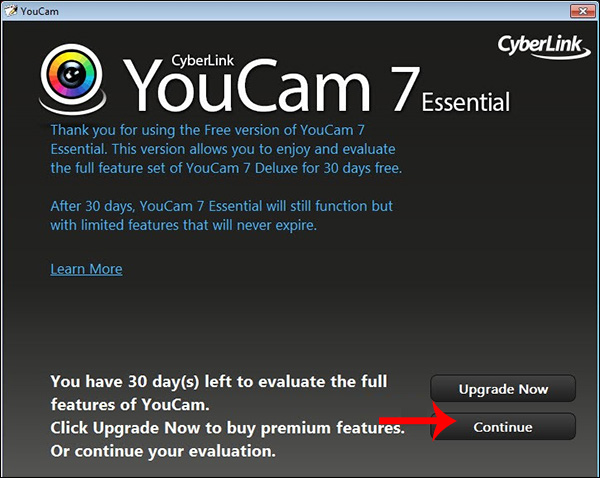
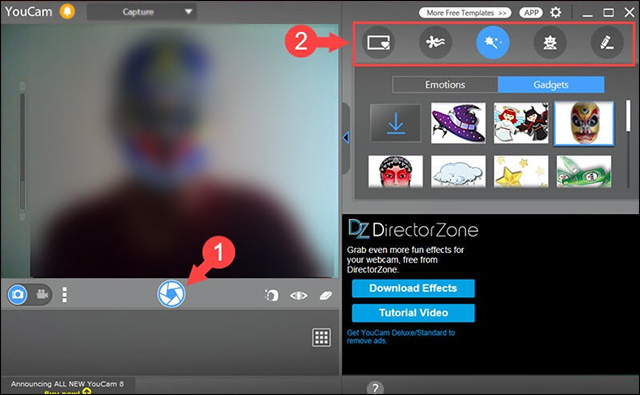
Step 3: Launch CyberLink YouCam. Your webcam feed will display in the application window. Click the circular button in the center to take photos. You can also switch to video recording mode if you prefer.
CyberLink YouCam offers many effects and frames to customize your shots.
Enabling Your Camera on Windows 8
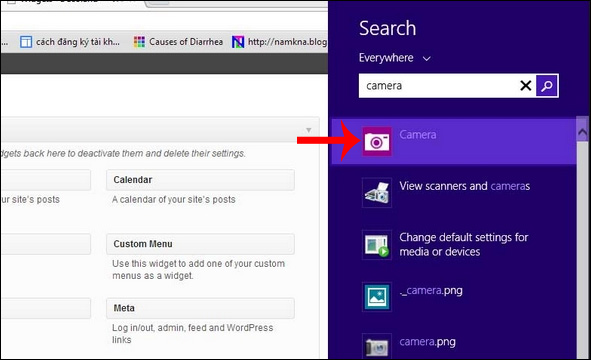
Move your mouse to the right edge of the screen and type camera in the search box. When results appear, simply click on Camera to open it.
What You Can Do With Your Webcam
Sure, video calls with family and friends are fun, but your webcam is far more versatile than most people realize. The real concern is that many users overlook the potential beyond basic video chatting.
With basic surveillance software, you can set up a home security system to detect intruders or monitor your pets while you're away. You can even use your webcam as a quick mirror to check your appearance before important meetings.
Some webcam uses can actually generate income. If you have expertise in something people want to learn—like electronics assembly or makeup application—you can create tutorial videos or teach live online classes and upload them to YouTube. If you're a gamer, you can stream your gameplay on Twitch and potentially earn through subscriptions and donations. You can also use your webcam to produce podcasts and video blogs for entertainment or marketing purposes.
The methods for enabling your camera are straightforward across all Windows versions. If you install additional software like CyberLink YouCam, you'll have access to more advanced features through the app's interface, whereas the built-in camera app keeps things simple.
Good luck, and happy streaming!
Related Articles
- 8 Effective Methods to Monitor Your Hard Drive Health and Catch Problems Early
- How to Fix the Task Host Window Blocking Windows Shutdown
- How to Restore a Windows System Using UEFI-Compatible .tib Ghost Files
- Understanding Mesh WiFi: How Does a Mesh Network System Actually Work?
- The 22 Best Tools for Creating Bootable USB Drives
No Comment to " How to Enable Your Laptop Webcam on Windows 7, 8, 10, and 11 "