How to Resize, Move, and Edit Objects in Google Photos Using AI
Google Photos' AI editing suite delivers some genuinely impressive capabilities that require minimal effort from users. From enhancing portrait lighting with AI to removing unwanted objects automatically, the app now lets you manipulate subjects in multiple ways.
You can enlarge or shrink any subject, reposition it anywhere you'd like, and the AI intelligently fills in the background without compromising composition or color balance. Here's everything you need to know about adjusting objects with Google Photos' AI tools.
Moving Objects Within Your Photos Using Google Photos AI
Step 1:
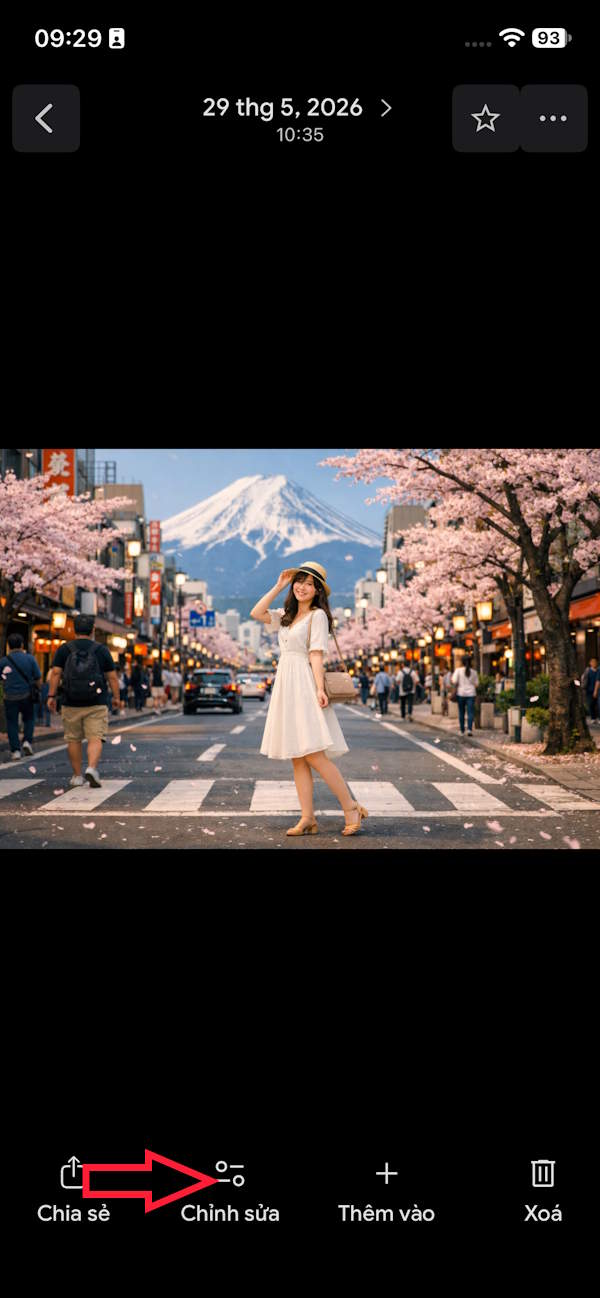
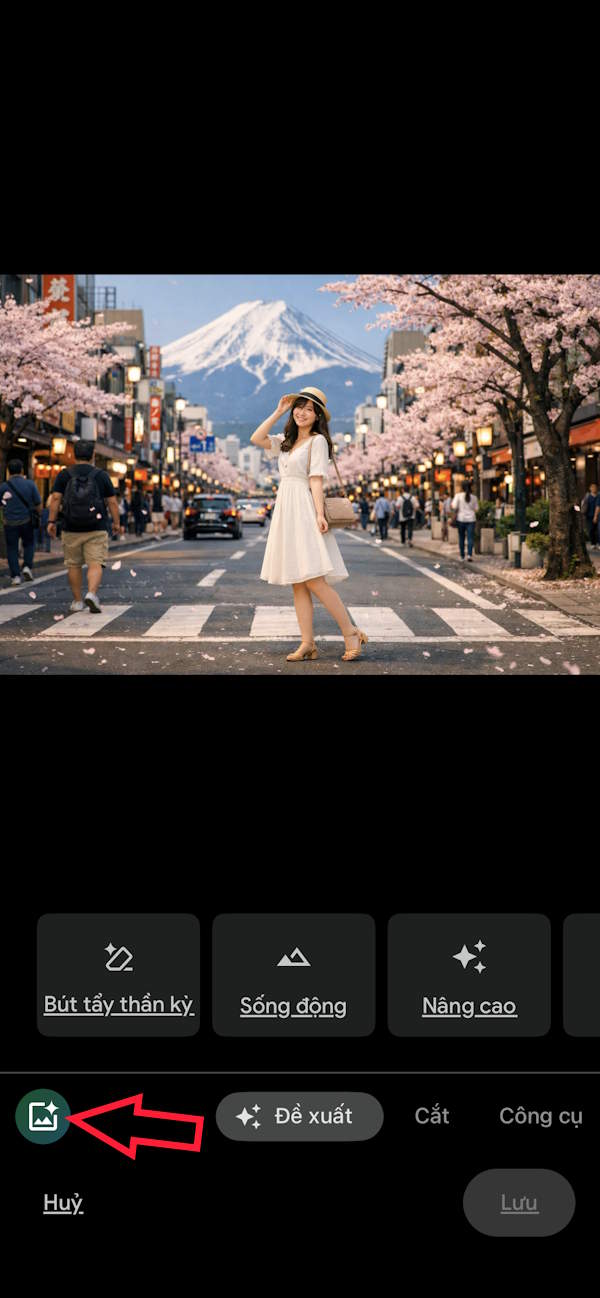
Open the photo you want to edit and tap the edit icon at the bottom. Once the editor loads, tap the Magic Editor icon in the lower left corner.
Step 2:
Now draw a selection around the object you want to move. For this example, we're repositioning a subject on the right side of the frame.


Step 3:
Hold down on the selected object and drag it to your desired location. The subject moves instantly from its original position. Once you've positioned it where you want, tap the arrow icon in the lower right to generate a new version of the image.


Step 4:
You'll get a photo with the object repositioned. Here's where the AI really shines—the original location is automatically filled in by the AI, creating a seamless, natural-looking result without visible gaps.
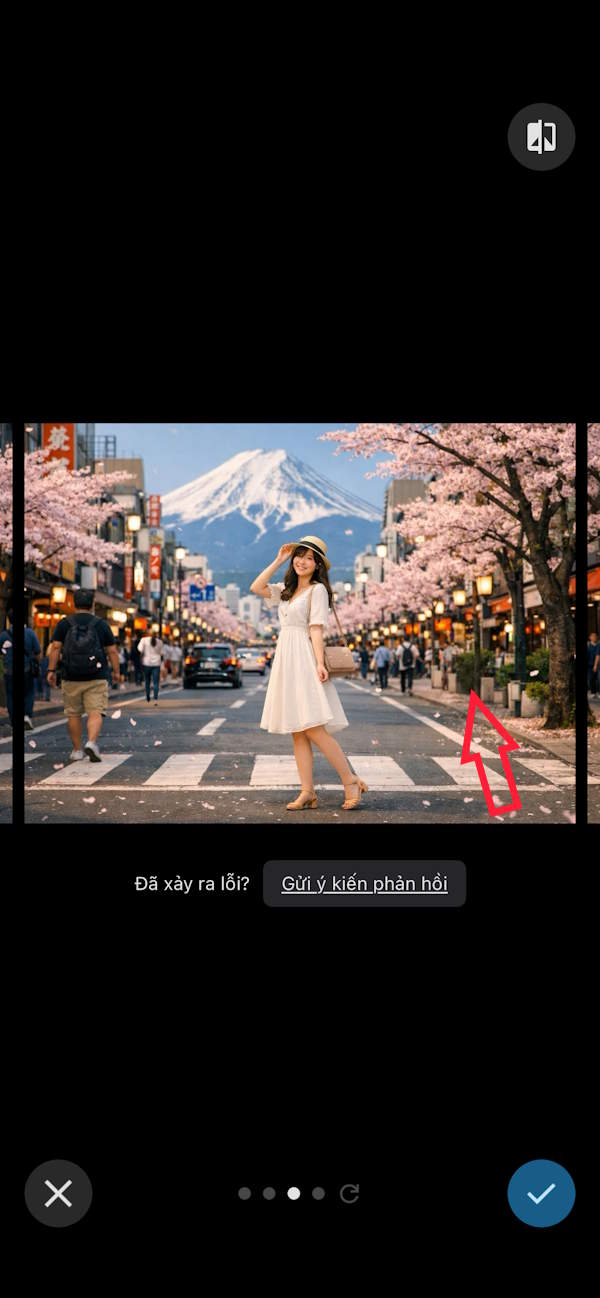
Google Photos generates multiple variations for you to choose from. Swipe left and right to browse different results. Not satisfied? Scroll down and select View new results to see additional variations. When you've found the one you like, tap the checkmark to save your edited photo.


Enlarging or Shrinking Objects Using Google Photos AI
Step 1:
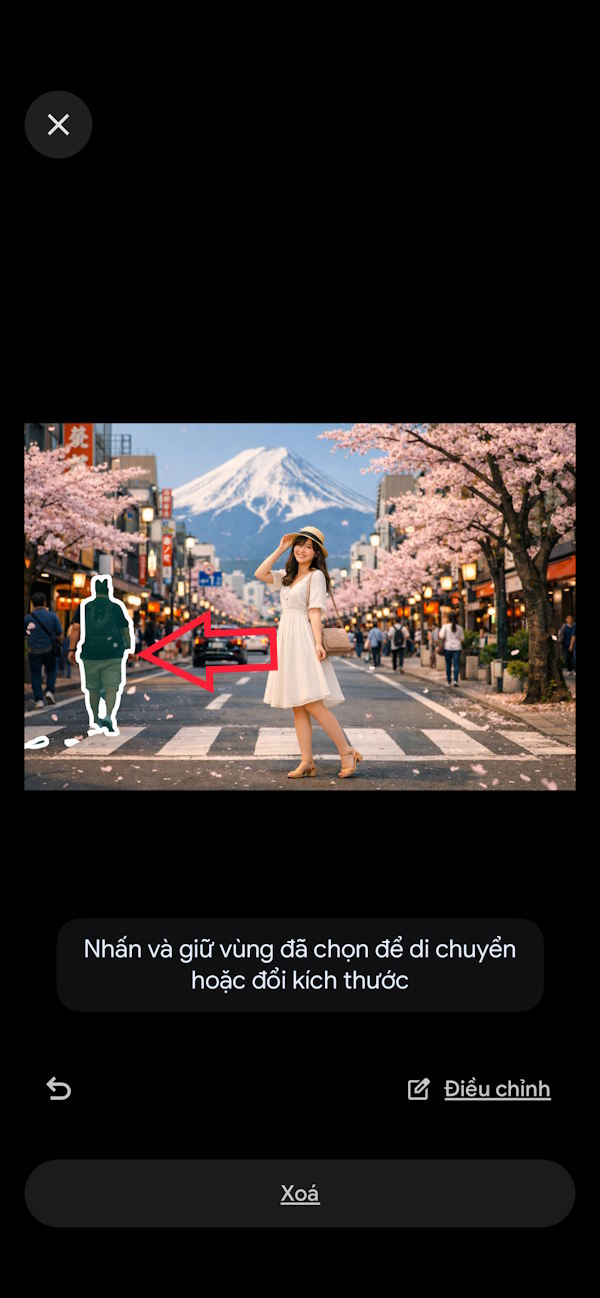
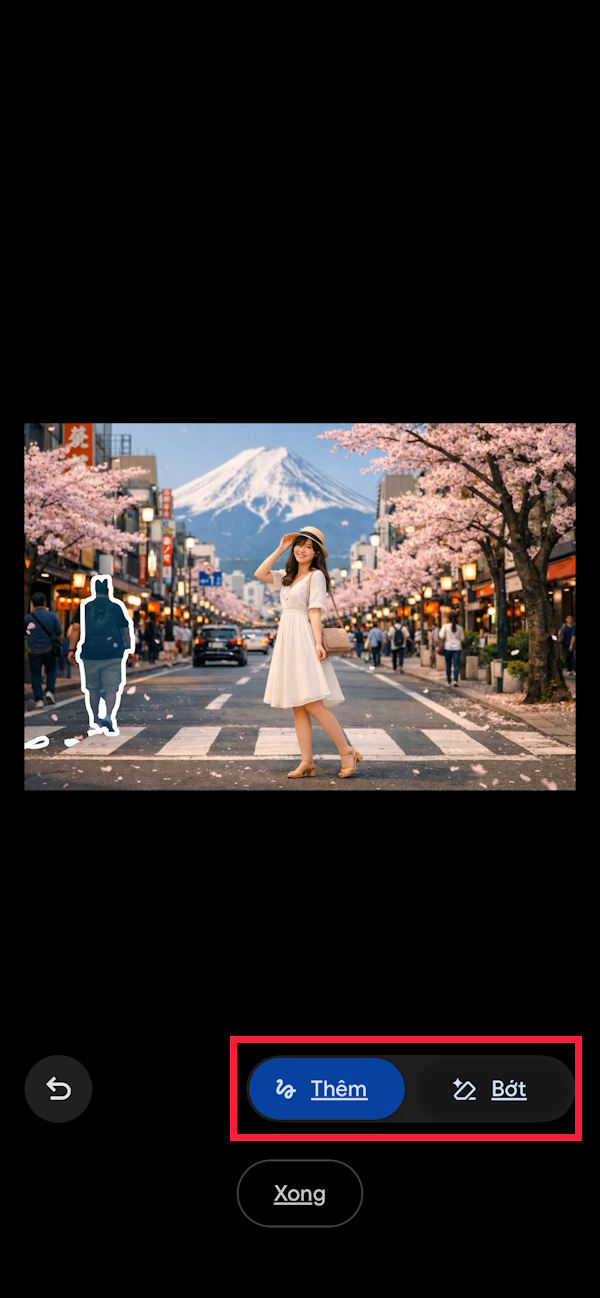
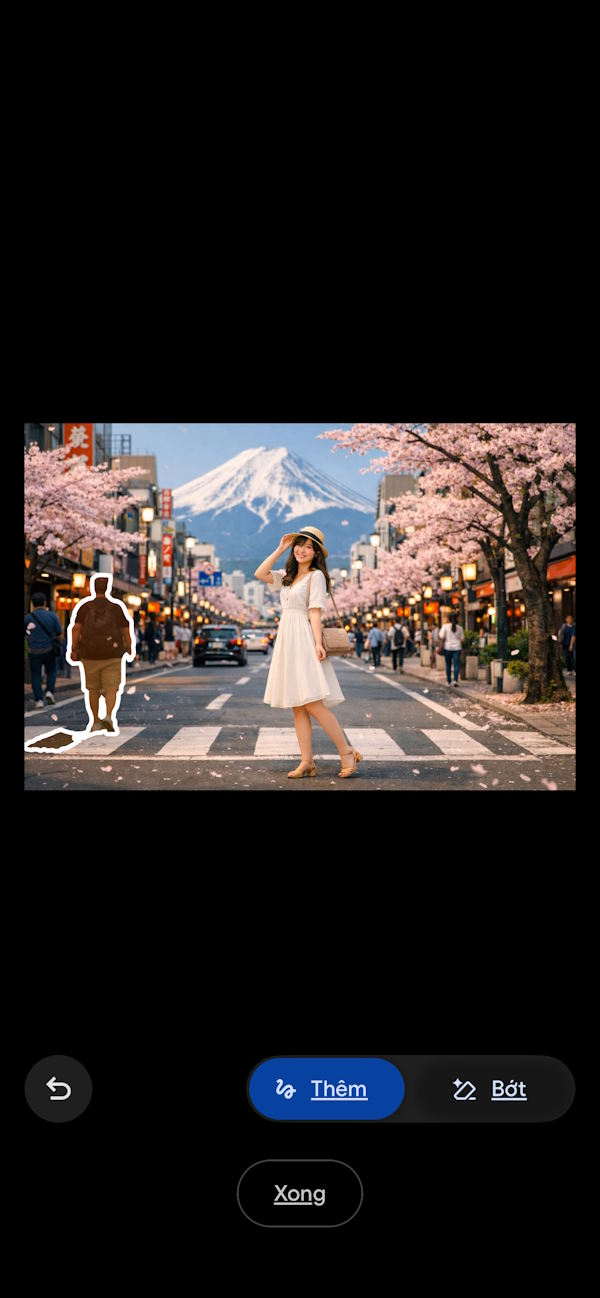
Go to the AI editing mode in Google Photos and draw a selection around your subject. Need to adjust your selection? Tap Adjust, then choose Add or Remove to fine-tune the selected area.
Step 2:
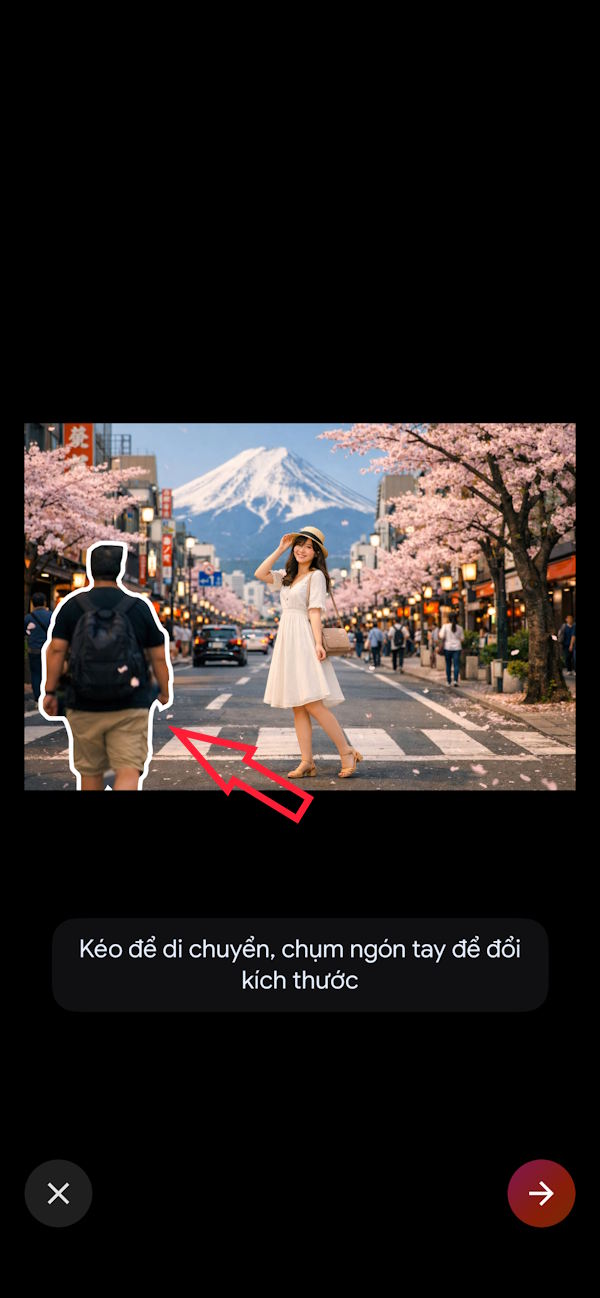
After confirming your selection, hold the object and pinch in or out with your fingers to shrink or enlarge the subject as needed. Then tap the arrow to generate a new image.
Step 3:
Your enlarged (or shrunk) subject now looks naturally integrated into the image without affecting surrounding details. Swipe left to explore additional variations, or request more results if you want to see other options. Finally, save your final result and you're done.


Description: Master Google Photos' AI-powered object editing tools. Learn to move, resize, and reposition subjects while maintaining natural image composition.
Related Articles
- 12 Essential Claude Code Settings You Should Enable Right Now
- Why AI Agents Still Need Traditional Machine Learning
- The 10 Best AI Business Coaching Tools for 2026
- Creating AI-Enhanced Lesson Plans with ChatGPT: A Complete Guide
- What Is Loop Engineering? Why It Could Become the Most Critical Skill in AI Coding

No Comment to " How to Resize, Move, and Edit Objects in Google Photos Using AI "