Turn Any Photo Into a Rotatable 3D Scene Using Apple's Free AI Model
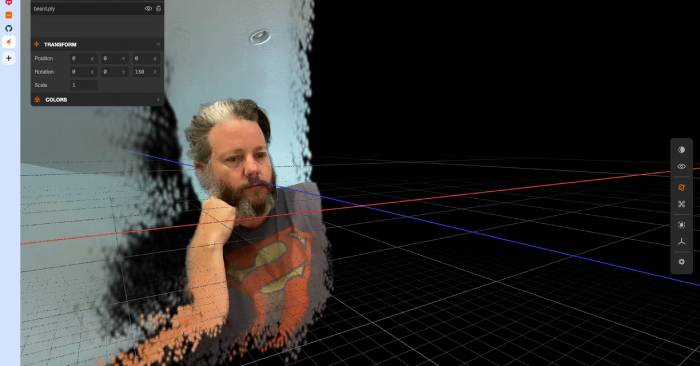
One developer recently transformed three ordinary photos into fully rotatable 3D environments using Apple's free SHARP AI model running on a MacBook Air M5. The entire setup took about 15 minutes, and generating each scene was even faster. It's a genuinely impressive experiment to try—even if you don't have an immediate use case for it.
SHARP is Apple's open-source research model that converts a single photograph into a 3D scene using "Gaussian splat" technology. Rather than relying on sharp edges and polygons like traditional 3D models, this technique reconstructs the image from millions of soft, semi-transparent colored dots. These dots blend seamlessly together to create photorealistic results, allowing you to explore the scene from different viewing angles.
Because the output maintains precise real-world scale measurements, viewing it through a VR headset displays the scene at life-size proportions—so people have already been experimenting with these converted scenes on Apple Vision Pro. You can relive your favorite memories or export the data to share via a web viewer. That said, paid alternatives exist too; Meshy AI produces solid models, but requires a subscription to download results. SHARP, meanwhile, is completely free and runs offline. The catch? It's hosted on GitHub with somewhat confusing documentation. Let's walk through how to get it running.
SHARP Converts a Single Photo Into an Explorable 3D Environment
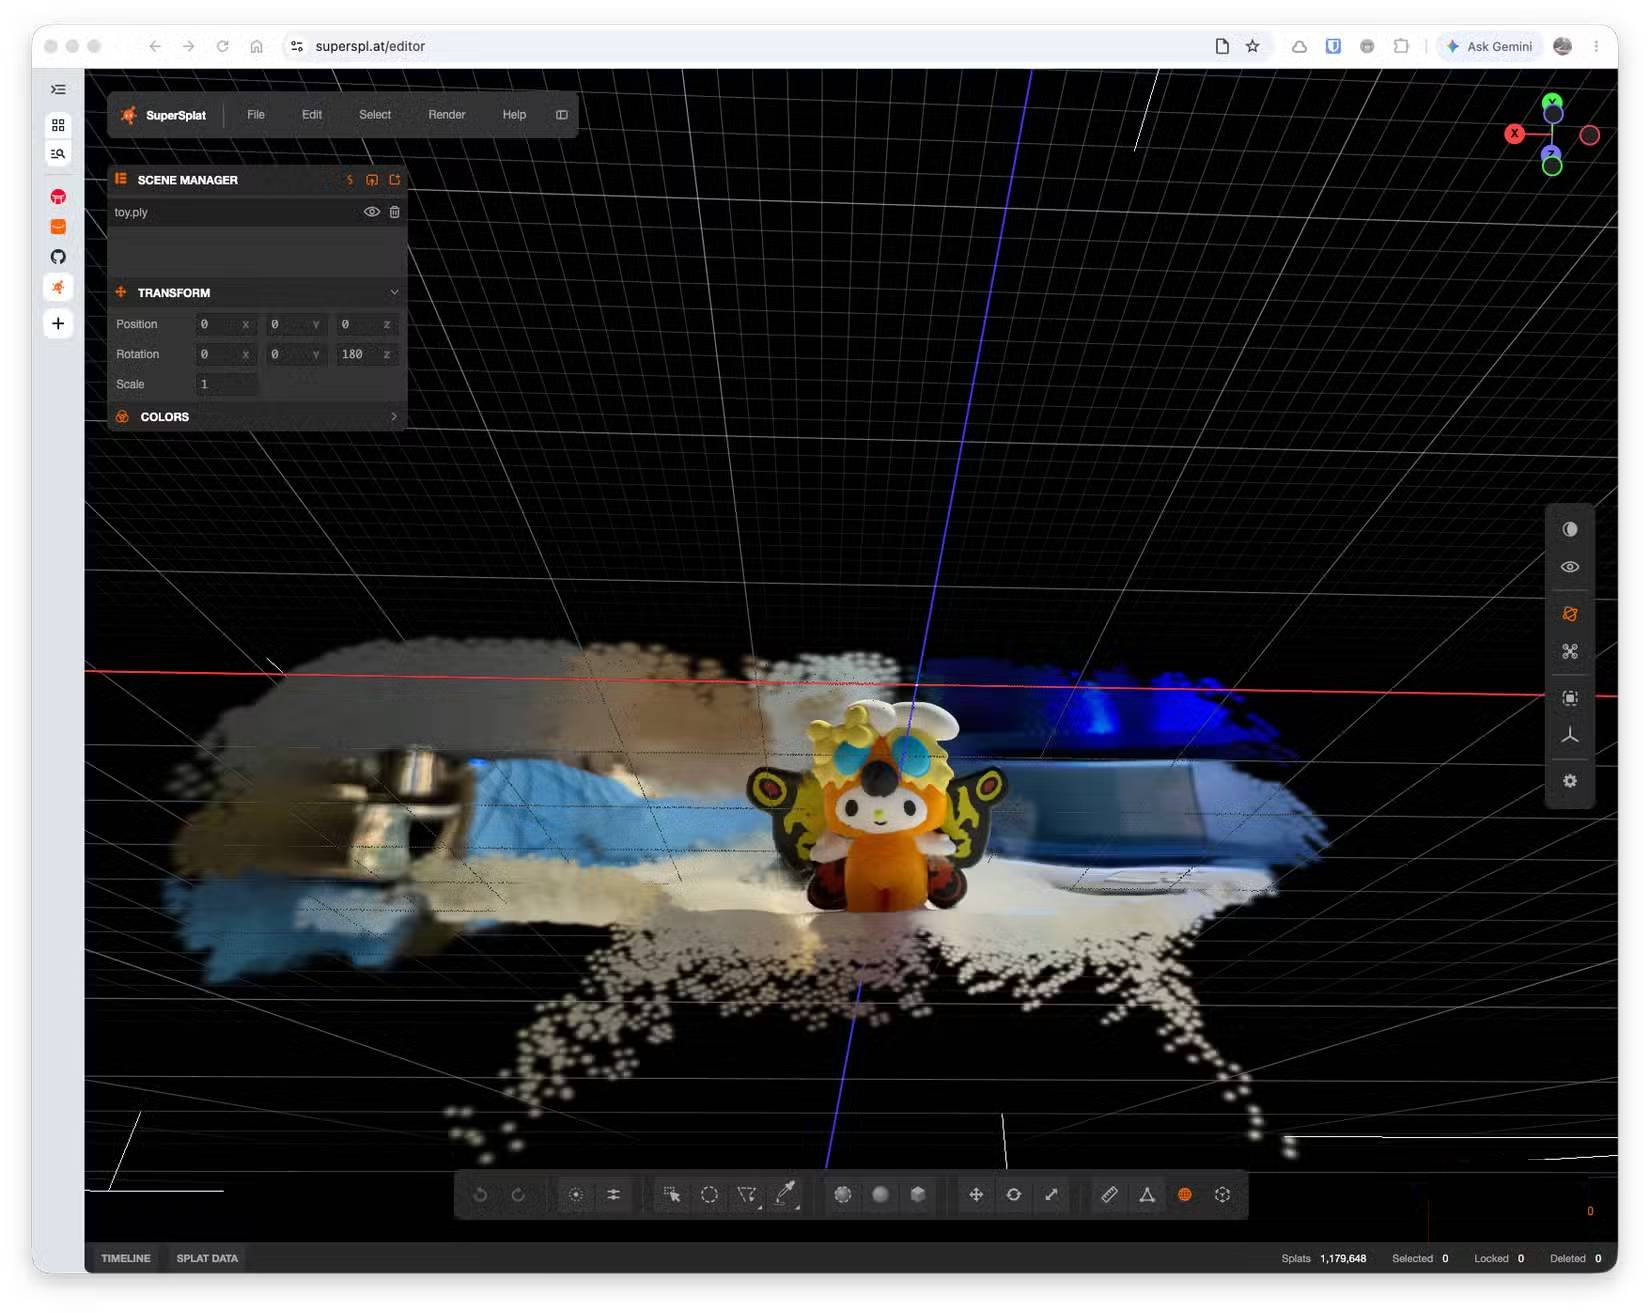
Most Gaussian splat 3D models are built from multiple photographs and stored as millions of soft 3D colored dots rendered in real-time. SHARP does something remarkable—it produces comparable results from just a single image.
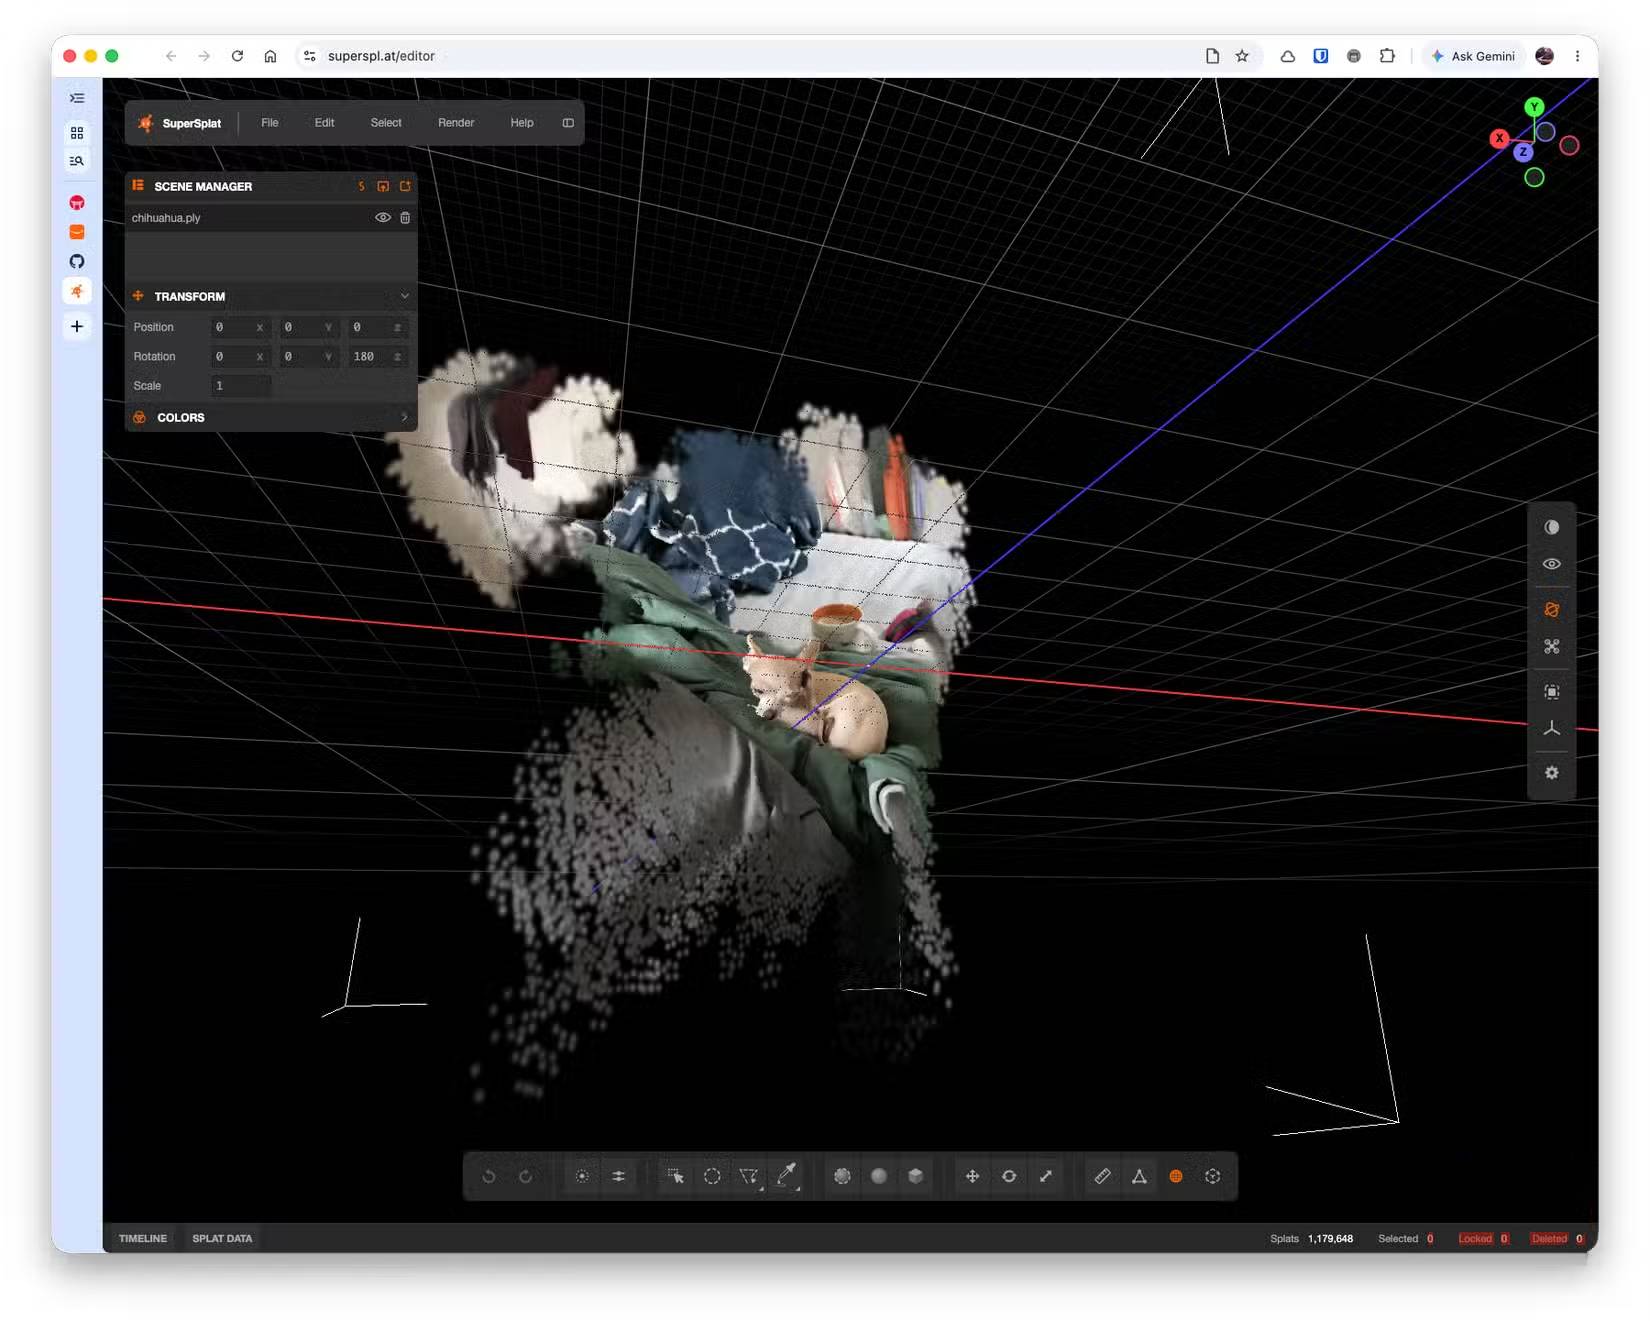
Think of this as the full 3D version of iOS 18's "Spatial Scenes" feature, which separates subjects from backgrounds and adjusts perspective as you tilt your phone. The difference is that Spatial Scenes displays as an effect in the Photos app or on your lock screen, while SHARP saves the data in standard .ply format, compatible with any Gaussian splat viewer available today. Each scene contains roughly 1.2 million Gaussians organized into two 768x768 layers. When you load the output in SuperSplat, you'll see the exact count—in our tests, all three images showed precisely 1,179,648 points.
SHARP runs on Mac, Windows, and Linux, though Apple provides documentation only for Mac and Linux. On Apple Silicon Macs, the command-line interface automatically uses Metal (MPS) acceleration. On a MacBook Air M5, inference took 12, 47, and 58 seconds respectively for three photos, plus about 60 seconds to load the model initially. Total processing time for the entire batch was roughly two minutes.
Setting Up SHARP on Your Mac
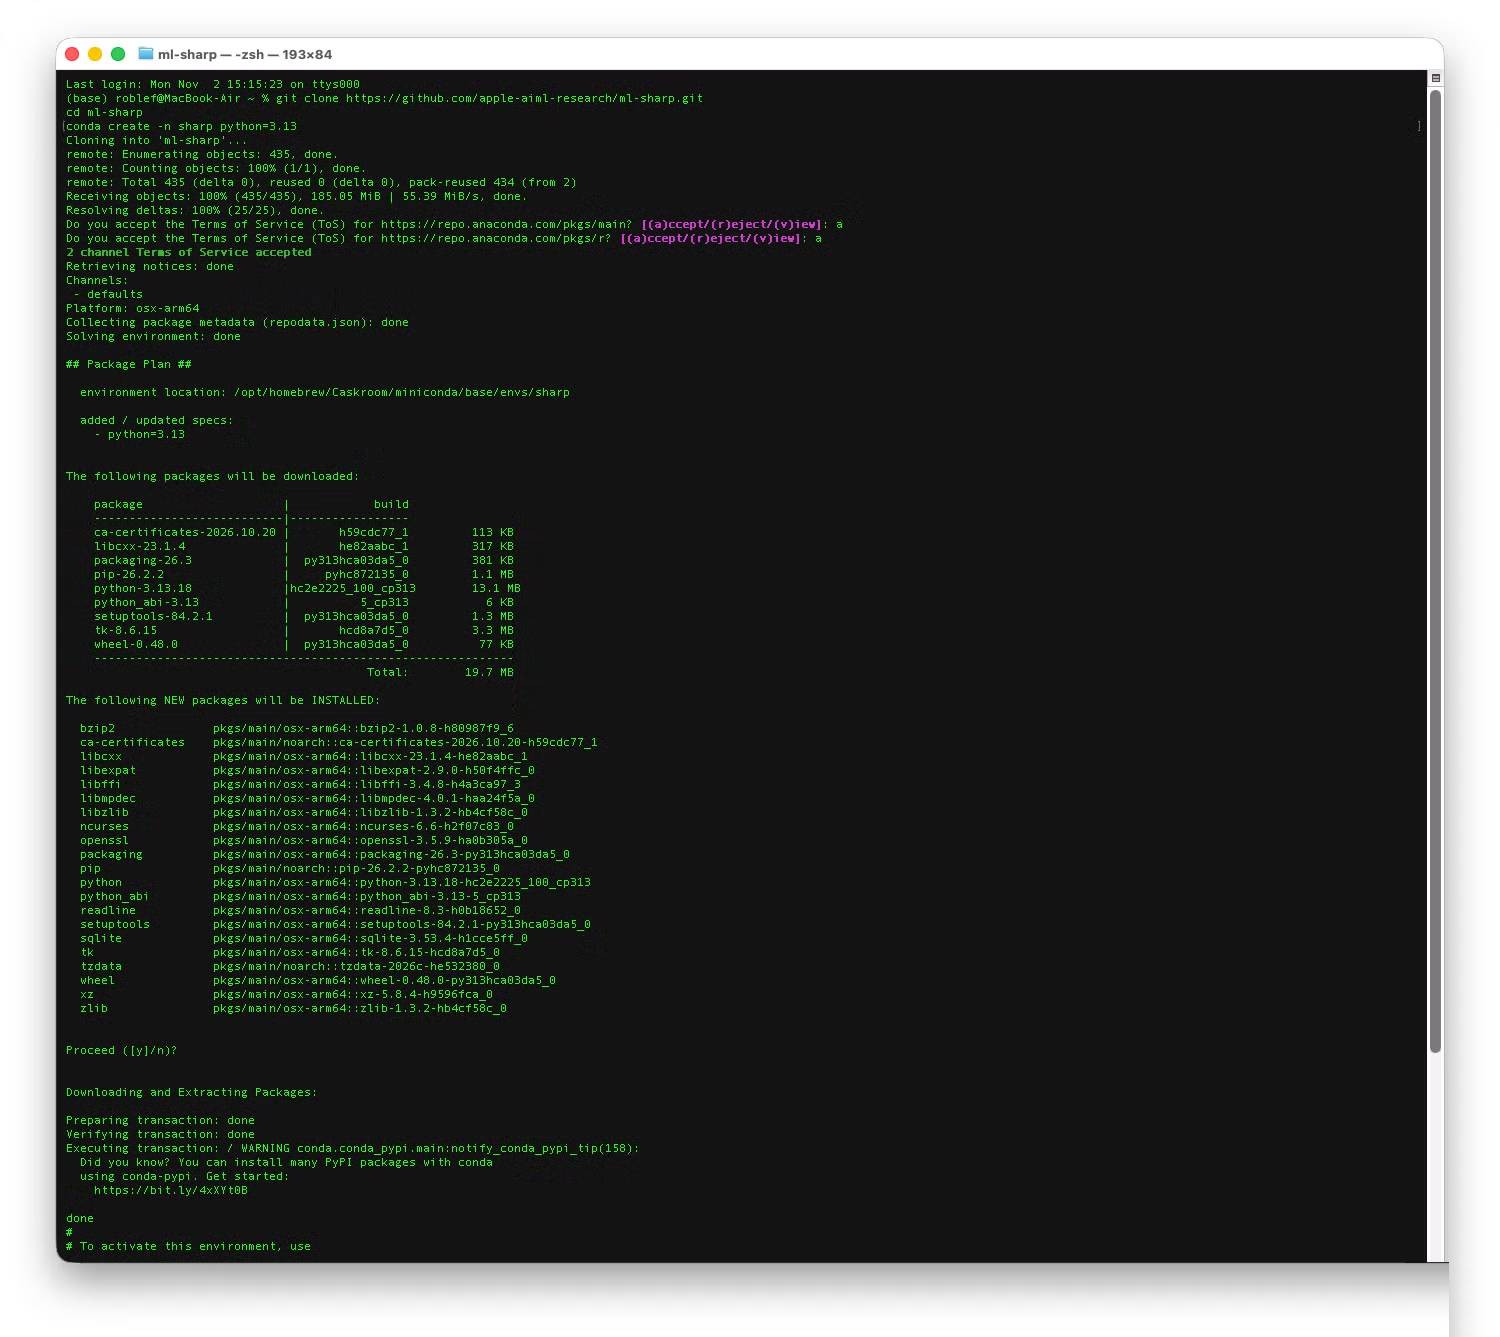
This isn't overly complicated, but it does require some basic Terminal knowledge.
Step 1: Install Miniconda via Homebrew
- Run
brew install --cask miniconda(using the official Homebrew cask). - Run
conda init "$(basename "${SHELL}")"as instructed, then close and reopen Terminal. If you see the(base)prefix in your prompt, conda is active.
Step 2: Clone Apple's Code
- Run
git clone https://github.com/apple-aiml-research/ml-sharp.git, then enter the directory withcd ml-sharp. - Keep this directory in mind—you'll need to stay here for Step 4.
Step 3: Create a Python 3.13 Environment
- Run
conda create -n sharp python=3.13, then activate it withconda activate sharp. The README requires Python 3.13; your prompt prefix will change from(base)to(sharp). - If conda complains about Terms of Service (TOS), run
conda tos acceptand retry. Anaconda requires TOS acceptance to use default channels. Not everyone hits this, but some setups will prompt you.
Step 4: Install SHARP
- Run
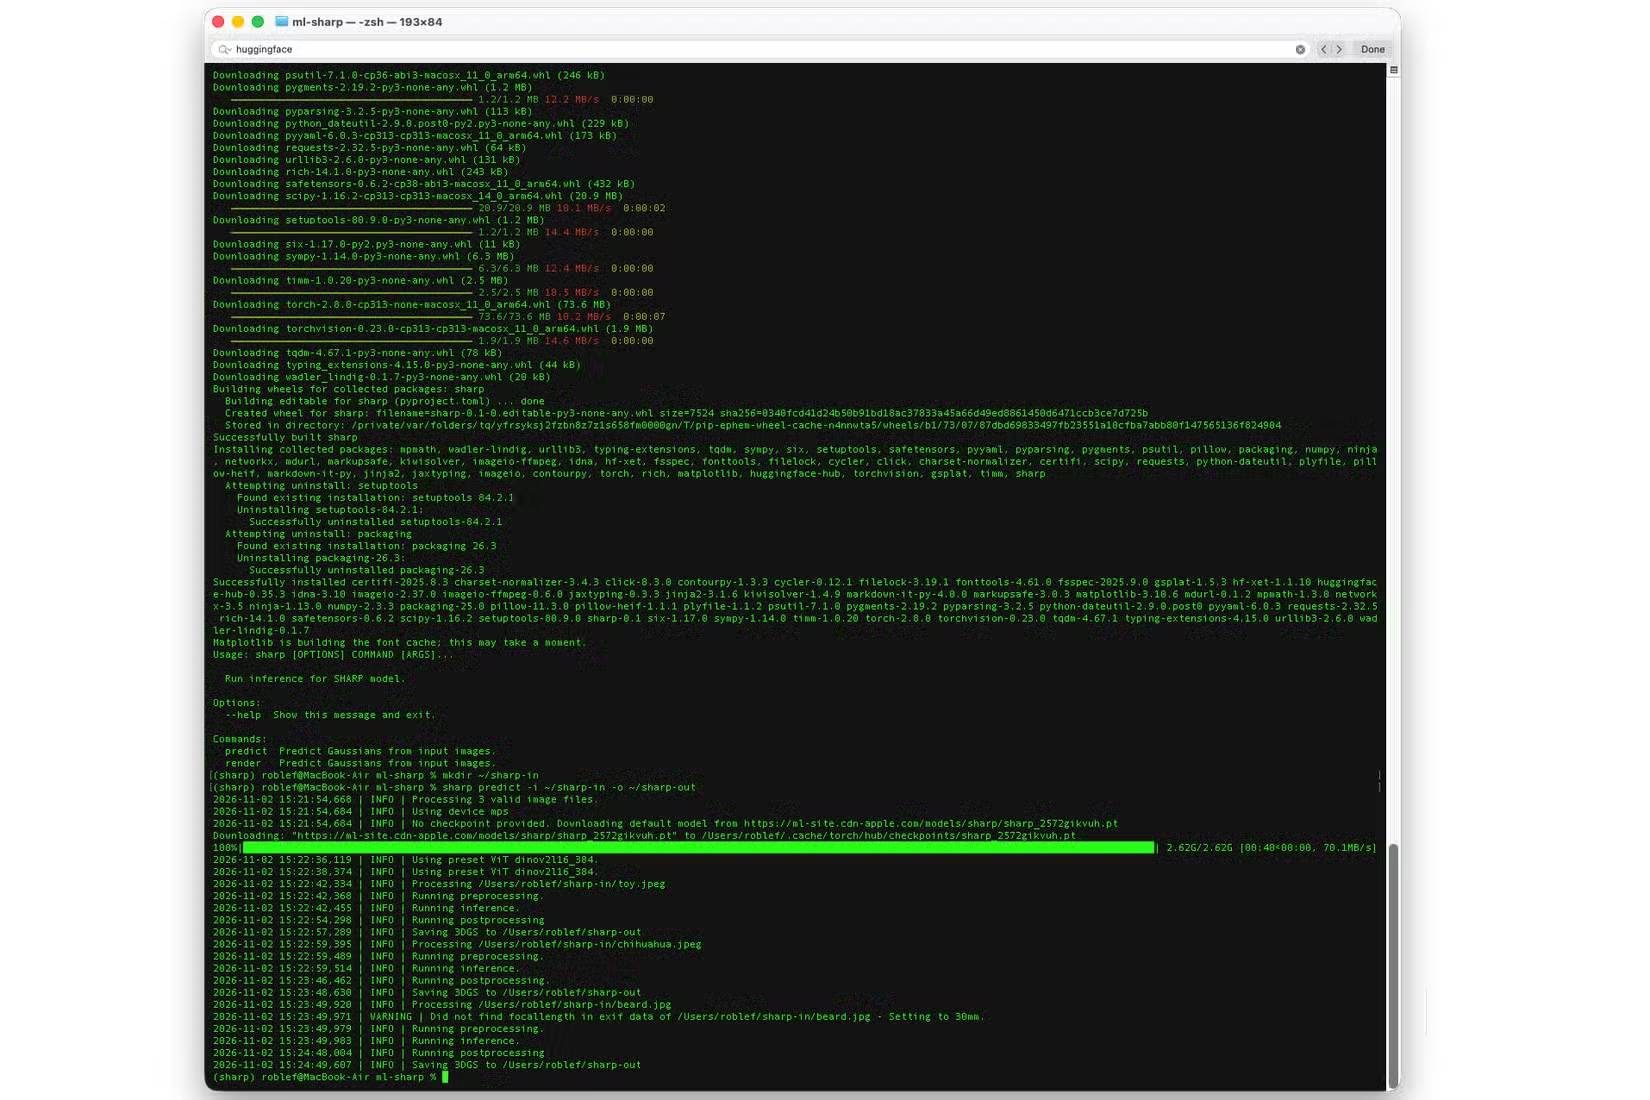
pip install -r requirements.txt, then verify withsharp --help. If you seepredictandrenderoptions, installation succeeded. - This directory matters because the requirements file starts with
-e ., which installs the sharp tool from your current location. Nvidia packages only work on x86 Linux, so they'll be skipped on Mac—that's fine. - You'll see Hugging Face packages appear during installation; these are necessary dependencies, so don't worry about them.
Step 5: Choose Photos With Simple Subjects
After testing three different images, a clear pattern emerged. A toy sitting on a table produced the best results. A portrait worked decently, though blurry patches appeared where the head blocked the background. A photo of a chihuahua on a cluttered sofa fell apart into separated floating layers. The documentation notes that macro shots, starry skies, and water reflections often confuse the depth-estimation algorithm.
Use original files whenever possible. SHARP reads focal length data from EXIF information; if it's missing, it defaults to 30mm. The selfie example—a 720×1280 copy with no lens data—triggered a warning, though results were still decent. Using the original file will yield better quality.
Note: HEIC files from iPhones work directly thanks to built-in pillow-heif support.
Once you've selected your images, gather them in one folder: mkdir ~/sharp-in.
Step 6: Run the Command
Execute: sharp predict -i ~/sharp-in -o ~/sharp-out. Look for "Using device mps" in the output—that confirms your Mac's GPU is handling the processing. On first run, the system downloads the model to ~/.cache/torch/hub/checkpoints/. It's 2.62 GB; on a good connection, download takes about 40 seconds. Subsequent runs skip this step.
You can batch-process multiple images at once. The CLI loads the model once, then automatically processes every file in the folder. Each photo becomes a .ply file around 66 MB.
Step 7: Open Results in SuperSplat
- SuperSplat is a free browser-based splat editor built by PlayCanvas. Visit superspl.at/editor to use it.
- Drag and drop your .ply file into the browser window, or use File > Import. Use your mouse to orbit the view and scroll to zoom.
- SHARP uses a coordinate system where Y points downward, which can flip images in other viewers. SuperSplat version 3.7.0 automatically rotated models 180 degrees around the Z axis to display correctly. Other viewers might need manual adjustment.
- To share, export as a standalone HTML file or a compressed PLY (much smaller than the original 66 MB file).
- Linux users with Nvidia cards can add the
--renderparameter to auto-generate a camera movement video. Fair warning: the README notes this requires CUDA.
A Free Way to Step Into Your Photos
If you're looking for models to 3D-print, paid mesh generators like Meshy make more sense. SHARP shines at creating viewable scenes rather than printable objects.
What's interesting here is that experiencing an old photograph at life size through VR, or sharing an interactive 3D image as a single HTML file, opens up genuinely cool possibilities. The fact that it runs completely offline on your own laptop—using free software from Apple, no less—makes it even better. Give it a shot and see how it handles your photos.
Description: Apple's SHARP model lets you convert a single photo into an interactive 3D scene. Here's how to set it up on your Mac in under 15 minutes.
Related Articles
- Use AI to Edit Photos Directly in Google Slides
- 8 Essential Privacy Tips for ChatGPT Users
- Top 6 AI-Powered Browsers That Boost Your Productivity
- Microsoft Copilot vs ChatGPT: Which AI Assistant Should You Actually Use?
- Where Did the Copilot Button Go? Here's Why It Disappeared from Your Office Apps

No Comment to " Turn Any Photo Into a Rotatable 3D Scene Using Apple's Free AI Model "