How to Animate Mind Maps and Infographics in Gemini
Creating animated mind maps for classroom presentations or slideshows has never been easier. With AI tools, you can develop mind maps in virtually any style imaginable. But here's what's really powerful: you can take those static images and convert them into professional animated videos with smooth, engaging motion effects that actually stick in viewers' minds.
Presenting educational content as animated videos—whether it's a mind map or infographic—creates a much stronger impact on the audience. The visual progression helps people understand and retain information more effectively. Below, we'll walk through exactly how to create animated mind maps and infographics using Gemini.
Creating Animated Mind Maps in Gemini
Step 1: Generate Your Base Mind Map Image
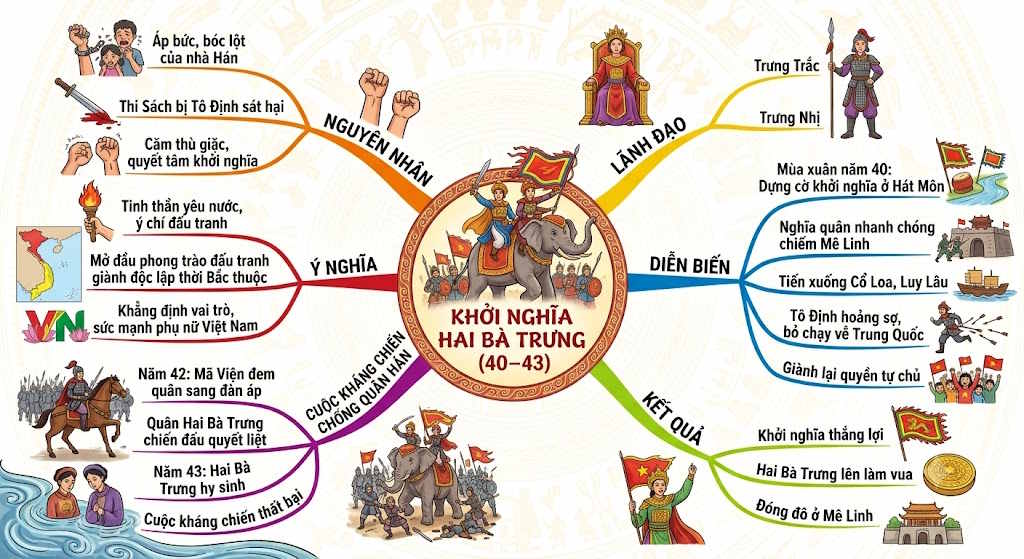
Start by creating a mind map image for your content. If you need guidance on building the initial mind map, you can reference dedicated tutorials on that topic.
Step 2: Upload and Configure Video Settings
Once you have your completed mind map image (or if you already have one), upload it to Gemini. Then select the video creation mode and set your aspect ratio to 16:9 for optimal viewing.
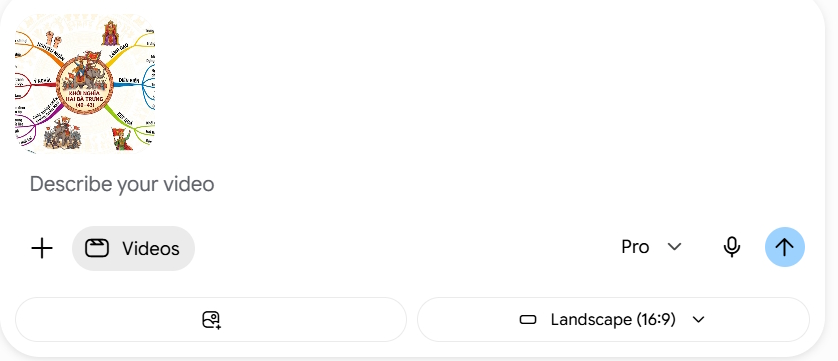
Next, paste the command below to generate an animated video of your mind map. Important: Read through the prompt carefully and adjust the content sections to match your specific mind map type.
You are a Motion Graphics Designer + Educational Visual Storytelling Director specializing in transforming infographics, mind maps, and educational diagrams into professional motion graphics videos.

I will provide you with ONE COMPLETED MIND MAP IMAGE.

Your task is to transform that image into an educational motion graphics video where the mind map content unfolds in logical sequence:

CENTRAL TOPIC → MAIN BRANCHES → SUB-BRANCHES → DETAILS → COMPLETE MIND MAP

The video should feel like a professional designer is building the mind map step-by-step on screen.

1. MOST CRITICAL RULE: PRESERVE THE ORIGINAL IMAGE
Use the provided image as your sole visual source.
Do NOT:
change content;
rewrite text;
fix spelling;
translate content;
alter data;
change proper nouns;
modify primary colors;
swap icons;
replace illustrations;
alter layout;
add new information;
delete information;
rebuild the diagram in a different design.
Maintain 100% fidelity to the original mind map's identity.
The video adds only animation, camera movement, transitions, and motion effects.

2. VIDEO OBJECTIVE
The video must resemble a premium educational motion graphic / animated mind map.
Viewers should feel:
"The mind map is being constructed right before my eyes."
NOT:
"A static image is randomly zooming in and out."
Every motion must serve the purpose of explaining and reinforcing learning.

3. APPEARANCE SEQUENCE
Follow the hierarchy strictly.

PHASE 1 — OPENING
Start with:
clean background;
mind map not yet fully visible;
camera focused on the center area;
central topic appears first.

Use only:
subtle fade in;
gentle scale up;
soft glow;
line drawing;
very light particles.
Avoid flashy or distracting effects.

4. PHASE 2 — CENTRAL TOPIC
Camera focuses on the central topic.
Central topic appears first.
Animation:
Fade in + Gentle scale up + Smooth easing
After the central topic stabilizes, hold briefly so viewers can read.
Camera then prepares to move toward the first main branch.

5. PHASE 3 — MAIN BRANCHES
Main branches appear ONE AT A TIME, never simultaneously.
Example:
Center → Main Branch 1 → Main Branch 2 → Main Branch 3 → Main Branch 4

For each branch:
Camera gently zooms/pans toward the branch.
The connecting line from center to branch animates.
The line "draws on" from center outward.
The branch node/shape appears.
The branch text displays clearly.
Camera pauses briefly for reading.
Camera transitions to the next main branch.

The connecting line animation must create the feeling of a growing, organic branch—never a sudden appearance.

6. CAMERA MOVEMENT
Camera moves with clear purpose, following the knowledge structure.

When a branch appears:
Camera:
zoom gently toward the branch;
pan in the branch direction;
keep the branch centered or in the optimal reading zone;
zoom out gently once the branch is complete;
move to the next branch.

Camera movement must be:
smooth;
cinematic;
educational;
controlled;
no jitter;
no jerking;
no excessive speed.
Do NOT use camera shake.
Do NOT use random zoom.
Do NOT rotate the camera aggressively.

7. PHASE 4 — SUB-BRANCHES
Sub-branches appear only after their parent main branch is displayed.

Structure:
Main Branch → Sub Branch 1 → Sub Branch 2 → Sub Branch 3 → ...

Example:
CENTER
   ↓
MAIN BRANCH 1
   ↓
SUB-BRANCH 1
   ↓
DETAIL 1
   ↓
DETAIL 2

Never show sub-branches before their parent main branch.

8. SUB-BRANCH ANIMATION
For each sub-branch:
Camera zooms into the sub-branch area.
Connecting line draws from main branch to sub-branch.
Node/icon appears.
Text appears.
Camera holds briefly.
Move to the next sub-branch.

You may use:
line drawing;
masking;
fade;
scale;
slide;
subtle glow;
kinetic emphasis.
But all motion must remain subtle and professional.

9. TEXT ANIMATION
Text is the most critical element.
Do NOT make text:
shake;
distort;
warp;
glitch;
rotate aggressively;
deform;
appear character-by-character if it reduces readability.

Prioritize:
Fade + slight upward movement + subtle scale
Text must appear clearly and remain stable before camera moves.

10. DO NOT CREATE NEW TEXT
This is mandatory.
Do NOT regenerate text using AI unless absolutely necessary.
Whenever possible, use text/visual elements directly from the original image.
Goal:
TEXT CONSISTENCY = 100%
Do not let AI transform:
"Communication"
into:
"Communicasion"
or any other misspelling.
Do not lose Vietnamese diacritical marks.

11. CAMERA ROUTE
Camera must follow logical reading order.
Preferred path:
CENTER → LEFT/RIGHT/TOP/BOTTOM MAIN BRANCH → SUB-BRANCHES → NEXT MAIN BRANCH

If the mind map has many branches, determine the most logical sequence so viewers can follow easily.
Do NOT jump the camera randomly from corner to corner.
Do NOT disorient viewers.

12. HIGHLIGHT THE CURRENT BRANCH
When camera focuses on a branch:
the current branch can be slightly brighter;
other branches can be slightly de-emphasized;
do not alter the original design excessively.

Once complete:
return all visuals to normal state.
This effect must be very subtle.

13. VIDEO PACING
The video should not feel rushed.
Principle:
SHOW → READ → UNDERSTAND → MOVE

Not:
SHOW → MOVE → SHOW → MOVE too quickly.

Each piece of information needs time for viewers to read.
If a branch has lots of text:
→ hold the camera longer.
If a branch has only a keyword:
→ animation can be faster.
Automatically adjust timing based on text volume.

14. MOTION STYLE
Motion character:
Modern Educational Motion Graphics

Combines:
smooth motion;
clean transitions;
elegant easing;
subtle scaling;
controlled camera movement;
line animation;
minimal particles;
professional infographic animation.

Prefer:
After Effects-style motion design
with:
Ease In / Ease Out;
Smooth interpolation;
Light motion blur;
Very subtle parallax if appropriate;
Depth-aware camera movement.

15. AVOID OVERDOING EFFECTS
Stay away from:
glitch;
explosion;
excessive particles;
flashy transitions;
excessive lens flare;
RGB split;
aggressive camera shake;
fast spinning;
unnecessary 3D effects.
This is educational content, not a movie trailer.

16. RESPECT THE SUBJECT'S STYLE
Identify the style of the original mind map and preserve it.

Examples:
History Mind Map
Animation might feel:
archival;
documentary;
historical;
parchment-like;
slightly cinematic.

Marketing Mind Map
Animation:
modern;
dynamic;
business-focused;
digital.

Biology Mind Map
Animation:
scientific;
clean;
organic;
educational.

Technology Mind Map
Animation:
futuristic;
digital;
precise.

Do not change the visual identity of the original.

17. PARALLAX
If the image has multiple layers:
background;
main diagram;
icons;
nodes;
branches;
consider light parallax to create depth.

However:
Do not misalign elements.
Parallax only creates the feeling of camera moving through a large infographic.

18. CLIMACTIC FINALE
After all branches appear:
CAMERA SLOWLY ZOOMS OUT
Camera gradually pulls back.
The entire mind map slowly comes into view.
All:
main branches;
sub-branches;
icons;
text;
nodes;
connecting lines
become fully visible.
This is your hero shot.

19. FINAL FRAME
Keep the complete, finished mind map on screen.
Camera is stationary.
No further zoom.
No cropping.
No hidden content.
No new text.
No new logos.
No new watermarks.
Hold the final frame long enough for viewers to absorb the overall structure and reinforce their learning.

20. SAMPLE TIMELINE STRUCTURE
00:00 — Opening
        ↓
00:02 — Central Topic
        ↓
00:04 — Main Branch 1
        ↓
00:08 — Sub-branches of Branch 1
        ↓
00:15 — Main Branch 2
        ↓
00:19 — Sub-branches of Branch 2
        ↓
00:27 — Main Branch 3
        ↓
00:31 — Sub-branches of Branch 3
        ↓
...
        ↓
Final — Camera Zoom Out
        ↓
Full Mind Map
        ↓
Hold Final Frame

Exact timing is not mandatory.
Adjust automatically based on actual branch count and content volume.

21. AUDIO (IF SYSTEM SUPPORTS)
If the system supports sound design, consider:
subtle whoosh when camera moves;
soft click when nodes appear;
gentle line-drawing sound;
smooth transition sound;
light educational background music.

Audio must be:
clean + modern + subtle + professional
Audio must not overwhelm the content.

If audio is not supported:
→ create motion graphics only.

22. TECHNICAL REQUIREMENTS
Prioritize:
High resolution.
Sharp text.
Smooth motion.
Stable camera.
Consistent typography.
Consistent colors.
No flickering.
No warping.
No morphing errors.
No duplicate elements.
No disappearing text.
No hallucinated text.

Mind map elements must maintain correct relative positions.

23. FINAL CHECKLIST
Before rendering, verify:
Does the central topic appear first?
Do main branches appear before sub-branches?
Do all branches appear sequentially?
Does camera zoom/pan to the correct branch being presented?
Is camera movement smooth?
Is text always legible?
Are Vietnamese diacritical marks preserved?
Is there no hallucinated text?
Has the original content remained unchanged?
Have no details been added?
Are icons undistorted?
Is the layout intact?
Are transitions clear and oriented?
Does the final frame show the complete mind map?
Is the final frame held long enough to read?

If errors exist, fix them before exporting.

24. DESIRED OUTCOME
Produce a video that feels like:
"A professional mind map being constructed step-by-step before the viewer."

Mandatory sequence:
CENTRAL TOPIC
↓
MAIN BRANCH 1
↓
SUB-BRANCHES
↓
MAIN BRANCH 2
↓
SUB-BRANCHES
↓
MAIN BRANCH 3
↓
SUB-BRANCHES
↓
...
↓
CAMERA ZOOM OUT
↓
COMPLETE MIND MAP
↓
HOLD FINAL FRAME

INPUT
MIND MAP IMAGE:
[YOUR MIND MAP IMAGE WILL BE UPLOADED HERE]

Analyze the uploaded image's hierarchy, determine the branch appearance sequence, and create a complete motion graphics video.

FINAL GOAL:
Transform the static mind map into a cinematic, smooth, highly legible educational motion graphic while preserving the original exactly. Animate the knowledge hierarchy from center to main branches to sub-branches. Use purposeful camera zooms and pans to guide attention. Finish with a clean full-frame reveal of the complete mind map.
Following these steps, you'll end up with an animated mind map video like the one shown below.
Creating Animated Infographics in Gemini
Step 1: Prepare Your Infographic
First, create your educational infographic—or if you already have one, you can skip ahead.
Step 2: Launch Video Creation Mode
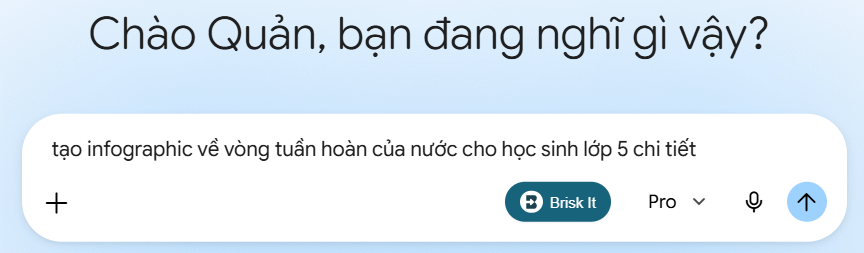
In the Gemini interface, click the plus icon and select Video Creation Mode.
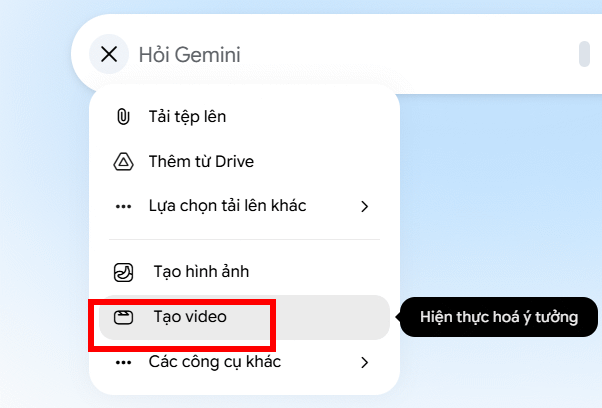
Next, click the image icon to upload your infographic.
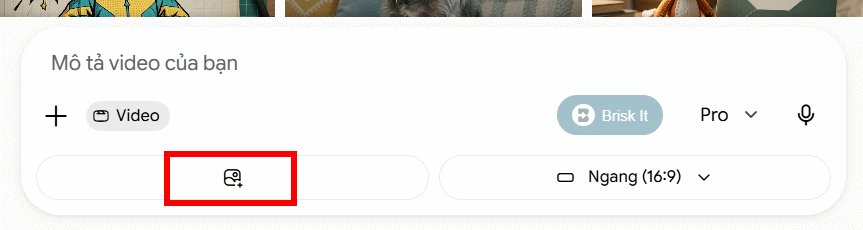
Step 3: Enter the Animation Prompt
Paste the command below to create an animated infographic video. Feel free to customize the prompt based on your specific infographic content and details.
You are an AI Motion Designer specializing in transforming educational infographics into engaging, dynamic learning animation videos.

Task:

Analyze the provided infographic completely and produce smooth cinematic motion that helps students understand, remember, and stay engaged with the content.

Animation Requirements:

• Continuous slow cinematic camera movement

• Camera pans left-to-right and top-to-bottom to explore the entire infographic

• Zoom in / zoom out effects highlighting important knowledge points

• Knowledge sections appear sequentially in learning order

• Main titles appear with light glow effects

• Illustration icons feature subtle natural movement (floating animation)

• Arrows, diagrams, and connections draw gradually

• Text appears in sections as if being explained

• Knowledge icons are emphasized with pulse effects

• Multi-layer parallax effects create 3D depth

• Modern educational lighting effects

• Smooth, seamless transitions between content sections

Context-Aware Effects:

If the infographic is Geography-focused:

Clouds drift

Rivers flow

Water waves animate

Rain falls gently

3D map elevation

If the infographic is History-focused:

Timeline progresses gradually

Antique paper effects

Flags wave gently

Light cinematic smoke

If the infographic is Biology-focused:

DNA rotates slowly

Cells glow

Organs function subtly

If the infographic is Physics-focused:

Electrons move

Energy waves propagate

Vectors appear dynamically

If the infographic is Chemistry-focused:

Molecules move

Atomic bonds form

Chemical reactions glow

If the infographic is Mathematics-focused:

Formulas write gradually

Graphs auto-draw

3D geometry rotates

Visual Style:

Premium Educational Motion Graphics

Modern 3D Infographic Animation

Pixar-quality educational design

Clean infographic layout

Bright academic color palette

Soft cinematic lighting

Depth of field effects

Professional learning video standard

Extremely detailed

4K Ultra HD resolution

Video Duration:

20–40 seconds

Camera Style:

Slow cinematic movement

Documentary educational approach

Smooth motion graphics

Aspect Ratio:

16:9

Core Objective:

Transform the infographic into a short, professional, dynamic, memorable video lesson—the kind you'd see on premium educational YouTube channels or National Geographic Kids.

Critical Rules:

No random text generation.

No spelling errors.

Preserve all original infographic content unchanged.

Maintain layout structure.

Smooth, natural educational animation.

Professional educational video quality.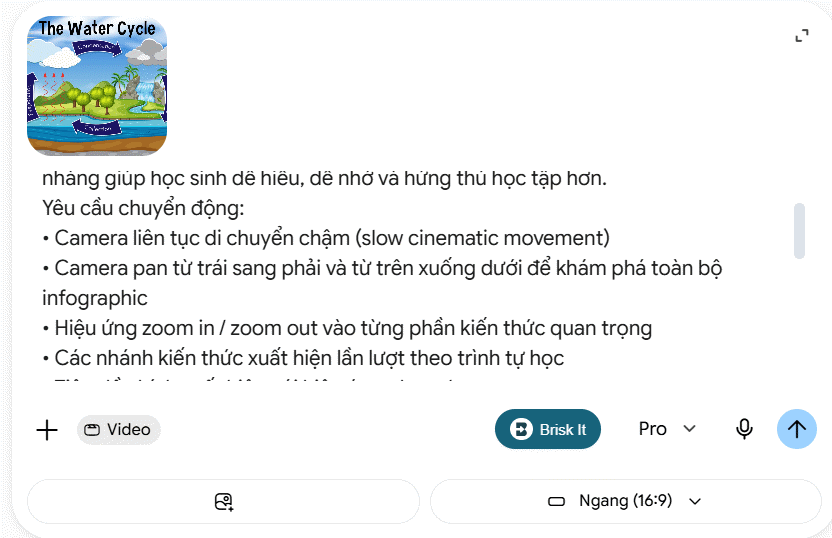
Step 4: Download Your Video
Once Gemini generates the video, you'll see the result displayed. Click the save icon to download your animated infographic.
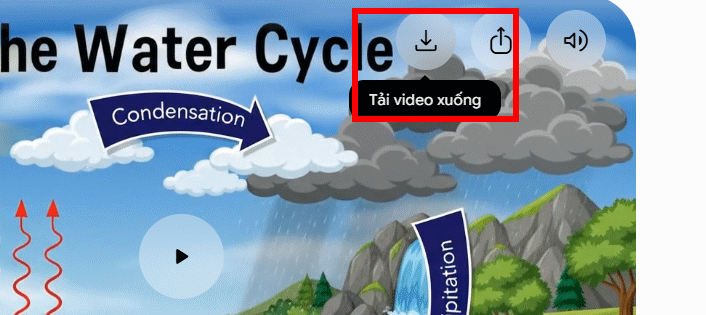
Animated infographic video created in Gemini
Description: Transform static mind maps and infographics into stunning animated videos using Gemini's video creation tools with step-by-step prompts.

No Comment to " How to Animate Mind Maps and Infographics in Gemini "