AI News

  • Loading...

Four Practical Ways to Deploy Large Language Models in 2025
On
Four Practical Ways to Deploy Large Language Models in 2025

Deploying a large language model isn't just about downloading an AI model and hitting run. Getting an LLM into production requires choosing the right GPU infrastructure, setting up a model serving engine, configuring APIs, and building auto-scaling to handle growing user demand. The choices you make here will ripple through your entire stack—affecting costs, control, performance, and operational overhead.

Today, you've got multiple paths forward. You can use managed APIs without touching infrastructure. You can spin up GPU servers and run models yourself. You can build dedicated inference endpoints. Or you can experiment locally with tools like Ollama. Each approach trades off cost, control, performance, and complexity in different ways.

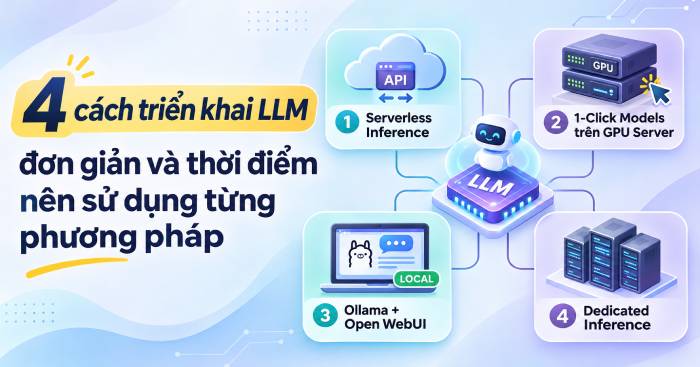
Let's explore four practical LLM deployment strategies for 2025, examining the strengths and weaknesses of each, plus when to use them. We'll focus on real implementations using DigitalOcean solutions to show you how these choices actually work in practice.

What LLM Deployment Actually Means

LLM deployment is the process of putting a trained language model into a production environment so applications and users can send requests and receive responses.

A functioning LLM deployment stack has four essential pieces:

  • Model weights: The trained parameters that determine how the model understands and generates text.
  • Inference engine: The software that runs predictions—think vLLM or Ollama.
  • API layer: The interface that lets applications send requests and receive responses.
  • GPU/CPU infrastructure: The actual computing power needed to run the model and process user requests.

Beyond those four components, your deployment environment also needs supporting software: GPU drivers, compatible libraries, and scaling rules. NVIDIA GPUs typically use CUDA, while AMD GPUs might run ROCm. Getting this foundation right determines whether your deployment will be fast, reliable, and cost-effective.

The deployment method you choose directly impacts your ability to balance performance against costs and your level of control over the system.
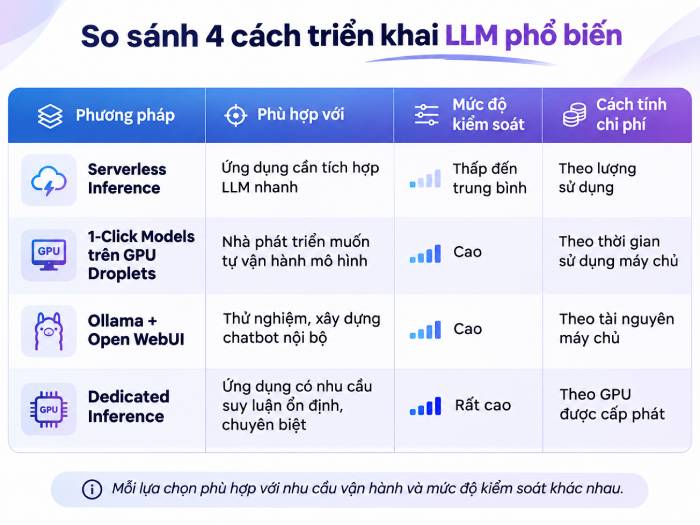
Comparison table of four common LLM deployment methods
Quick comparison of four LLM deployment approaches

Serverless Inference: Managed APIs

Serverless Inference is your move if you want LLM capabilities in your application without running your own GPU servers.

Instead of hosting a model yourself, you make API calls to a provider's managed service. They handle the infrastructure, scaling, and inference—you just send requests and pay for what you use.

DigitalOcean's Serverless Inference gives you access to multiple model families through a single API: GPT, Claude, Llama, DeepSeek, Qwen, and Kimi. Developers can experiment with different models without installing anything on their own servers.

The real advantages

  • Deploy fast: No GPU setup, no driver installation, no inference engine configuration needed.
  • Easy integration: Send requests via API, get responses back.
  • Model flexibility: Test different models without rebuilding infrastructure.
  • Pay-as-you-go pricing: You're charged per token processed, not for idle GPU time.
  • Cost optimization: Prompt caching can cut costs by up to 90% for repeated content, according to DigitalOcean's documentation.

DigitalOcean also offers an Inference Router (public preview) for request routing and a BYOM (Bring Your Own Model) feature that lets you deploy your own models from Hugging Face or DigitalOcean Spaces in Safetensors format.

When to use Serverless Inference

Pick this method if you:

  • Want to add LLM features to an app without managing infrastructure.
  • Are building chatbots, AI assistants, or text processing tools.
  • Need to test multiple models before committing to one.
  • Have variable request loads and don't want to pay for always-on GPU resources.

The tradeoff: You have less control over infrastructure and how the model runs compared to self-hosting. Also watch your token spending—costs add up fast with heavy usage.

GPU Droplets: Self-Hosted on VMs

Want more control over your model and runtime environment? Deploy on GPU Droplets instead.

DigitalOcean's GPU Droplets come with a 1-Click Models option. Rather than configuring everything from scratch, you start with a pre-configured environment that includes Docker and vLLM. You pick the model from Hugging Face, and you're running inference within minutes.

How it works

The environment comes with an Inference Ready setup that includes everything needed to run models. After launching a GPU Droplet, you load your chosen model and use vLLM to handle inference requests.

You can apply several optimization techniques:

  • Speculative decoding: Speeds up token generation.
  • FP8 quantization: Reduces memory requirements and boosts performance when compatible.
  • vLLM: A high-performance serving engine for efficient request handling.

Key strengths

  • Choose your own models: Load and run models from Hugging Face that fit your needs.
  • Control your environment: Tweak configurations and adjust how the model operates.
  • Optimize performance: Apply techniques like speculative decoding and quantization if your hardware supports them.
  • Predictable billing: Pay per hour of GPU time, not per token.

What's challenging

You're responsible for more moving parts. Monitor server health, patch software, handle errors, and set up scaling when demand grows. The model you run depends on your GPU type and available memory—one Droplet typically runs one model, so multiple models mean multiple Droplets.

When to use GPU Droplets

Go this route if you:

  • Want to self-host and control your LLM deployment.
  • Need to run open-source or custom models.
  • Want to tune inference settings for your application.
  • Have technical staff who can manage servers and software.

Ollama + Open WebUI: DIY Chatbot Stack

If your goal is experimenting with LLMs or building an internal chatbot interface, combining Ollama with Open WebUI is straightforward and quick.

Ollama downloads and runs large language models locally. Open WebUI provides a ChatGPT-like chat interface. Combine them on a single server, and you've got your own LLM chatbot environment without building a UI from scratch.

Deployment steps

DigitalOcean provides a 1-Click App for Ollama + Open WebUI on a Droplet. The basic flow:

  • Create a Droplet and select the Ollama + Open WebUI app.
  • Launch with appropriate resource settings.
  • Access the Open WebUI interface.
  • Set up an admin account.
  • Pull models from Ollama.
  • Start chatting and experimenting.

For smaller models, a CPU Droplet works fine for testing. For larger models or if you need faster responses, upgrade to a GPU Droplet.

Why this approach works well

  • Low friction: No need to build your own chat interface.
  • Self-hosted: Your model and interface run on infrastructure you control.
  • Great for exploration: Quickly test different models.
  • Internal use: Perfect for building team or company chatbots.

Real limitations

Performance depends heavily on your server resources and model size. Running a large model on CPU will be slow. You also need to manage the server yourself: software updates, security (definitely set up HTTPS), and access controls before using this in production.

When to use Ollama + Open WebUI

Choose this if you:

  • Want to build an internal AI chatbot.
  • Need to experiment with open-source models.
  • Want to build a prototype before developing a full product.
  • Want to learn how self-hosted LLM deployment works.

Dedicated Inference: Enterprise GPU Resources

Once your application has stable traffic or specific inference performance requirements, consider Dedicated Inference.

Unlike Serverless, this approach allocates GPUs exclusively for your deployment. You choose the model, GPU type, region, and resource quantity. It's a more hands-on approach for teams ready to scale beyond basic options.

DigitalOcean's Dedicated Inference lets you deploy private or public inference endpoints. Endpoints support OpenAI-compatible APIs, making integration into existing applications straightforward.

How it operates

Dedicated Inference runs on GPUs reserved for your use. The platform uses vLLM and llm-d on Kubernetes to serve models and manage deployments.

You configure:

  • Which model to deploy.
  • GPU type and quantity.
  • Geographic region.
  • Whether endpoints are private or public.

According to DigitalOcean's documentation, regions include ATL1, NYC2, and TOR1.

Main benefits

  • Dedicated GPU resources: Your GPUs aren't shared with other workloads.
  • High control: Choose your model, GPU configuration, and deployment settings.
  • Private endpoints: Set up public or private access depending on your security needs.
  • Steady workloads: Good for applications that need consistent inference capacity.

The real costs

Dedicated Inference charges by GPU-hour, meaning you pay even if your endpoint sits idle. That's a significant factor for applications with unpredictable or low traffic—you could end up paying for unused capacity. You'll also need technical expertise to manage models, endpoints, and infrastructure.

When to use Dedicated Inference

Consider this if you:

  • Run an AI application with steady request volume.
  • Need precise control over GPU resources and inference performance.
  • Want dedicated endpoints for your product or service.
  • Have specific requirements around deployment region or infrastructure configuration.

Which Deployment Method Should You Pick?

There's no universal answer. The best choice depends on traffic patterns, budget, performance requirements, and your team's infrastructure expertise. Here's a quick decision guide:

Your Requirement Best Approach Why
Add LLM features to an app quickly Serverless Inference No GPU management needed
Run your own open-source models GPU Droplets Full control over model selection and configuration
Build an internal chatbot or prototype Ollama + Open WebUI Ready-made chat interface and model runner
Deploy at scale with consistent traffic Dedicated Inference Dedicated GPU capacity available always

But before you decide, think through three critical factors:

1. Traffic Patterns

Sparse, irregular requests? Pay-per-use services avoid the waste of idle GPUs. Consistent, heavy traffic? Dedicated resources give you predictability and control.

2. Total Cost of Ownership

Don't just compare GPU prices or token costs. Factor in storage, server uptime, maintenance, monitoring, and engineering salaries. What's interesting here is that Serverless cuts operational overhead but can spiral in cost with volume, while Dedicated Inference pays GPU-hours regardless of utilization.

3. Control Needs

Self-hosted options (GPU Droplets, Ollama) give you freedom to pick models and tune settings. Managed APIs sacrifice control for simplicity.

Which Model Should You Start With?

After picking your deployment approach, you'll need to pick a model. People often make the mistake of jumping straight to the biggest, most powerful model available. That's usually wrong.

Start small. Test with a modest model to understand output quality, inference speed, and resource consumption before scaling up.

Some models worth considering:

  • Ministral 3 14B: 14 billion parameters, good for tasks needing more capability than smaller models.
  • Nemotron Nano 12B v2 VL: Multimodal model supporting both text and image processing.
  • gpt-oss-120b: Large-scale option for workloads demanding serious computational power.

If self-hosting, start with open-source models under 10 billion parameters. They're more hardware-friendly and make experimentation accessible.

Evaluate any model on:

  • Output quality for your specific use case.
  • Model size and memory requirements.
  • Response latency and throughput.
  • Compatibility with your GPU and inference software.
  • License terms for commercial deployment.

When to Migrate to a More Complex Setup

You don't need Kubernetes, multiple GPUs, or specialized inference infrastructure from day one. Simple solutions work fine for testing and early-stage products. But as your application grows, you'll eventually hit limits.

Signs it's time to upgrade:

  • API costs spiraling: When managed API bills become unpredictable or expensive, weigh it against self-hosting ROI.
  • Latency or throughput problems: If your app needs faster responses or must handle many simultaneous requests, you need resource optimization and possibly dedicated GPUs.
  • Multiple models or replicas: A single server can't handle everything forever. Multiple model deployments or redundant instances become necessary.
  • Need for LLM-specific monitoring: Production AI requires tracking latency, throughput, errors, token usage, and output quality.

The real concern is choosing complexity based on actual operational data, not assumptions. Avoid over-engineering before you have real-world metrics telling you to.

Which Platform Should Host Your LLM?

Beyond DigitalOcean, consider these platform categories:

Major cloud providers like AWS offer extensive infrastructure ecosystems. They're solid if your organization is already embedded in their services.

GPU-focused platforms like RunPod specialize in GPU rental and work well for projects needing raw compute without complexity.

Developer-friendly clouds like DigitalOcean offer a range of options from managed APIs to dedicated infrastructure, hitting a middle ground between simplicity and control.

When evaluating, look beyond just GPU pricing. Consider deployment ease, available regions, management tools, documentation quality, and fit with your existing infrastructure.


Description: Compare serverless APIs, GPU droplets, self-hosted solutions, and dedicated inference endpoints. Find the right LLM deployment strategy for your needs

Related Articles

Best AI Tools for Teachers: Lesson Plans, Presentations & Greeting Cards

On
Best AI Tools for Teachers: Lesson Plans, Presentations & Greeting Cards

Vietnam's Teachers' Day on November 20th is a time to celebrate educators—but it's also when many teachers scramble to prepare lessons, design slides, create learning materials, and craft greeting cards. These tasks eat up hours, especially when you want content that's accurate, engaging, and tailored to different student abilities.

AI tools for teachers can handle much of this workload. Instead of starting from scratch, you can feed AI your learning objectives, subject, student age group, and lesson duration to get a draft. Then you customize it to match your actual curriculum and students.

Here's our guide to the best AI tools for teachers, organized by task—from building lesson plans and creating exercises to designing slides and visuals for November 20th celebrations. Each tool includes real-world examples, pricing info, and important notes about using AI responsibly in education.

Quick comparison table of the best AI tools for teachers

ChatGPT – Versatile AI for Lesson Planning

Strengths

  • Works across subjects and many teaching tasks.
  • You can refine answers through conversation.
  • Great for quickly generating multiple lesson approaches or quiz questions.

Limitations

  • AI can include false information, weak examples, or incorrect answers.
  • Auto-generated lesson plans may not fit your school's curriculum or standards.
  • Don't assume all advanced features are free.

ChatGPT is a general-purpose AI assistant that supports teachers from planning through creating teaching materials. You describe your subject, topic, student age, and lesson length to get a draft lesson plan, discussion questions, or reinforcement activities.

The real strength here is iteration. You can ask ChatGPT to shorten content, increase question difficulty, add relatable examples, or turn a concept into a hands-on exercise. That back-and-forth saves hours compared to starting from nothing.

Key capabilities:

  • Build structured lesson plans by objective and duration.
  • Generate multiple-choice, essay, and discussion questions.
  • Create worksheets, rubrics, and group activity guides.
  • Adjust explanations to match student level.
  • Brainstorm ideas for extracurricular activities and November 20th events.

Real-world example:

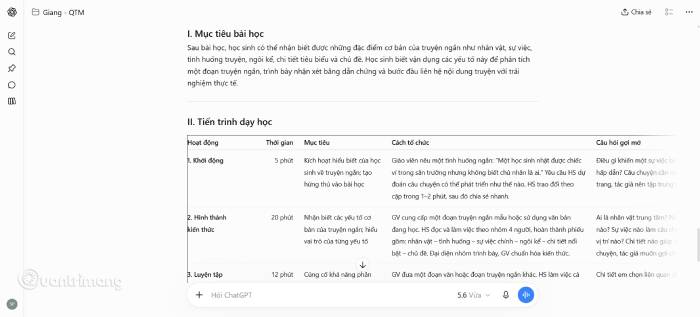
You're a literature teacher preparing a 45-minute lesson on short stories for 8th graders. Instead of building everything yourself, you could prompt ChatGPT with something like:

Act as an ELA teacher. Create a 45-minute lesson plan on short stories for grade 8. Break it into: opening activity, concept introduction, practice, and application. For each section, include learning goals, instructions, thought-provoking questions, and student deliverables. End with 5 comprehension check questions.

ChatGPT produces a structured draft. You then adjust it to match the actual text you're teaching, your school's requirements, and what you know about your class's actual abilities.

  • Best for: Teachers who need lesson concepts, full lesson plans, quiz questions, and custom versions for different classes.
  • Cost: Free tier available; paid plans unlock more features, usage limits, and document handling depend on your subscription.
  • Important note: Don't paste full names, grades, report cards, or identifying student info into your personal AI account without permission. Always verify answers, sources, and content fit before using it in class.

MagicSchool AI – Built for Teaching Tasks

Strengths

  • Many tools designed specifically for education work.
  • Cuts lesson prep and material creation time.
  • Ideal for teachers who need different types of learning materials regularly.

Limitations

  • Some tools lean toward foreign school systems rather than local curricula.
  • Generated content still needs checking and adjustment.
  • Advanced features and usage limits depend on your plan.

Unlike a general chatbot, MagicSchool AI focuses on what teachers do every day. The platform offers dedicated tools for lesson planning, creating worksheets, building quiz questions, writing rubrics, and preparing presentations.

The task-based approach makes it easier to find what you need instead of writing prompts from scratch every time.

Key capabilities:

  • Design lesson plans by theme and objective.
  • Generate multiple-choice and assessment questions.
  • Build worksheets, rubrics, and student support materials.
  • Suggest differentiated activities by skill level.
  • Help create presentations and classroom resources.

Real-world example:

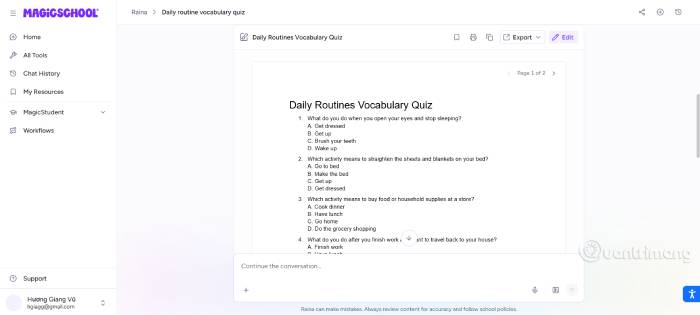
You're an English teacher who needs a vocabulary quiz for 6th graders. You use MagicSchool's question builder, provide your word list, and ask for 10 multiple-choice items, 5 fill-in-the-blank questions, and answer keys with explanations.

After AI generates the content, you review word usage, grammar, difficulty level, and lesson alignment before adding it to your actual test.

  • Best for: Teachers who want to generate lesson plans, exercises, questions, and assessment rubrics using education-specific tools.
  • Cost: Free tier with standard limits. Plus plan adds more usage and advanced features. School and district plans have custom pricing.
  • Important note: Check that materials match your actual curriculum. If using student data, stick to accounts and settings your school has approved. Follow your school's data protection policies.

Diffit – Adapt Materials by Student Level

Strengths

  • Useful for differentiating materials across student ability levels.
  • Reuse existing content instead of starting over.
  • Export materials for editing or printing.

Limitations

  • Doesn't replace your own assessment of student ability.
  • Simplified content can lose nuance or important details.
  • Export and resource options depend on your plan.

Every classroom has students with different reading levels and learning speeds. Diffit helps you turn one piece of content into materials matched to different student needs.

Start with a topic, text passage, PDF, link, or video transcript. The tool generates adapted reading materials, questions, and activities that you can continue to edit.

Key capabilities:

  • Create learning materials from topics or existing content.
  • Adjust reading difficulty levels.
  • Generate questions and practice activities.
  • Convert, edit, and translate materials.
  • Export to PDF or office-compatible formats (depends on plan).

Real-world example:

You're teaching ecosystems in science to a class with mixed reading ability. You take an introductory article about ecosystems and upload it to Diffit. You request two versions: one with short sentences and simpler vocabulary for students who need support, and another with inference questions for advanced readers.

Check that scientific terms are preserved accurately, then use both versions in the same lesson.

  • Best for: Teachers who need to adapt readings, exercises, and questions for students at different levels.
  • Cost: Free tier with limits. Diffit for Schools offers additional features, export options, and material management; pricing based on scale.
  • Important note: Verify accuracy after simplifying—key concepts shouldn't disappear. Don't upload student records or files with identifying info unless you have proper authorization.

Curipod – Interactive Lessons & Classroom Activities

Strengths

  • Combines slides with interactive activities.
  • Collect student feedback in real time during class.
  • Great for lessons that need discussion, response, and quick checks.

Limitations

  • Requires devices and reliable connectivity.
  • Learning the lesson design takes practice.
  • Free tier limits weekly live sessions and some advanced features.

Curipod helps you build slide-based lessons that include interactive activities. Instead of lecture-and-view, students answer open questions, take polls, create word clouds, or draw and respond.

This works well when you want more student participation, quick understanding checks, or to spark classroom discussion.

Key capabilities:

  • Create lessons and slides with AI assistance.
  • Add multiple-choice, open-ended, and survey questions.
  • Run word cloud and drawing activities.
  • Collect answers for class discussion.
  • Get AI feedback on some activities.

Real-world example:

In a biology lesson about environmental issues, you start with an opening question: "What human action do you think most impacts your local environment?"

Students submit answers. You review the top responses and use them to launch the lesson. At the end of class, you add a multiple-choice question and an activity where students propose environmental solutions to check understanding.

  • Best for: Teachers who want to turn presentations into activities with real student participation.
  • Cost: Free tier for teachers. School and district plans include additional features; custom pricing available.
  • Important note: Review AI-generated content before presenting it. If students participate directly, check how the platform handles responses and user data. Avoid asking students for unnecessary personal information.

Canva for Education – Design Slides, Graphics & Cards

Strengths

  • User-friendly, no design skills needed.
  • Tons of templates for lessons and school events.
  • Create teaching materials, slides, and November 20th cards.

Limitations

  • Some templates, assets, and AI features require paid access.
  • Beautiful design doesn't guarantee accurate teaching content.
  • AI-generated images or text sometimes have errors, especially with non-Latin script.

Canva is a visual design tool perfect for non-designers. With Canva for Education and built-in AI features (depending on your plan), you can create presentation slides, design graphics, build infographics, or make Teachers' Day greeting cards.

What's interesting here is the template library and visual editing. Start with a ready-made design, swap colors, images, and text to match your subject or school style.

Key capabilities:

  • Design presentation slides and posters.
  • Create infographics, diagrams, and worksheets.
  • Use AI to help generate content or images (varies by plan).
  • Make Teachers' Day greeting cards.
  • Share and collaborate on designs.

Real-world example: Design a Teachers' Day card

You want to create an elegant Teachers' Day card. Use Canva to pick a template, ask AI to suggest appreciation messages and layout ideas, then adjust colors, fonts, and images to your taste.

Sample prompt for message suggestions:

Write 5 Teachers' Day appreciation messages in English. Use sincere, heartfelt language. Keep each under 35 words—perfect for printing on greeting cards students give to teachers. Avoid clichés. Make each one distinct.

Pick the message that fits best, add it to your design, and carefully check spelling, punctuation, and layout before printing.

  • Best for: Teachers who need polished presentations, diagrams, worksheets, and greeting cards.
  • Cost: Free and paid tiers available. Canva for Education offers free access to eligible teachers under education program terms.
  • Important note: Check image and font licenses. Content through Canva for Education is licensed for educational, non-commercial use—not every asset is free for commercial purposes.

Which AI Tool Should You Pick?

You don't need all five tools. Start with the task that takes the most time, then choose the right tool.

Your Need Try This Tool How to Use It
Quick lesson planning ChatGPT or MagicSchool AI Provide subject, grade, objectives, and length to generate a draft
Create quiz questions ChatGPT or MagicSchool AI Request questions at different cognitive levels
Adapt readings by level Diffit Create multiple versions with varying difficulty
Build interactive lessons Curipod Combine slides with questions, polls, and response activities
Design slides and graphics Canva for Education Start with templates, customize layout and images
Make Teachers' Day cards Canva + ChatGPT Use ChatGPT for messages, Canva for card design

Budget-friendly approach:

  • Start free: Try ChatGPT free tier, MagicSchool AI, Diffit, Curipod, or Canva for Education if you qualify.
  • If you write lessons constantly: Prioritize ChatGPT or MagicSchool AI.
  • Mixed ability classes: Try Diffit to build differentiated materials.
  • Want interactive lessons: Choose Curipod for more student engagement.
  • Need visual polish: Go with Canva for Education.

How to combine tools in one lesson:

  • Create content: Use ChatGPT or MagicSchool AI to draft your lesson plan, questions, and activities.
  • Adapt materials: Use Diffit to create versions for different skill levels if needed.
  • Design and organize: Use Canva to finish your slides, or Curipod to add interactive elements.

You don't need to follow all these steps for every lesson. Use only what genuinely saves time or improves student learning.

Why Teachers Need AI Right Now

The numbers tell a story of exhaustion

  • 10+ hours weekly on work outside classroom time
  • 3-5 hours weekly just on grading
  • 44% of teachers consider leaving the profession within 5 years

The teacher time crisis

Teachers report that 70% of their non-teaching hours go to grading, planning, and admin work. The remaining 30% covers parent communication, professional development, and classroom management. There's almost no buffer—one unexpected issue can derail an entire week. AI tools can reclaim over 5 hours weekly, directly addressing the number-one cause of teacher burnout.

What AI Can Actually Do for Teachers

Beyond the marketing hype, AI genuinely saves teacher time.

Real time-saving applications

  • Grading: AI drafts feedback; you personalize it (saves 3–5 hours/week)
  • Lesson planning: AI suggests activities and assessments (saves 2–3 hours/week)
  • Content creation: AI templates and generated content ready to customize (saves 1–2 hours/week)
  • Email: AI drafts messages; you edit (saves 30 min/week)

Total impact

  • 5–11 hours/week recovered when using AI tools strategically. That's a full workday back for yourself.
  • Teaching & Assessment: Auto-generate interactive lessons and formative assessments from your content. Real-time data shows which students have mastered skills.
  • Engagement & Motivation: Turn review and testing into games. Ensure 100% participation. Provide instant results and fuel healthy competition.
  • Content & Materials: AI creates professional-looking visuals and converts lectures into study guides. No design skills required.

Copyright & Student Data Security When Using AI

AI speeds up work, but you must follow school policy and protect student privacy.

1. Verify content before using it

AI can invent facts, suggest weak questions, or give wrong answers. Cross-check against textbooks, academic sources, and curriculum standards before classroom use.

2. Protect student personal data

Don't enter full names, addresses, phone numbers, grades tied to identities, or personal records into AI tools without approval. If you discuss a situation, use anonymous data and share only what's essential.

3. Review each platform's data policies

Different AI tools handle data differently. Read privacy policies, education account terms, and your school's requirements before uploading anything. MagicSchool AI publishes education-specific data protections. Diffit states it doesn't collect student data. Curipod says it doesn't use teacher and student data to train its AI. Still, always check current terms and your account settings.

4. Respect copyright and licenses

Check the license for any image, font, or material from online libraries. Know the difference between educational-use rights and commercial rights.

5. Don't rely entirely on AI decisions

AI is a helper, not a replacement for teacher judgment. Decisions about grading, student feedback, or teaching method changes need professional review.


Description: Explore top AI tools that help teachers create lesson plans, design slides, build interactive lessons, and craft greeting cards faster.

Related Articles

How to Connect HyperFrames in Claude for Creating Motion Graphics

On
How to Connect HyperFrames in Claude for Creating Motion Graphics

HyperFrames in Claude is a powerful tool that lets you transform ideas, content, and HTML code into stunning motion graphics and videos—no prior design experience required. What's interesting here is how accessible this makes video creation for everyday users.

Built by HeyGen, a platform specializing in AI-powered video generation with eye-catching motion effects, HyperFrames brings professional-grade animation to your fingertips. You can take any piece of content and turn it into an animated video or promotional clip. Here's exactly how to get started creating motion graphics with HyperFrames inside Claude.

Step-by-Step Guide to Using HyperFrames in Claude

Step 1:

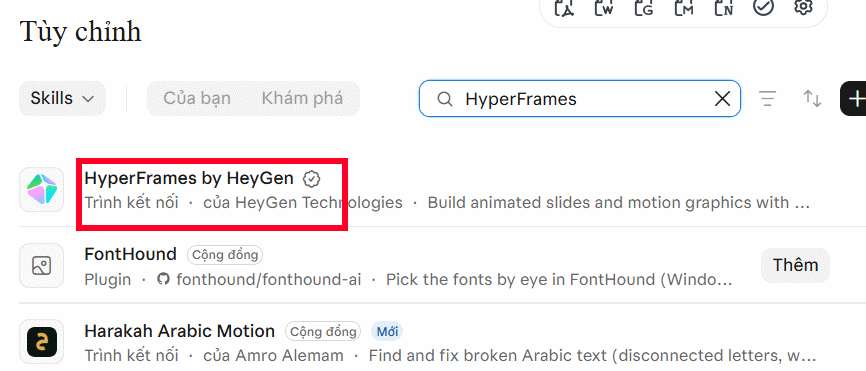
Open Claude and click on the Settings menu on the left sidebar. Move to the right side and type HyperFrames in the search box.

You'll see the HyperFrames application appear below. Click on it to view the details.

Finding HyperFrames app on Claude

Step 2:

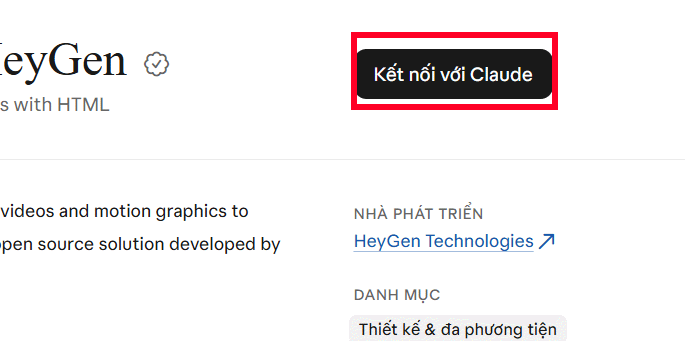
Next, click Connect Claude to link HyperFrames with Claude through HeyGen.

Connecting HyperFrames on Claude

Step 3:

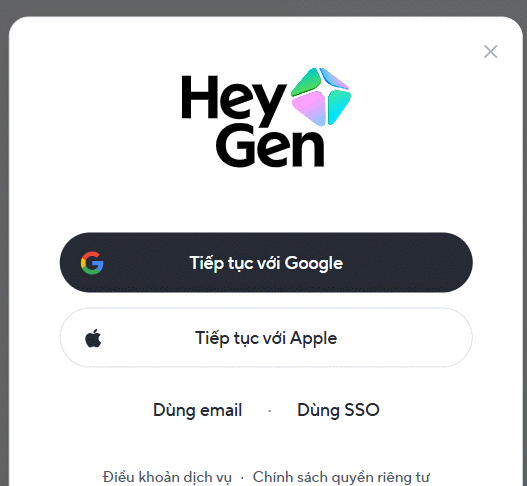
You'll need to log in to your HeyGen account or create a new one if you don't have one yet.

HeyGen account login

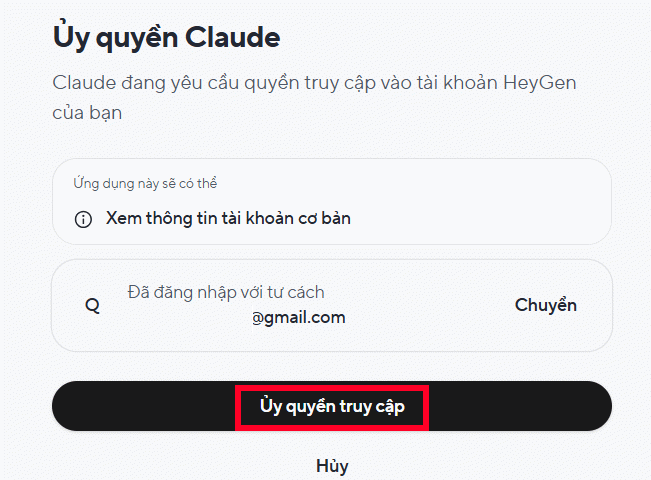
After that, you need to grant Claude permission to access your HeyGen account.

Authorizing Claude to access HeyGen

Step 4:

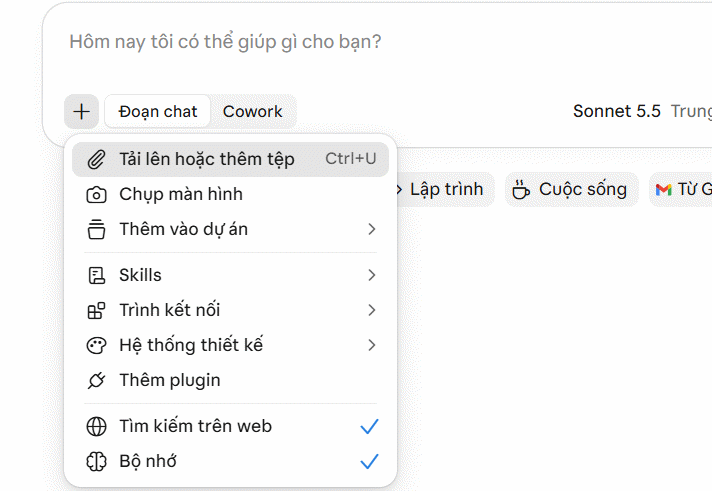
Back in Claude, you can now upload images or files for HyperFrames to process. For this example, I'll upload two image links and enter a prompt like this:

Use HyperFrames to create a motion graphic video from the 2 images I've uploaded. Add only the text "HOUSE" in a modern, bold font style. Create smooth, eye-catching text animations with zoom effects and clean scene transitions between both images. Keep the style minimal and professional. Don't add any other text or content. Export as MP4.

Uploading files to Claude for video creation

Step 5:

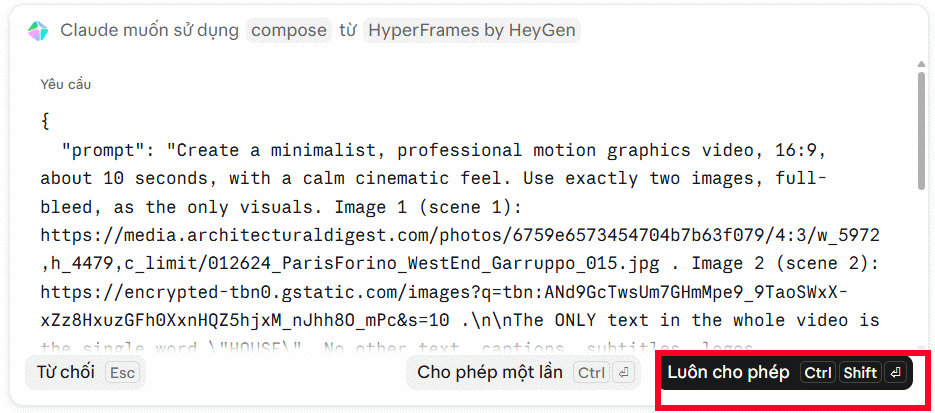
Claude will now begin processing your motion graphic video. During this process, you may see prompts asking for permission to use certain HyperFrames tools—click Always Allow to proceed.

Accessing Heygen on Claude

The video generation process is now underway. Rendering time depends on video complexity, the number of images, and the effects you've requested. More elaborate transitions and complex effects will naturally take longer to process.

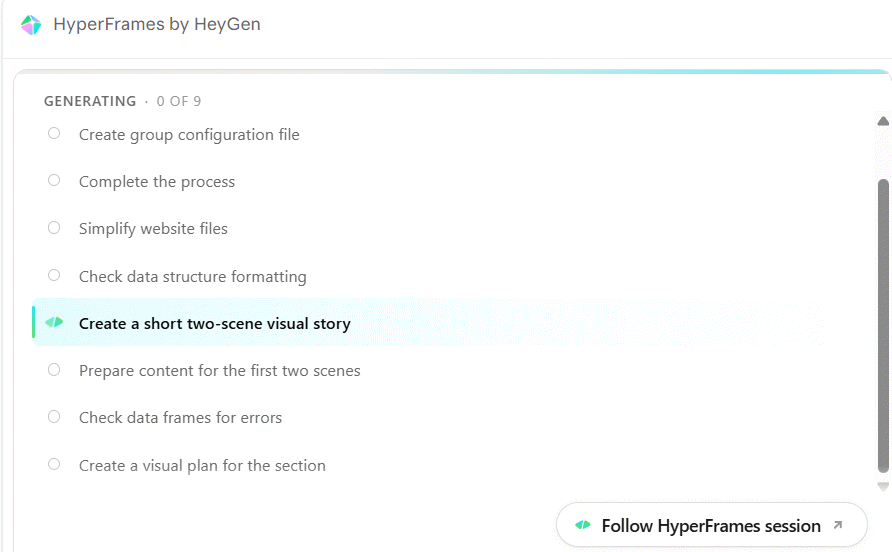
Creating motion video with HyperFrames on Claude

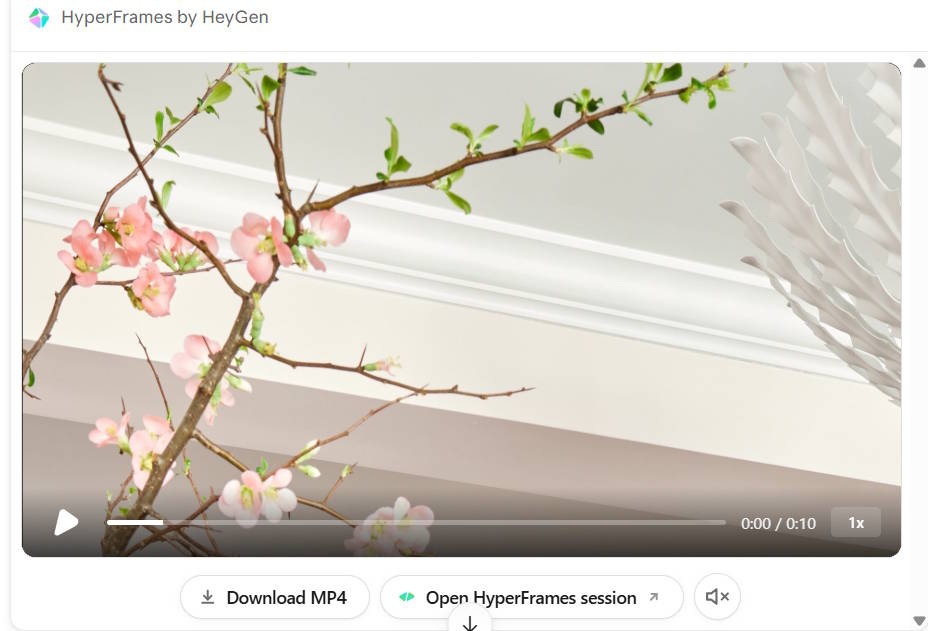
After a short wait, your finished motion graphic video will be ready. You can download it directly or open it in HeyGen for further editing if you want to make adjustments.

Finished motion video created with HyperFrames on Claude


Description: Learn to use HyperFrames in Claude to transform images and ideas into professional motion graphics videos without needing advanced design skills.

Related Articles

5 Essential Tips for Launching Your First AI Project Successfully

On
5 Essential Tips for Launching Your First AI Project Successfully

Building an AI project is one of the best ways to turn theory into practice. You could create a chatbot, build an image recognition app, develop spam filters, or design a recommendation engine. But here's the thing—turning an AI idea into a working product requires solid planning before you even write a single line of code.

The real concern for newcomers is that picking an overly complex idea, lacking quality data, or underestimating computational needs can derail your project fast.

Below are 5 practical tips to successfully launch and deploy an AI project, covering everything from idea selection to data preparation, infrastructure, and finding community support.

5 mẹo cần biết trước khi bắt đầu dự án phát triển AI cá nhân
5 essential tips to know before starting your personal AI project

1. Pick a Project That Matches Your Interests

When choosing your first AI project, focus on something aligned with your passions, work, or a real problem you want to solve. Genuine interest keeps you motivated when things get frustrating during testing and debugging.

You don't need to invent something revolutionary. Start by observing your daily routine and identifying where AI could automate or improve a specific task.

Some beginner-friendly project ideas include:

  • Personal chatbot: Build a bot that answers questions on a specific topic—travel, learning, or customer support.
  • Content summarizer: Use large language models (LLMs) to summarize articles, documents, or notes automatically.
  • Image recognition app: Classify photos by category, identify objects, or detect specific items in pictures.
  • Movie recommendation system: Suggest content based on viewing history and user preferences.
  • Email writing assistant: Generate email drafts based on purpose and user-provided information.

Tip: Choose a small, verifiable problem that matches your current skill level. A simple finished project teaches you far more than an ambitious idea left incomplete.

2. Start Small and Scale Gradually

A common rookie mistake is attempting to build an overly complex system right away. This approach leads to projects that drag on, become unmanageable, and kill your motivation. Instead, break your big idea into smaller, achievable milestones you can complete step by step.

Say you want to build an image recognition system. Start with a model that classifies a few simple object categories before moving to a system that detects multiple objects in a single image.

Each small win reinforces your knowledge, builds confidence with new technology, and makes it easier to expand the project later.

3. Choose the Right Infrastructure and Tools

Your infrastructure directly impacts how efficiently you develop and run your AI project. Depending on your goals, you'll need different computational resources.

For instance, real-time object detection using convolutional neural networks (CNNs) benefits from a GPU to process data faster. A simple chatbot app, however, might work fine leveraging existing AI APIs without custom hardware.

For AI/ML work, GPUs are invaluable—their parallel processing power accelerates both model training and inference.

When evaluating GPU platforms, pay attention to these specs:

  • CUDA cores: Determine the GPU's parallel processing capacity.
  • Memory bandwidth: Controls how fast data moves between GPU and memory.
  • VRAM capacity: Limits model size and how much data you can process simultaneously.

If you need serious computing power but don't want to buy hardware, cloud-based GPU solutions are worth considering. DigitalOcean's Gradient GPU Droplets (available in Early Availability at the time of the original source) offer one option for resource-intensive AI/ML tasks.

Cloud GPUs give you flexibility to scale resources up or down and minimize upfront hardware investment. Before choosing, verify current availability, pricing, and hardware configurations.

4. Source and Prepare Your Data Carefully

Data is the backbone of nearly every AI project. Data quality and relevance directly affect your model's training results and real-world performance.

If you don't have your own dataset, check out these public sources:

  • Kaggle: Offers extensive datasets for machine learning, data analysis, and computer vision tasks.
  • UCI Machine Learning Repository: A widely-used machine learning data repository for education and research.
  • Jupyter Notebooks: Interactive environments for experimenting with code, analyzing data, and building models.

DigitalOcean also provides Jupyter Notebooks with computational resources for AI workloads. Check their current documentation and terms if you're considering this platform.

When collecting data, prioritize datasets with clear documentation, understandable structure, and relevance to your project. Also consider licensing terms and privacy concerns if your data contains personal information.

5. Engage with Communities and Keep Experimenting

AI moves fast with constantly evolving tools, libraries, and techniques. Tapping into community knowledge saves time and provides solutions when you hit roadblocks.

Some platforms worth joining include:

  • Stack Overflow: Ask questions and find solutions to programming problems.
  • Reddit: Join communities like r/MachineLearning and r/datascience to exchange ideas, share projects, and learn from others.
  • GitHub: Explore open-source AI projects, contribute to the community, and connect with other developers.

Beyond seeking help, actively share your work, participate in discussions, and embrace feedback from the community.

Don't hesitate to try different approaches. Continuously improving your project deepens your understanding of the technology and sharpens your problem-solving skills.

Conclusion

You don't need a groundbreaking idea, top-tier hardware, or deep expertise to launch a successful AI project. What matters is choosing the right problem, setting realistic goals, securing suitable data and resources, and learning from others in the community.

Start with something small, polish the first version, then improve it based on real results. Every completed project builds experience and confidence for tackling more complex AI challenges down the road.


Description: Learn how to start your AI project right: choose the right idea, set achievable goals, pick proper tools, prepare your data, and join communities.

Related Articles

Google Ask Maps: How AI is Changing Location Search

On
Google Ask Maps: How AI is Changing Location Search

Google Maps is rolling out a smarter way to search for places. The new Ask Maps feature lets you describe what you're looking for in plain English—no keyword matching required. What's interesting here is how different this feels from traditional search. Instead of typing "coffee near me," you can ask something like "where can I get a good cappuccino that's quiet for working?" The AI doesn't just find locations—it synthesizes reviews, evaluates results, and explains why each recommendation fits your needs. That's a meaningful upgrade to how we discover places.

How to Use Google Ask Maps

Step 1:

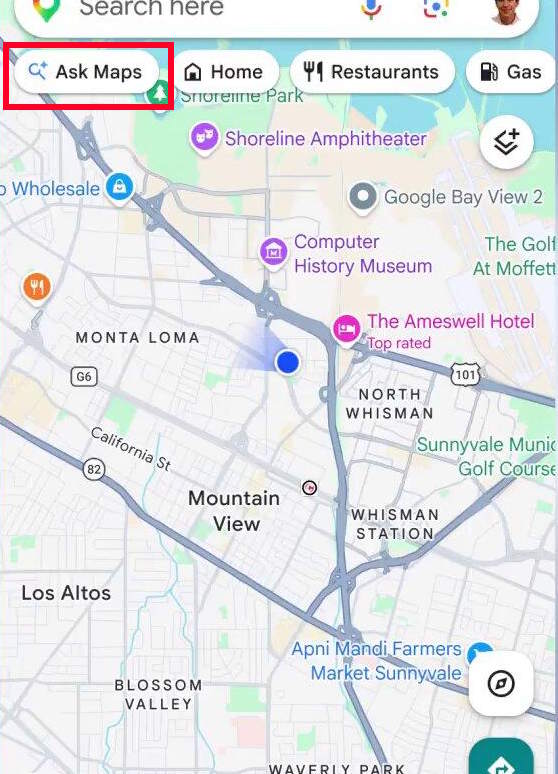
Open Google Maps on your phone or desktop. If the feature has rolled out to your account, you'll see the Ask Maps tool right on the main interface. Haven't spotted it yet? Google is still gradually releasing this feature, so you might need to wait a bit longer.

Google Ask Maps tool interface

Step 2:

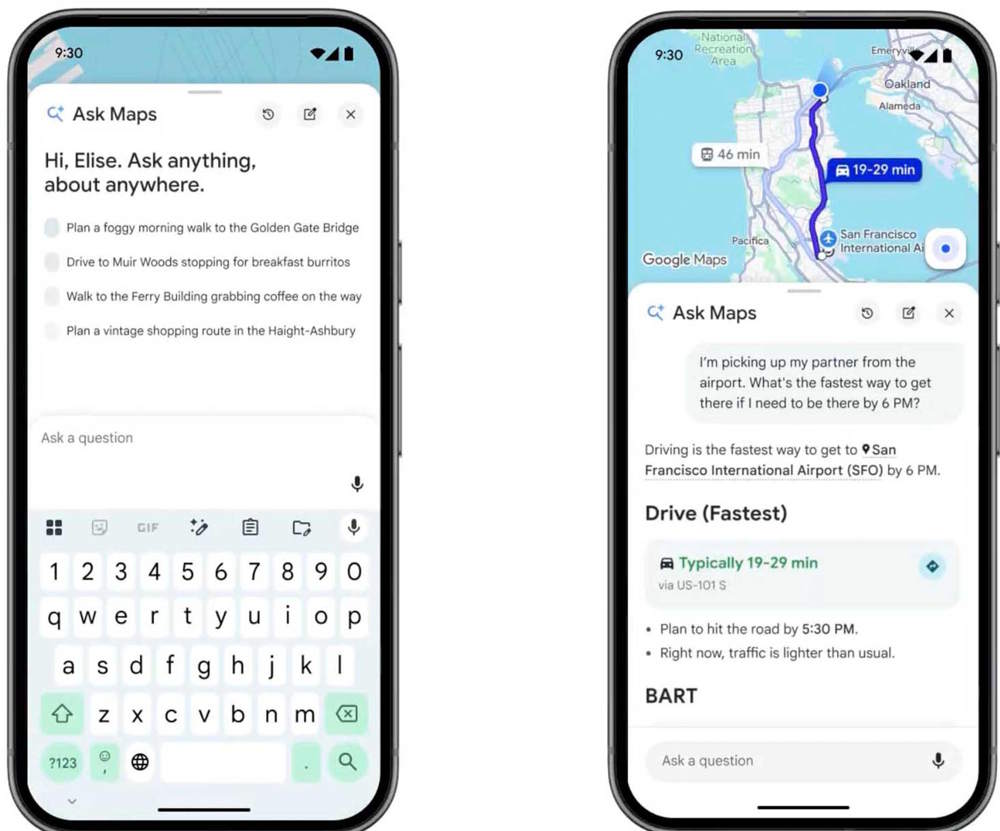
Type out your question about a specific location or describe the type of place you're hunting for. Be as specific as you want—the more details you provide about what matters to you, the better the results. It works much like asking a question in a conversational AI tool.

Asking a question in Google Ask Maps

Step 3:

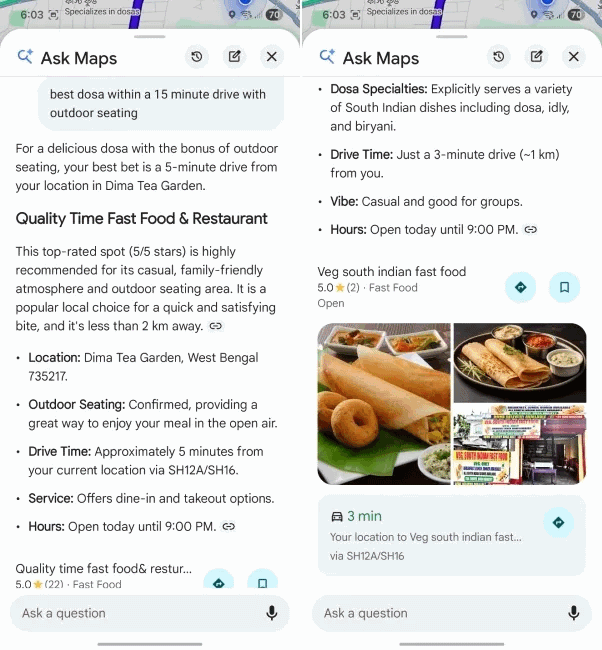
Wait for the AI to process your request and generate results. Google Ask Maps will pull up matching locations on the map, explain why each recommendation makes sense for your query, and include insights from user reviews. You get context, not just a list of pins.

Results from Google Ask Maps

The beauty of Ask Maps is that you don't need to memorize any special syntax or follow rigid formatting rules. Just explain what you're after in natural language, and the AI will get it right. That's the whole point—search should work the way you think, not the other way around.


Description: Google's new Ask Maps tool uses AI to understand natural language queries. Here's how to find exactly what you're looking for.

Related Articles

Which Gemini Apps Should You Connect? A Risk vs. Reward Guide

On
Which Gemini Apps Should You Connect? A Risk vs. Reward Guide

Not All Connections Are Created Equal

Back in Lesson 2, you connected Photos and Calendar, then ran your first multi-app prompt. You saw real location tags, actual dates, and precise places. That's a simple combination—high value, low risk. But here's where it gets trickier: Should you connect more apps? Gemini can access nine or more applications. Some could save you hours every week. Others risk accidentally exposing data you'd never intentionally share with an AI tool.

The difference between a smart setup and a risky one isn't about quantity. It's about which apps you choose and the order you add them.

The Risk-vs-Reward Matrix

Each app Gemini can connect to sits somewhere on two axes: how much value it adds to cross-app summaries, and how sensitive the data it exposes really is.

Here's where each one lands:

App Value for Cross-App Synthesis Data Sensitivity Recommendation
Google Photos High – locations, faces, events, visual context Low – mostly personal memories ✅ Connect early
Google Calendar High – appointments, commitments, scheduling patterns Low-to-Medium – meeting titles are visible ✅ Connect early
YouTube Medium – interests, learning patterns Low – just your watch history ✅ Safe to add early
Google Maps Medium – location patterns, commute data Low – places you've visited ✅ Safe to add early
Google Search Medium – what you've been curious about Medium – search history reveals a lot ⚠️ Add when comfortable
Chrome Medium – browsing context for current session Medium – depends on your browsing habits ⚠️ Add when comfortable
Google Drive High – documents, spreadsheets, presentations High – may contain client work, financial data, confidential docs ⚠️ Personal accounts only
Gmail Very High – richest context source by far Very High – client emails, contracts, NDAs, HR info ⚠️ Personal accounts only
Phone/SMS/WhatsApp (Android) Medium – communication context High – private conversations, client messages ⚠️ Evaluate carefully

Quick Check: Looking at this matrix, which two apps combine the highest value AND the highest data sensitivity?

Answer: Gmail and Google Drive. Both are incredibly useful for synthesis, but both contain data you'd probably never want an AI reading.

A Phased Approach to Adding Apps

Don't connect everything at once. Follow this week-by-week roadmap:

Week 1 – Photos + Calendar (you've already done this). Live with it for a week. Try 5–10 prompts that ask Gemini to combine data from both. Notice what comes back and what feels like it's missing.

Week 2 – Add YouTube + Maps. These are low-risk choices that fill in the picture of where you've been and what interests you. You'll start seeing Gemini connect your YouTube history to calendar events in interesting ways.

Week 3 – Add Search + Chrome (if you want). Medium risk here. Search history tells Gemini what you were curious about—useful for retrieving that obscure thing you looked up last Tuesday, but awkward when it knows about your 2 a.m. symptom searches. Your call.

Week 4+ – Consider Drive and Gmail. This is where caution matters most. These apps hold real work value, but also real professional risk. Before you flip the switch on either one, ask yourself:

Is this my personal Google account, or does it contain any work data?

If it's purely personal—personal Gmail, personal Drive with only vacation planning spreadsheets and tax documents—the risk stays manageable. You're the only one using that data.

If it contains work data—forwarded client emails, confidentiality agreements stored on Drive, shared folders from your old employer—don't connect it. Not because Google has bad intentions, but because once information is "read" by an AI, it can't be "unread." The moment Gemini processes a confidential document in your prompt context, that data moves from a controlled storage system into a personal AI interaction space. We'll discuss why that matters in Lesson 6.

Quick Check: A freelance marketer stores client NDAs in her personal Google Drive. Should she connect that Drive to Personal Intelligence?

Answer: No—not until those files move to a separate account or a Google Workspace setup managed by the company.

Build Your Personal Connection Plan

Grab your phone or open a new browser tab. Check your current Personal Intelligence settings from Lesson 2. You should have Photos and Calendar connected.

Based on the matrix above, write down:

  1. One app you'll add this week—pick from the "safe to add early" row (YouTube or Maps).
  2. One app you'll add next month—from the "add when comfortable" row.
  3. One app you'll probably never connect—and write down why.

That third one matters. Knowing what you won't connect is just as important as knowing what you will. That boundary is what keeps the tool useful instead of risky.

Don't add anything right now. Sit with your plan for a few days. The phased approach works because it gives you time to feel the real value each connection brings before you move to the next step.

Try This: The Personal Connection Roadmap Tool

Use this prompt to build a customized four-week plan:

Act as an app connection strategist for me. Based on my actual account contents, create a personalized 4-week connection roadmap—including specific verification checkpoints I need to run before each new connection.

My account details:
- Photos contain: [family photos / work screenshots / medical images / financial screenshots / mixed]
- Calendar: [% work vs personal events]
- Google Drive: [personal data only / some client work / NDA materials / regulated data]
- Gmail: [% work vs personal]
- YouTube history: [no sensitive content / some sensitive / significant sensitive content]
- Search history: [no sensitive queries / some sensitive / significant sensitive]
- Chrome history: [no sensitive sites / some sensitive / significant sensitive]
- Maps history: [no sensitive locations / some sensitive / significant sensitive]
- Android access (phone/SMS/WhatsApp): [yes / no]

Provide:
1. Week 1 roadmap: specific new connection + 2-minute pre-activation checklist
2. Weeks 2-4 phased connections with go/no-go criteria for each
3. "Never connect" list specific to my account with reasons
4. Post-connection verification prompt to confirm safe operation
5. Disconnection triggers: scenarios when I should revoke access

MANDATORY RULES:
- Never connect Gmail or Drive if account contains: forwarded work emails, customer NDAs, medical info (HIPAA), payment card data (PCI), financial records (GLBA), student records (FERPA), attorney-client privileged documents, or classified information
- Even "personal" Gmail usually has: client contracts, freelance invoices, auto-forwarded bank statements, medical appointment confirmations, school notices about kids. Audit inbox carefully before connecting
- Chrome history reveals every site you've visited—for most people, more sensitive than Gmail. Think hard
- Search history is similar: midnight health anxiety searches now become AI training data
- For journalists, activists, abuse survivors, or people in custody disputes: connecting Gmail/Drive/Chrome could expose sources, safety plans, or legal evidence. Model your own risk
- In active litigation (custody, divorce, employment, immigration, criminal): any Google data could be demanded in discovery. Adding AI tools creates additional digital footprints. Consult your lawyer
- If you're a mandated reporter (teacher, nurse, therapist, clergy): client data in Gmail is still confidential. Don't connect
- If you work for U.S. government, federal contractors, or defense: never use personal AI tools with work data. Use GovCloud or FedRAMP-authorized tools only
- Quarterly review each connection: what was safe six months ago may not be safe now. Life changes (new job, new clients, health situation) shift risk. Check every 90 days
- Each additional app multiplies risk, not just adds: Gmail + Maps + Photos reveals not just what you did, but where, when, and with whom. Each new connection compounds
- Use per-prompt customization: if you accidentally input sensitive info, you can block it from being stored
- Delete conversations with sensitive content. Google retains data per policy unless you delete it
- Export your data (Google Takeout) regularly to know what Google stores. You may need this for deletion requests
- For minor children: if account is linked to Family Link, check child settings. COPPA applies
- Don't screenshot Personal Intelligence responses containing others' private info without consent. GDPR and publicity rights apply

Output format:
- Week 1-4 timeline with specific apps and checkpoints
- Personal "never connect" list with account-specific reasons
- Pre-activation checklist (2 minutes max)
- Post-activation verification prompt
- Disconnection decision tree

Be specific—vague input = vague output. Tell me what's actually in your accounts.

How to use it: Replace each bracketed section with your actual account details. The more specific you are, the more useful your roadmap will be.

What you'll get: A phased four-week plan, pre-connection verification steps, a "never connect" list tailored to your situation, a post-connection safety prompt, and a decision tree for when to disconnect. All grounded in handling regulated data, protecting professional confidentiality, securing sources, avoiding legal discovery risk, respecting mandated reporter obligations, complying with government data rules, and staying current as your life changes.

How to act on it: Save the roadmap to Notes. Pick the highest-impact suggestion and execute it this week. Don't try to do everything at once.

The Bottom Line

  • Apps aren't equal. Photos and Calendar are low-risk, high-value. Gmail and Drive are high-value but high-risk—especially if your personal account holds work data.
  • Use a phased approach: Photos and Calendar first; then YouTube and Maps; then Search and Chrome when you're comfortable; then Drive and Gmail only after hard thought.
  • Before you connect Drive or Gmail, ask yourself: "Would I ever paste this directly into a personal AI tool?" If the answer is no, don't connect.
  • Set your boundaries in writing. Knowing what you won't connect is what makes the tool valuable instead of dangerous.

Description: Learn which Google apps are safe to connect to Gemini's Personal Intelligence and which ones pose privacy risks. A phased approach to maximizing value

Related Articles

Turn Any Photo Into a Rotatable 3D Scene Using Apple's Free AI Model

On
Turn Any Photo Into a Rotatable 3D Scene Using Apple's Free AI Model

One developer recently transformed three ordinary photos into fully rotatable 3D environments using Apple's free SHARP AI model running on a MacBook Air M5. The entire setup took about 15 minutes, and generating each scene was even faster. It's a genuinely impressive experiment to try—even if you don't have an immediate use case for it.

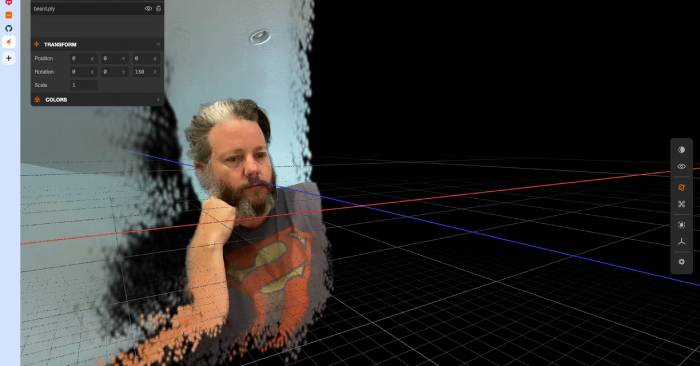
SHARP is Apple's open-source research model that converts a single photograph into a 3D scene using "Gaussian splat" technology. Rather than relying on sharp edges and polygons like traditional 3D models, this technique reconstructs the image from millions of soft, semi-transparent colored dots. These dots blend seamlessly together to create photorealistic results, allowing you to explore the scene from different viewing angles.

Because the output maintains precise real-world scale measurements, viewing it through a VR headset displays the scene at life-size proportions—so people have already been experimenting with these converted scenes on Apple Vision Pro. You can relive your favorite memories or export the data to share via a web viewer. That said, paid alternatives exist too; Meshy AI produces solid models, but requires a subscription to download results. SHARP, meanwhile, is completely free and runs offline. The catch? It's hosted on GitHub with somewhat confusing documentation. Let's walk through how to get it running.

SHARP Converts a Single Photo Into an Explorable 3D Environment

Mô hình 3D dạng "splat"

Most Gaussian splat 3D models are built from multiple photographs and stored as millions of soft 3D colored dots rendered in real-time. SHARP does something remarkable—it produces comparable results from just a single image.

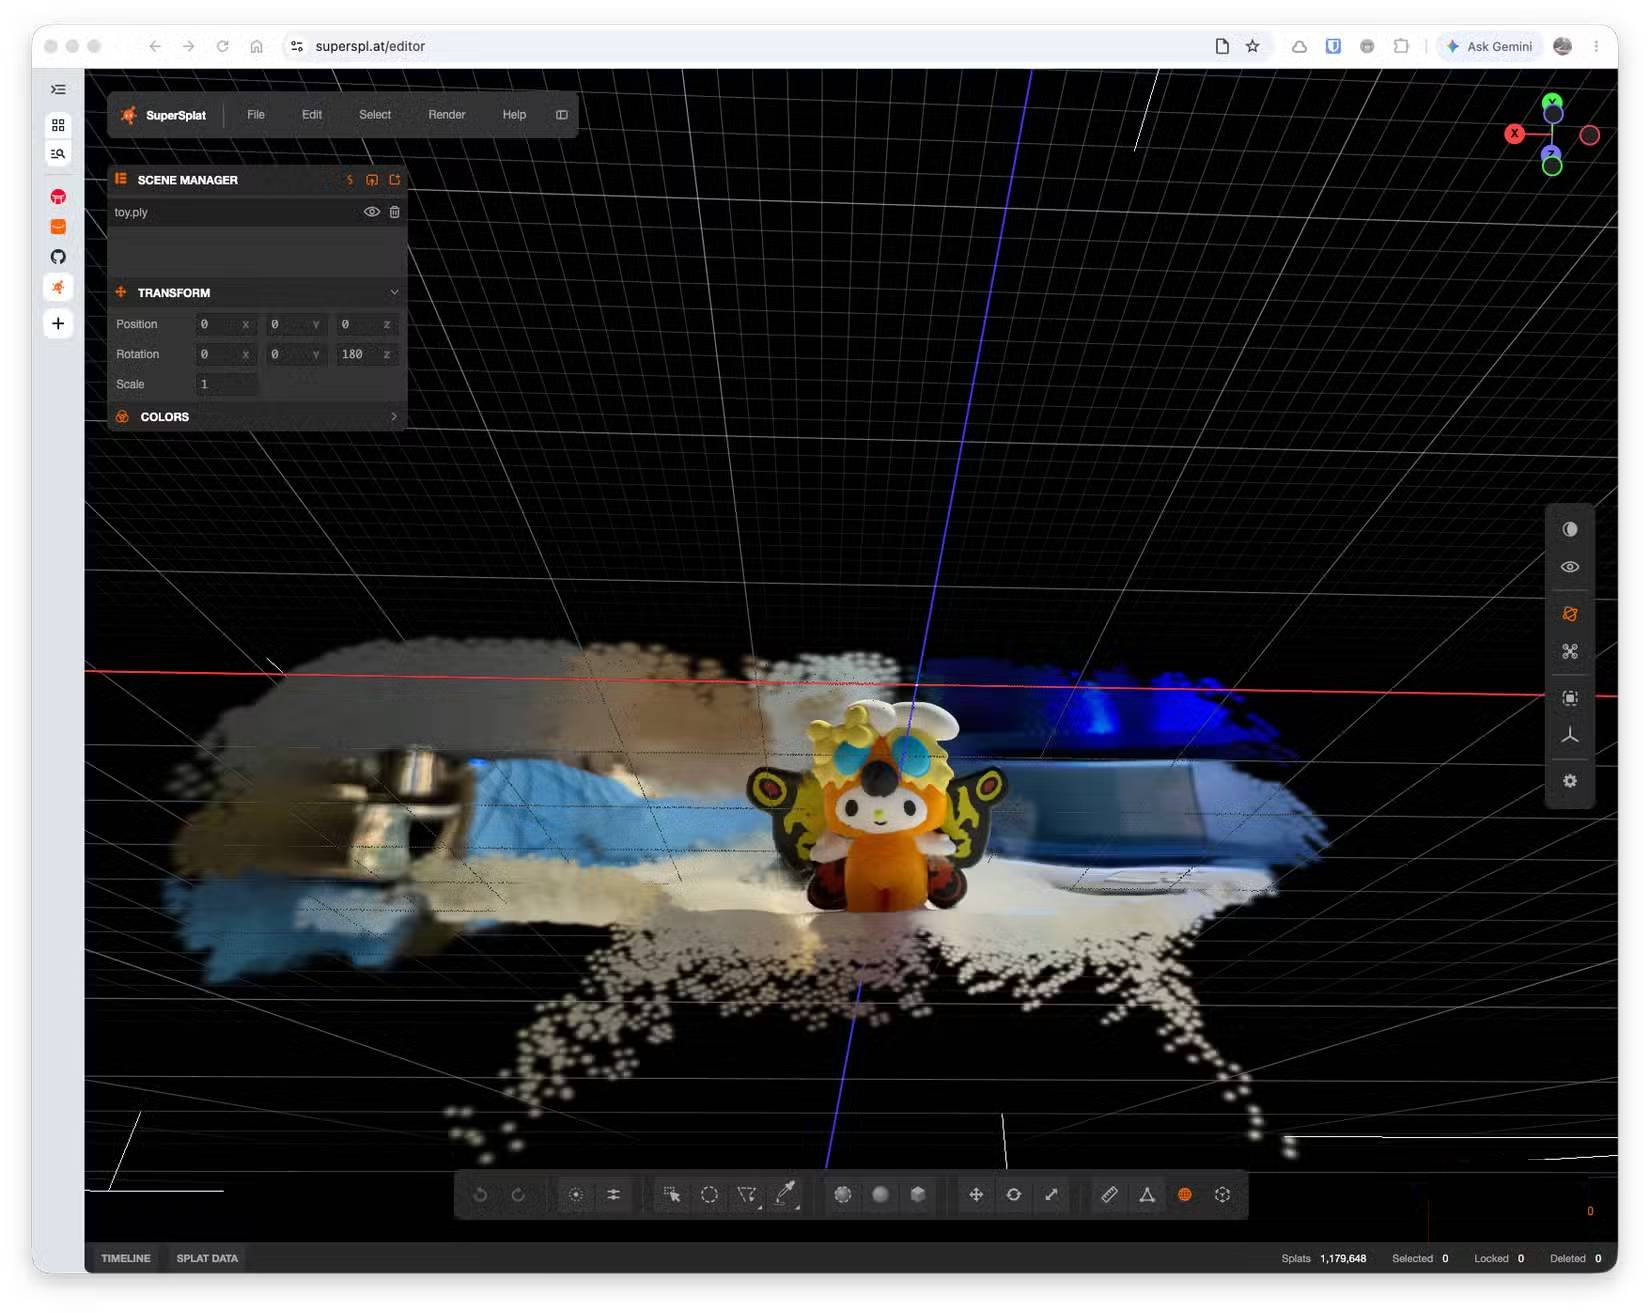
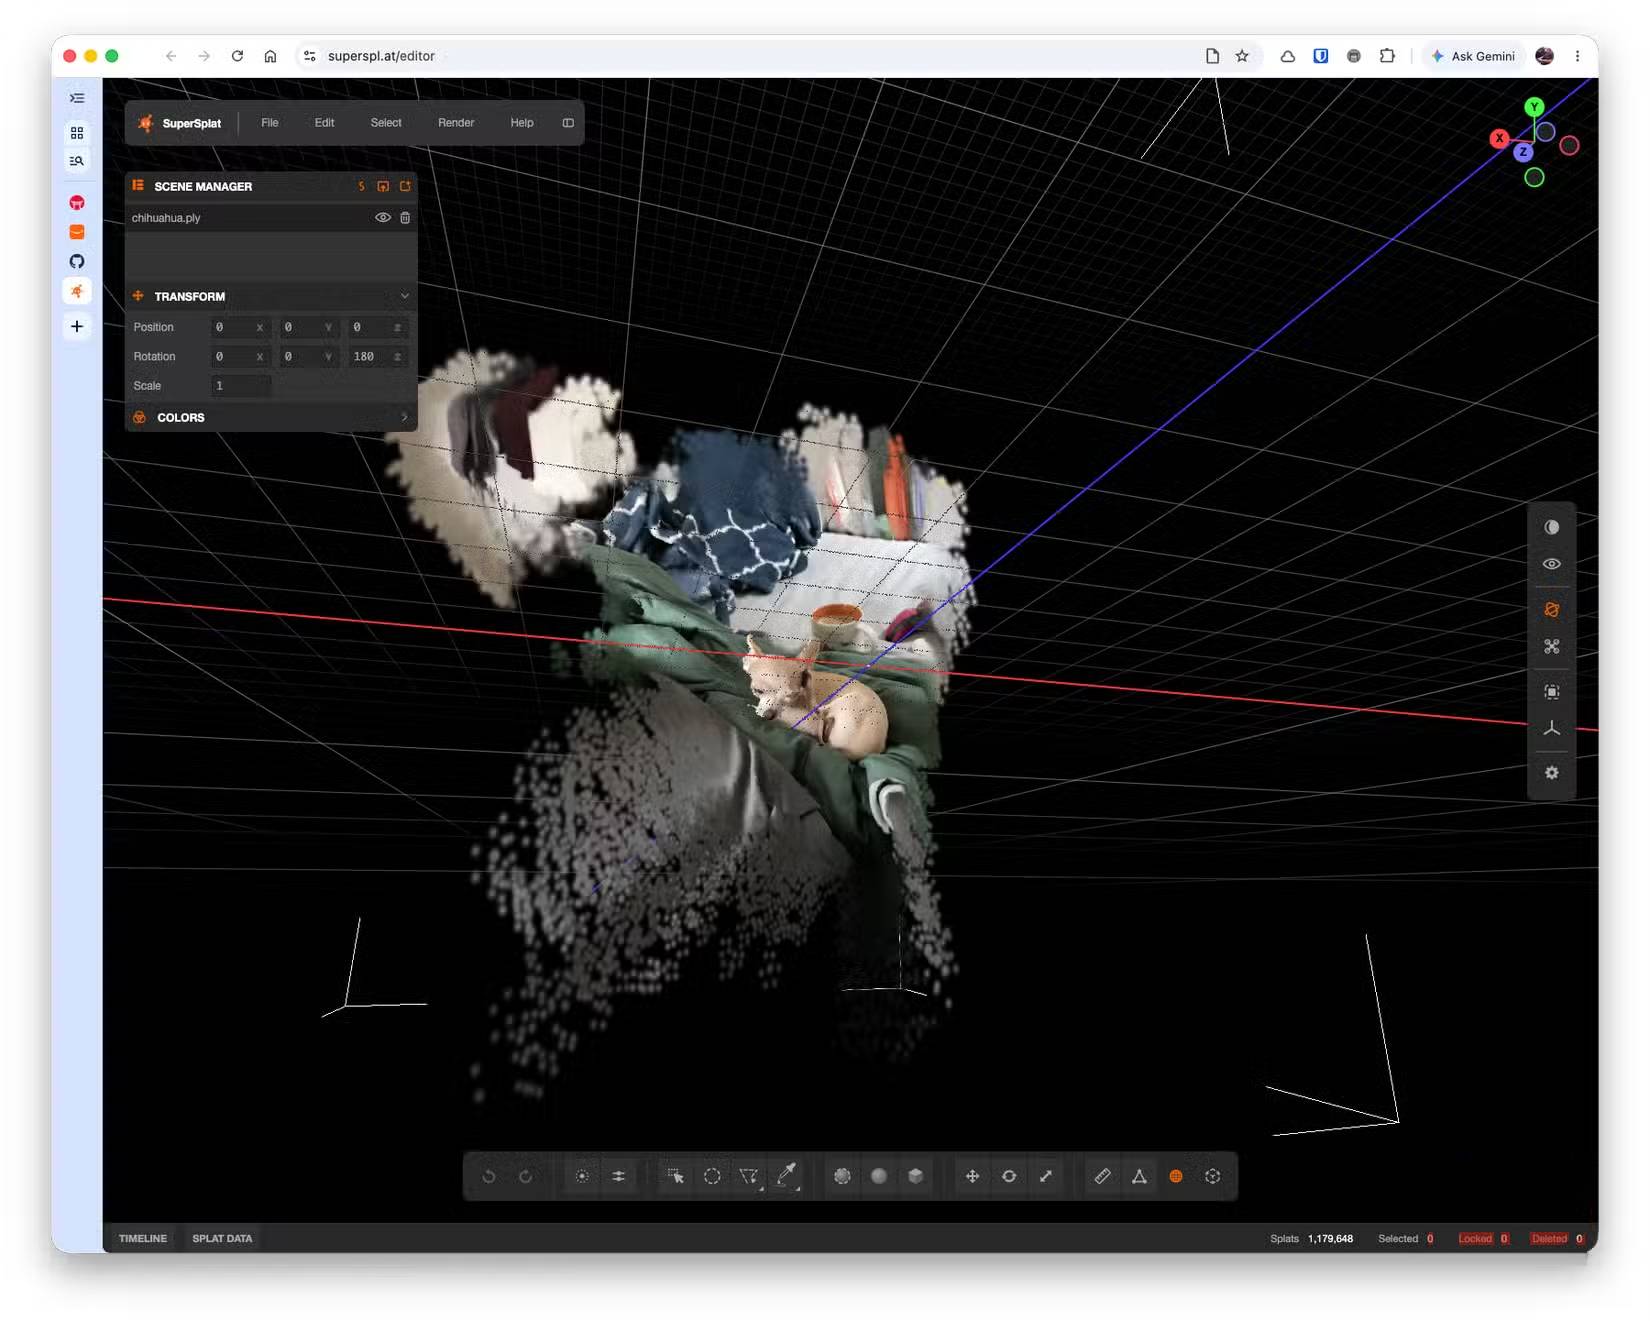
Think of this as the full 3D version of iOS 18's "Spatial Scenes" feature, which separates subjects from backgrounds and adjusts perspective as you tilt your phone. The difference is that Spatial Scenes displays as an effect in the Photos app or on your lock screen, while SHARP saves the data in standard .ply format, compatible with any Gaussian splat viewer available today. Each scene contains roughly 1.2 million Gaussians organized into two 768x768 layers. When you load the output in SuperSplat, you'll see the exact count—in our tests, all three images showed precisely 1,179,648 points.

SHARP runs on Mac, Windows, and Linux, though Apple provides documentation only for Mac and Linux. On Apple Silicon Macs, the command-line interface automatically uses Metal (MPS) acceleration. On a MacBook Air M5, inference took 12, 47, and 58 seconds respectively for three photos, plus about 60 seconds to load the model initially. Total processing time for the entire batch was roughly two minutes.

Setting Up SHARP on Your Mac

This isn't overly complicated, but it does require some basic Terminal knowledge.

Step 1: Install Miniconda via Homebrew

  • Run brew install --cask miniconda (using the official Homebrew cask).
  • Run conda init "$(basename "${SHELL}")" as instructed, then close and reopen Terminal. If you see the (base) prefix in your prompt, conda is active.

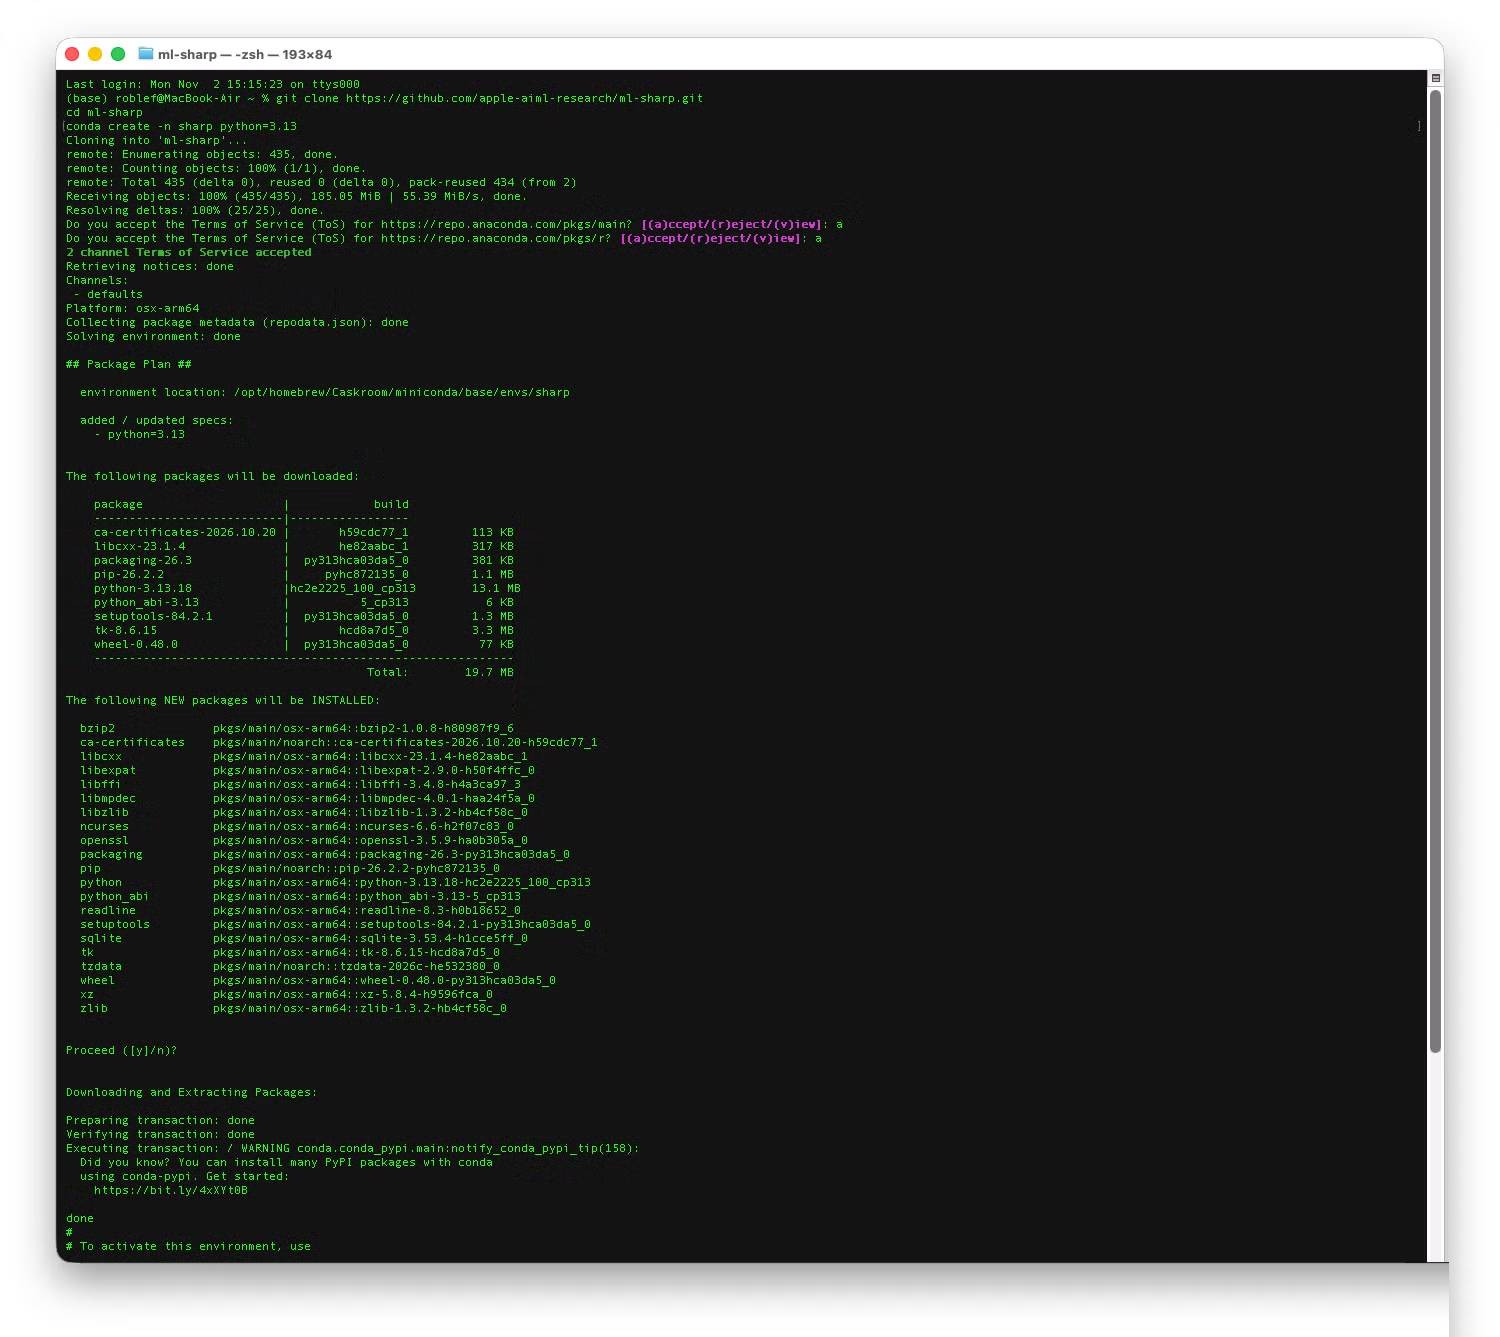
Step 2: Clone Apple's Code

  • Run git clone https://github.com/apple-aiml-research/ml-sharp.git, then enter the directory with cd ml-sharp.
  • Keep this directory in mind—you'll need to stay here for Step 4.

Step 3: Create a Python 3.13 Environment

  • Run conda create -n sharp python=3.13, then activate it with conda activate sharp. The README requires Python 3.13; your prompt prefix will change from (base) to (sharp).
  • If conda complains about Terms of Service (TOS), run conda tos accept and retry. Anaconda requires TOS acceptance to use default channels. Not everyone hits this, but some setups will prompt you.

Step 4: Install SHARP

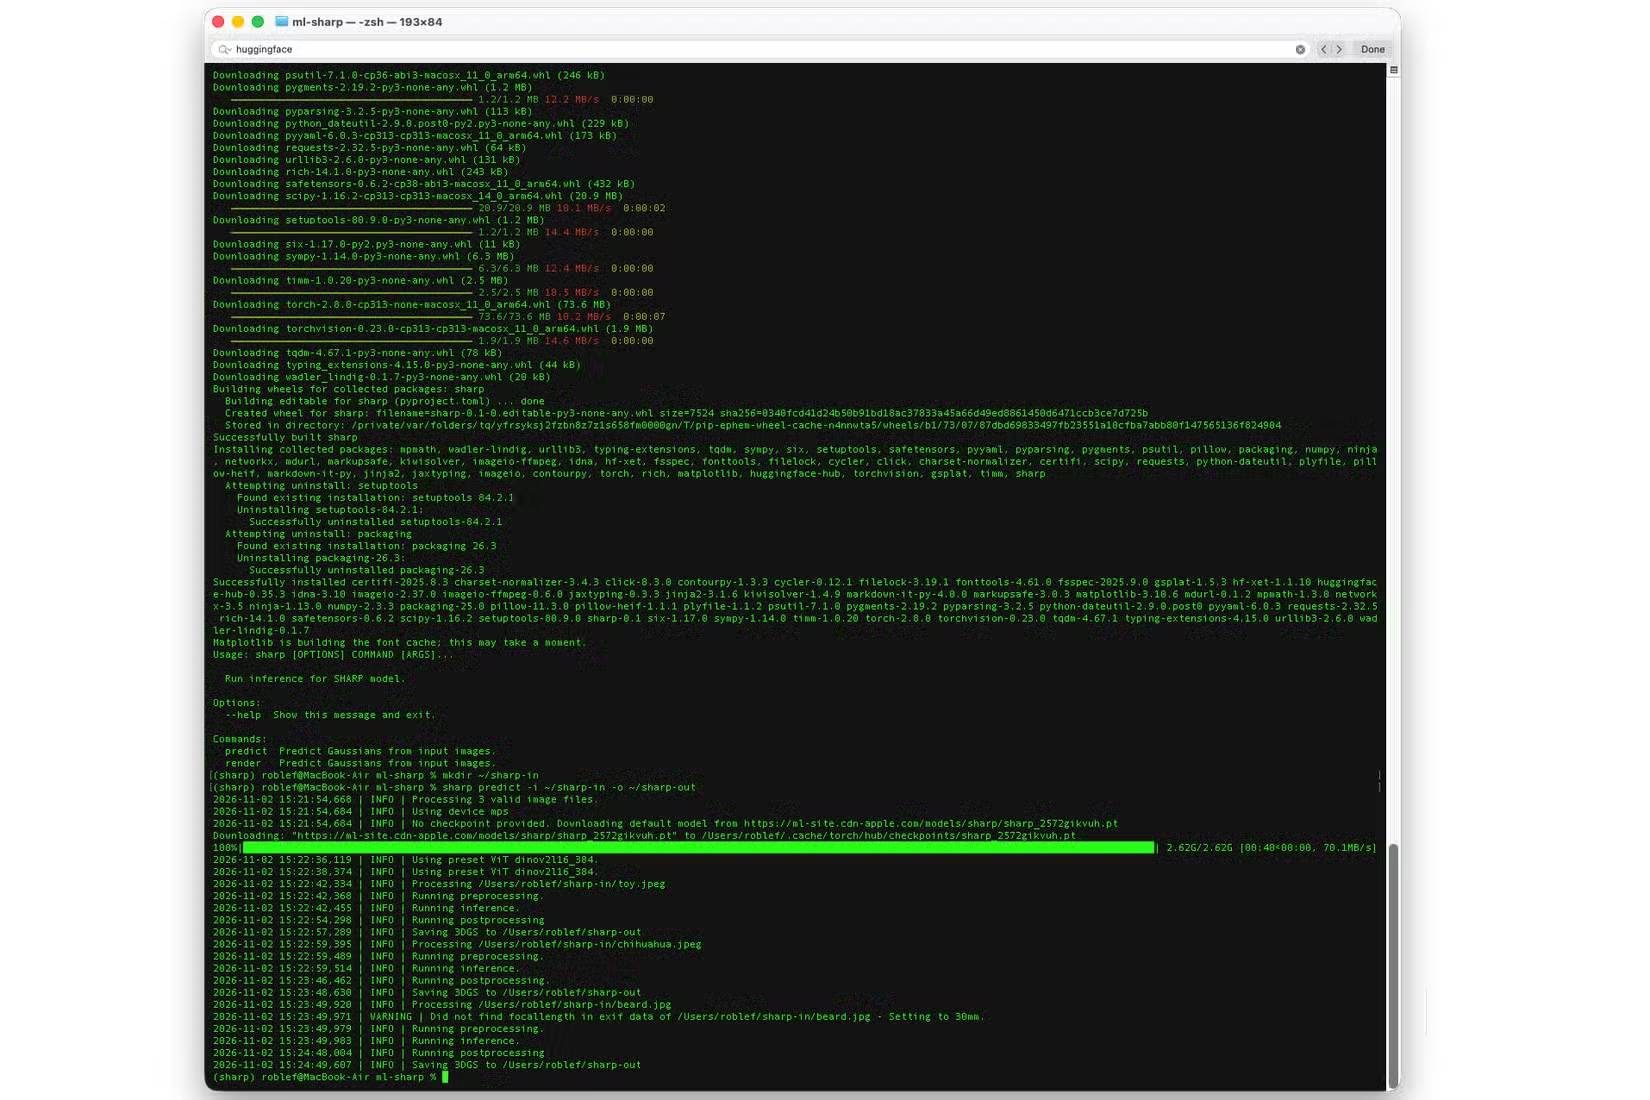
  • Run pip install -r requirements.txt, then verify with sharp --help. If you see predict and render options, installation succeeded.
  • This directory matters because the requirements file starts with -e ., which installs the sharp tool from your current location. Nvidia packages only work on x86 Linux, so they'll be skipped on Mac—that's fine.
  • You'll see Hugging Face packages appear during installation; these are necessary dependencies, so don't worry about them.

Step 5: Choose Photos With Simple Subjects

After testing three different images, a clear pattern emerged. A toy sitting on a table produced the best results. A portrait worked decently, though blurry patches appeared where the head blocked the background. A photo of a chihuahua on a cluttered sofa fell apart into separated floating layers. The documentation notes that macro shots, starry skies, and water reflections often confuse the depth-estimation algorithm.

Use original files whenever possible. SHARP reads focal length data from EXIF information; if it's missing, it defaults to 30mm. The selfie example—a 720×1280 copy with no lens data—triggered a warning, though results were still decent. Using the original file will yield better quality.

Note: HEIC files from iPhones work directly thanks to built-in pillow-heif support.

Once you've selected your images, gather them in one folder: mkdir ~/sharp-in.

Step 6: Run the Command

Execute: sharp predict -i ~/sharp-in -o ~/sharp-out. Look for "Using device mps" in the output—that confirms your Mac's GPU is handling the processing. On first run, the system downloads the model to ~/.cache/torch/hub/checkpoints/. It's 2.62 GB; on a good connection, download takes about 40 seconds. Subsequent runs skip this step.

You can batch-process multiple images at once. The CLI loads the model once, then automatically processes every file in the folder. Each photo becomes a .ply file around 66 MB.

Step 7: Open Results in SuperSplat

  • SuperSplat is a free browser-based splat editor built by PlayCanvas. Visit superspl.at/editor to use it.
  • Drag and drop your .ply file into the browser window, or use File > Import. Use your mouse to orbit the view and scroll to zoom.
  • SHARP uses a coordinate system where Y points downward, which can flip images in other viewers. SuperSplat version 3.7.0 automatically rotated models 180 degrees around the Z axis to display correctly. Other viewers might need manual adjustment.
  • To share, export as a standalone HTML file or a compressed PLY (much smaller than the original 66 MB file).
  • Linux users with Nvidia cards can add the --render parameter to auto-generate a camera movement video. Fair warning: the README notes this requires CUDA.

A Free Way to Step Into Your Photos

If you're looking for models to 3D-print, paid mesh generators like Meshy make more sense. SHARP shines at creating viewable scenes rather than printable objects.

What's interesting here is that experiencing an old photograph at life size through VR, or sharing an interactive 3D image as a single HTML file, opens up genuinely cool possibilities. The fact that it runs completely offline on your own laptop—using free software from Apple, no less—makes it even better. Give it a shot and see how it handles your photos.


Description: Apple's SHARP model lets you convert a single photo into an interactive 3D scene. Here's how to set it up on your Mac in under 15 minutes.

Related Articles

Building Custom Skills Directly in Google Docs: A Complete Guide
On
Building Custom Skills Directly in Google Docs: A Complete Guide
Google Workspace Skills is rolling out across Google's ecosystem faster than ever. What's interesting here is that you're no longer confined to using Gemini in isolation. Instead, you can ask Gemini to build, refine, and validate custom skills for your Google applications without switching windows. It's a significant workflow improvement for teams relying on Google's suite.

Once you enable a skill, Gemini can recognize when it's the right tool for the job and apply it automatically. Alternatively, you can manually invoke the skill whenever you need it. Here's the breakdown of how to get started.

Creating Skills in Google Docs: Step by Step

A quick heads-up: this feature is still in beta and only available in select regions, so full rollout will take some time.

Step 1: Access the Skill Builder

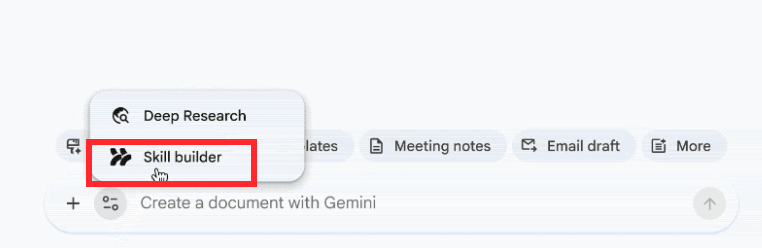
Open Google Docs and locate the Gemini icon at the bottom of your screen. Click the three horizontal lines menu and select Skill builder to begin creating your skill.

Building a skill in Google Docs

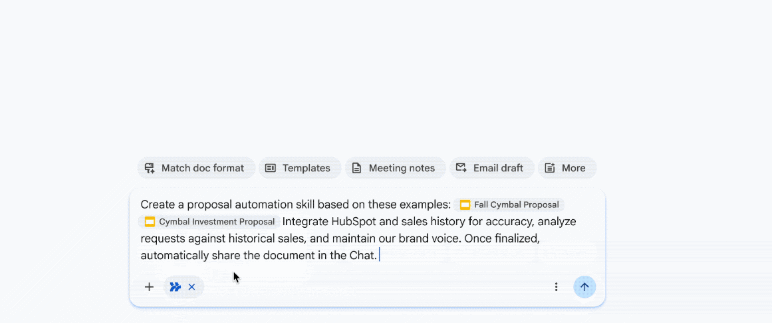
From here, you'll instruct Gemini to generate a skill based on template documents you provide. In this example, we're creating a Proposal Automation Skill that learns from your existing proposal templates.

Create a proposal automation skill based on these examples: Full Cymbal Proposal, Cymbal Investment Proposal. Integrate HubSpot and past sales history for accuracy, analyze requests against historical sales, and maintain our brand voice. Once finalized, automatically share the document in the Chat.

Command prompt for creating a skill from documents

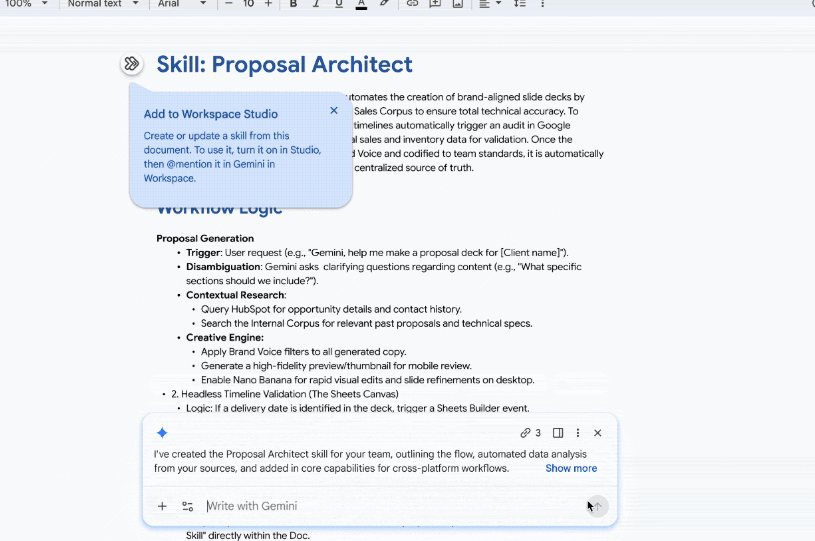
The result? A new skill called Proposal Architect that automates the entire proposal creation and management workflow using Gemini and Google Workspace tools. This is exactly the kind of time-saver teams need.

Your newly minted skill automatically syncs across all Google Workspace applications, ready to be called whenever you need to generate content. On this screen, click Add to Workspace Studio to integrate the skill into your workspace.

Skill created from templates

Step 3: Activate Your Skill

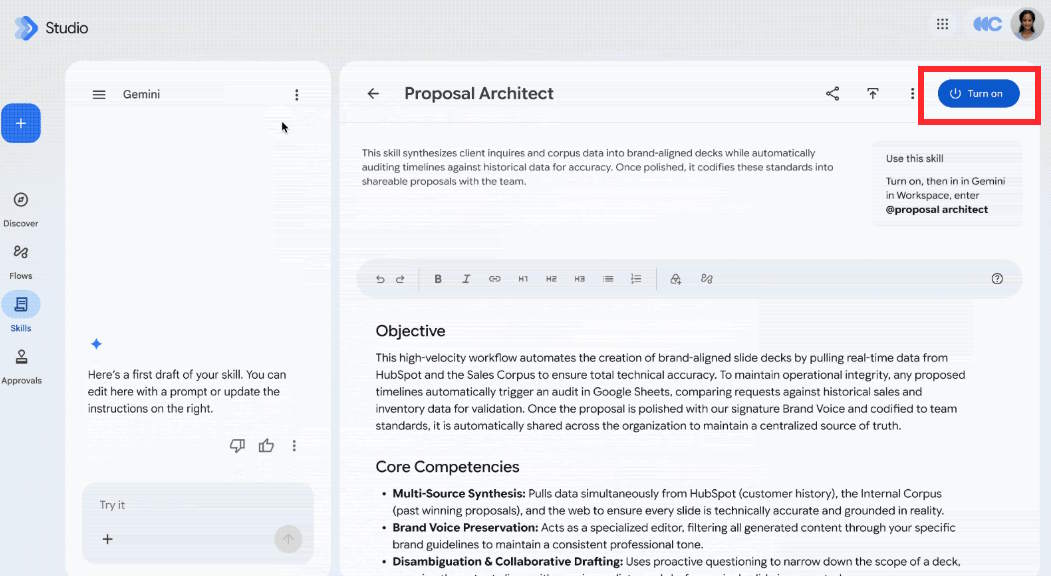
Navigate to Workspace Studio, and you'll see your new skill displayed with details about its functionality—in this case, generating proposals and presentation slides for business use. Hit the Turn on button to activate it across your workspace.

Enabling a skill in Google Workspace Studio

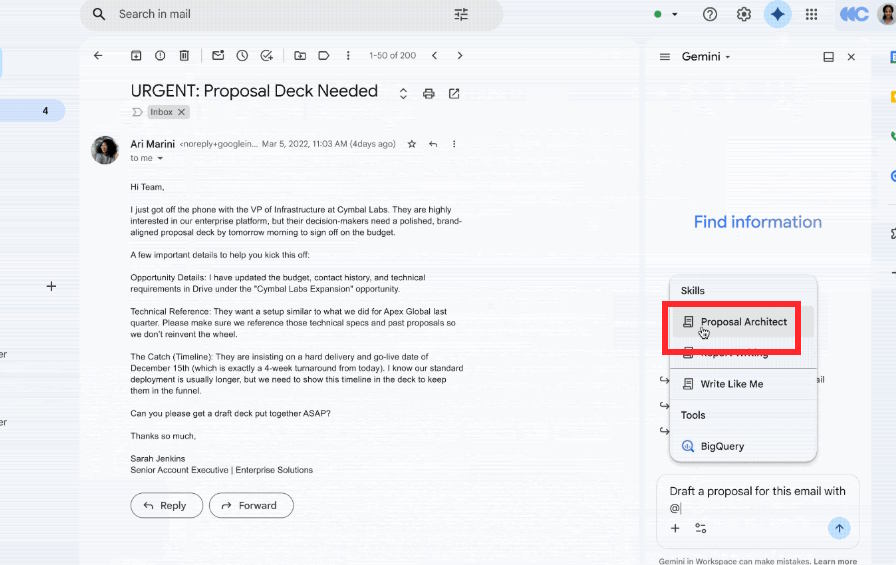
Now jump over to Gmail (or any other Google app). Click the Gemini icon and draft a message. In the chat window, type your request for an email, then enter @ followed by your newly created skill name. Gemini will generate content aligned with that skill's training. The real concern is ensuring your skills are specific enough to produce consistently useful results—too broad, and you'll get generic outputs.

Using a custom skill in Google Workspace Studio


Description: Learn how to create and deploy custom Google Workspace Skills through Gemini without leaving Google Docs. Step-by-step instructions inside.

Related Articles

Copyright © 2016 QTitHow All Rights Reserved